
Hey, community! 👋
My name is Dave Lin. I'm currently on a short career break after spending the last ten years building and scaling products in startups and large tech companies. I spent the last three months building GPT Lab—a Streamlit app that lets anyone chat with or create AI-powered assistants (we don't call them chatbots 🤖).
In this post, I’ll share with you the twelve lessons I learned from developing a multi-page app and working with OpenAI's large language models:
- Structuring your application for improved maintainability and scalability
- Developing advanced UIs with UI functions rendered by session states
- Creating reusable UI elements for multiple pages
- Adding limited styling with markdown languages and static Streamlit components
- Programmatically laying out Streamlit elements
- Supporting multiple OpenAI completion endpoints
- Safeguarding your AI assistant from potential injection attacks
- Ensuring smooth chat experiences by strategically condensing chat sessions
- Protecting user privacy
- Separating development and production databases
- Hosting options and considerations
- Protecting yourself as a solo developer
But before we get to the fun stuff, let me tell you…
What inspired me to build GPT Lab?
I first encountered Streamlit at the 2022 Snowflake Summit. During the session, I was immediately hooked by its ease of use and intrigued by the idea of using it to reduce the development time for internal tools. In one afternoon, despite having no prior Streamlit knowledge and rusty Python skills, I nearly completed a Streamlit application that retrieved and plotted data from Snowflake (I was one dependent picklist away from completion). Unfortunately, the real world took over after I left the Summit, and Streamlit became an afterthought.
Then in December 2022, I was blown away by the release of ChatGPT. After a week of playing with it, I wondered if ChatGPT could serve as a life coach (super relevant to me then, as I contemplated my next career move). In two weeks, I created and released a private Streamlit life coach application, Coach Marlon. I received positive reviews from friends and family, took another month to refactor my code, add a Firebase data store, and expand "Coach Marlon" into "Marlon's Lounge," where you can chat with other coaches. While people loved the coaches, they expressed interest in creating their own assistants.
Finally, I took another month to restructure the app, revise the underlying data model, and add support for the non-backward compatible OpenAI chat-completion endpoint. 2,800 lines of Python code later (1,400 of which are Streamlit), GPT Lab was finally unveiled to the world.🎈
1. Structuring your application for improved maintainability and scalability
The Streamlit application's complexity drastically increased as it evolved from Coach Marlon to Marlon's Lounge and, finally, to GPT Lab. As I implemented new features, I took the necessary steps to segregate and modularize the code.
| Iteration | High-level description | File structure |
|---|---|---|
| Coach Marlon | Single-page Streamlit app with a title, one text input box, and chat messages rendered by the Streamlit-chat component. | One 100-line python file |
| Marlon’s Lounge | Single-page Streamlit app with two main UI views: a 2-column view displaying assistant details and a chat view (title + text input box + chat message) rendered by the streamlit-chat component. | Streamlit file, one API file with functions to interact with Firestore DB, and a utility file containing OpenAI endpoint wrapper functions and one-way hash value generation for user emails. |
| GPT Lab | Multi-page Streamlit app with the following pages: home.py (introduces GPT Lab), lounge.py (shows a 2-column view displaying showcased or users' assistants), assistant.py (renders assistant detail, assistant search view, or chat view, depending on session states), lab.py (renders assistant configuration pages, test chat view, and assistant creation confirmation page — all based on session states), and faq.py and terms.py (markdown pages). | Fourteen total python files: six main Streamlit files, backend files (api_util_firebase.py, api_users.py, api_bots.py, api_sessions.py, api_util_openai.py), and application-related files (app_users.py, app_utils.py). |
Although it may seem excessive initially, code modularization sped up development in the long run. It allowed me to better develop, test, and deploy different functions in isolation. For example, I added support for the newly released GPT-4 model to the backend APIs without introducing it to the front end since only some users can access the new model.
2. Developing advanced UIs with UI functions rendered by session states
As the UI complexity grew, I quickly realized the typically nesting UI elements in if-else statements wouldn’t suffice. I settled on the following patterns within my Streamlit files:
- The UI element handler functions to change session states and make necessary backend calls
- Functions to layout related UI elements
- Session states to control which UI element group functions to call
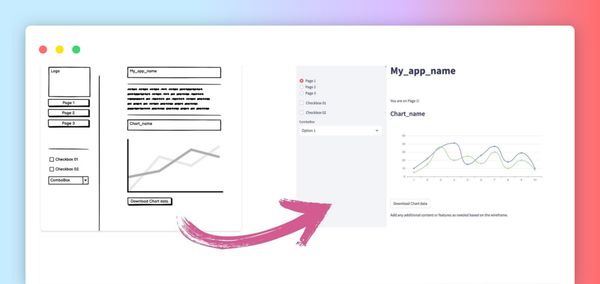
I’ll illustrate these concepts with the assistant page. It shows user login, assistant search, assistant details, chat views, and chat session recap:


The page contains handler functions to manage user actions and UI element group functions that lay out related UI elements.
Handler functions:
| Function | High-level description | |
|---|---|---|
| handler_bot_search | Handles assistant search and sets session state for the found assistant. | |
| handler_start_session | Manages to start a new session, setting session state variables, and generating the initial assistant response. | |
| handler_bot_cancellation | Resets assistant-related session state variables if the user chooses to find another assistant. | |
| handler_user_chat | Processes user chat input, fetches assistant response, and appends it to session state. | |
| handler_end_session | Handles session end request, fetches chat summary, and sets session_ended state variable. | |
| handler_load_past_session | Manages to resume past sessions, fetch chat messages, and set session state variables. |
UI element group functions:
| Function | High-level description | |
|---|---|---|
| render_user_login_required | Displays login prompt and components. | |
| render_bot_search | Shows assistant search input and the “Switch to Lounge” button. | |
| render_bot_details | Displays assistant details, start session/find another assistant buttons, and past session list. | |
| render_chat_session | Shows the chat view with user message input, end session button, and chat messages. Shows the session recap if the session has ended. | |
| render_message | Renders user or assistant avatar and chat message in a 2-column layout. |
Finally, session state variables control which UI element groups are displayed.
if st.session_state.user_validated != 1:
    render_user_login_required()

if st.session_state.user_validated == 1 and st.session_state.bot_validated == 0:
    render_bot_search()

if st.session_state.user_validated == 1 and st.session_state.bot_validated == 1 and "session_id" not in st.session_state:
    render_bot_details(st.session_state.bot_info)

if st.session_state.user_validated == 1 and st.session_state.bot_validated == 1 and "session_id" in st.session_state:
    render_chat_session()
3. Creating UI elements that can be reused on multiple pages
I created a class for the OpenAI API key login UI elements:
The class allows me to avoid recreating the same UI elements to control the same session state variables on multiple pages. The class contains methods for managing session state variables, rendering UI elements, and handling UI actions:
class app_user:
# initialize session state variables and container
def __init__(self):
if 'user' not in st.session_state:
st.session_state.user = {'id':None, 'api_key':None}
if 'user_validated' not in st.session_state:
st.session_state.user_validated = None
self.container = st.container()
# renders OpenAI key input box
# "password" type masks user input
# "current-password" autocomplete gets modern browsers to remember key
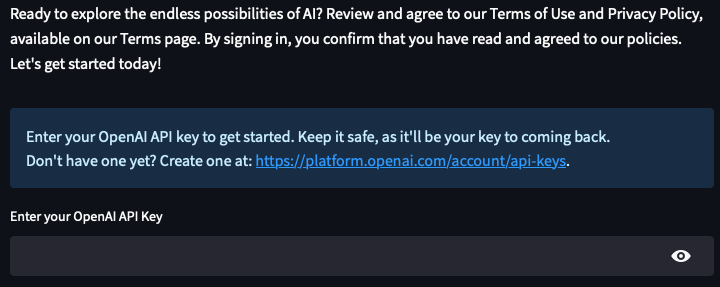
def view_get_info(self):
with self.container:
st.markdown(legal_prompt)
st.markdown(" \n")
st.info(user_key_prompt)
st.text_input("Enter your OpenAI API Key", key="user_key_input",on_change=self._validate_user_info, type="password", autocomplete="current-password")
# handler that calls a backend function to get or create a user record
def _validate_user_info(self):
u = au.users()
try:
user = u.get_create_user(api_key=st.session_state.user_key_input)
self._set_info(user_id=user['id'], api_key = st.session_state.user_key_input, user_hash=user['data']['user_hash'])
st.session_state.user_validated = 1
# displays error in the container below the text input
except u.OpenAIClientCredentialError as e:
with self.container:
st.error(user_key_failed)
except u.DBError as e:
with self.container:
st.warning("Something went wrong. Please try again.")
# redners success message
def view_success_confirmation(self):
st.write(user_key_success)
Each page can instantiate the class and invoke necessary methods. For example, in home.py, both view_get_info() and view_success_confirmation() are invoked:
vu = vuser.app_user()
if 'user' not in st.session_state or st.session_state.user_validated != 1:
   vu.view_get_info()
else:
   vu.view_success_confirmation()
In assistant.py, the view_get_info() can be invoked, but view_success_confirmation() can be skipped:
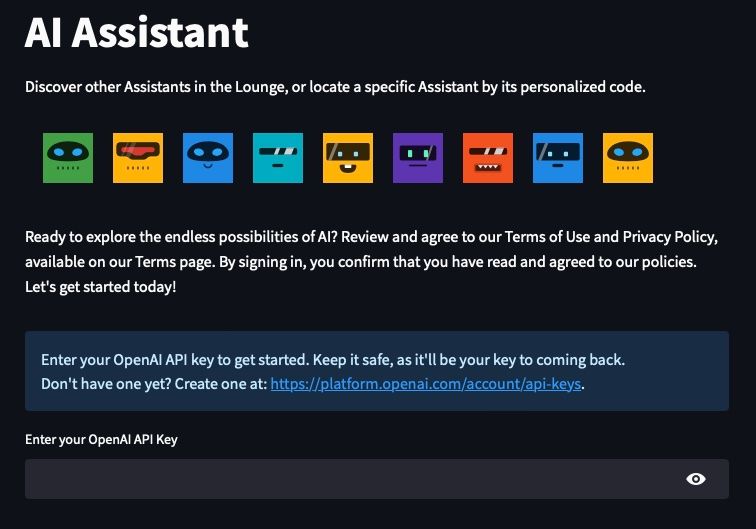
def render_user_login_required():
   st.title("AI Assistant")
   st.write("Discover other Assistants in the Lounge, or locate a specific Assistant by its personalized code.")
   ac.robo_avatar_component()
   vu = vuser.app_user()
   vu.view_get_info()
4. Adding limited styling with Markdown languages and static Streamlit components
While Streamlit applications generally look good out of the box, minimal pixel pushing can make a big difference. There are two ways to add styling in Streamlit: creating a custom component and injecting styling via Markdown. However, to maintain a cohesive look, it’s important not to overuse these methods.
In GPT Lab, I created a custom component for the assistant avatar divider:

The divider was initially composed of a st.columns(9) element with an avatar in each column. This looked great, except for columns vertically stacked on smaller screen resolutions. Yikes! With ChatGPT's help (since I’m not a front-end person), I created a custom static component (with only CSS and HTML codes):
def robo_avatar_component():

   robo_html = "<div style='display: flex; flex-wrap: wrap; justify-content: left;'>"
   # replace with your own array of strings to seed the DiceBear Avatars API
   robo_avatar_seed = [0, 1, 2, 3, 4, 5, 6, 7, 8, 9]

   for i in range(1, 10):
       avatar_url = "<https://api.dicebear.com/5.x/bottts-neutral/svg?seed={0}>".format(robo_avatar_seed[i-1])
       robo_html += "<img src='{0}' style='width: {1}px; height: {1}px; margin: 10px;'>".format(avatar_url, 50)
   robo_html += "</div>"

   robo_html = """<style>
         @media (max-width: 800px) {
           img {
             max-width: calc((100% - 60px) / 6);
             height: auto;
             margin: 0 10px 10px 0;
           }
         }
       </style>""" + robo_html

   c.html(robo_html, height=70)
The static component displays a maximum of nine evenly-spaced avatars. It adapts the layout for smaller screens by keeping the avatars horizontally aligned and reducing the number of visible avatars for phone resolutions:
![]()
Additionally, I used wiki Markdowns to add awesome font icons in front of the CTA links:
def st_button(url, label, font_awesome_icon):
   st.markdown('<link rel="stylesheet" href="<https://cdnjs.cloudflare.com/ajax/libs/font-awesome/4.7.0/css/font-awesome.min.css>">', unsafe_allow_html=True)
   button_code = f'''<a href="{url}" target=_blank><i class="fa {font_awesome_icon}"></i>   {label}</a>'''
   return st.markdown(button_code, unsafe_allow_html=True)
Generally, I recommend not overusing the Markdown-injected CSS method for three reasons:
- It causes the font to be inconsistent throughout your application
- It tends to blend poorly with the system preference-dependent dark/light theme
- Unsafe_allow_html makes me nervous in general
5. Programmatically laying out Streamlit elements
The coolest thing I learned was that Streamlit elements could be laid out programmatically. 🤯 It allowed me to create a more complex and customized user interface:
In the Lounge, I used the following code snippet to dynamically lay out the assistants in a two-column layout. For each assistant, I programmatically generated a unique button key (to avoid element key collisions):
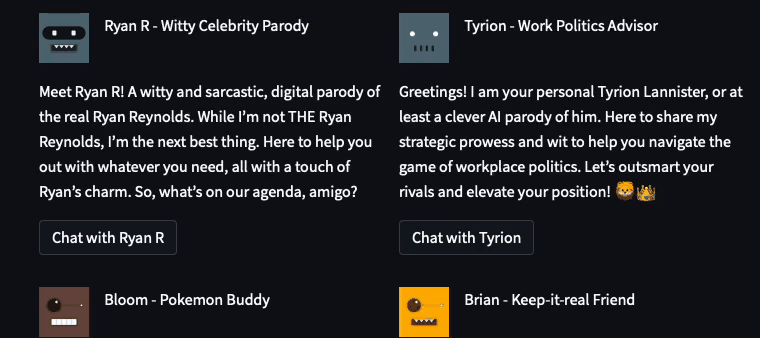
def view_bot_grid(bot_dict, button_disabled=False, show_bot_id=False):

   col1, col2 = st.columns(2)

   for i in range(0,len(bot_dict)):
       avatar_url = "<https://api.dicebear.com/5.x/bottts-neutral/svg?seed={0}>".format(bot_dict[i]['name'])
       button_label="Chat with {0}".format(bot_dict[i]['name'])
       button_key="Lounge_bot_{0}".format(bot_dict[i]["id"])
       if i%2 == 0:
           with col1:
               cola, colb = st.columns([1,5])
               cola.image(avatar_url, width=50)
               if show_bot_id == False:
                   colb.markdown(f"{bot_dict[i]['name']} - {bot_dict[i]['tag_line']}")
               else:
                   colb.markdown(f"{bot_dict[i]['name']} - {bot_dict[i]['tag_line']}  \\nAssistant ID: {bot_dict[i]['id']}")
           col1.write(bot_dict[i]['description'])
           if col1.button(button_label, key=button_key, disabled=button_disabled):
               st.session_state.bot_info=bot_dict[i]
               st.session_state.bot_validated = 1
               au.switch_page('assistant')
           col1.write("\\n\\n")
       else:
           with col2:
               col2a, col2b = st.columns([1,5])
               col2a.image(avatar_url, width=50)
               if show_bot_id == False:
                   col2b.markdown(f"{bot_dict[i]['name']} - {bot_dict[i]['tag_line']}")
               else:
                   col2b.markdown(f"{bot_dict[i]['name']} - {bot_dict[i]['tag_line']}  \\nAssistant ID: {bot_dict[i]['id']}")
           col2.write(bot_dict[i]['description'])
           if col2.button(button_label, key=button_key, disabled=button_disabled):
               st.session_state.bot_info=bot_dict[i]
               st.session_state.bot_validated = 1
               au.switch_page('assistant')
           col2.write("\\n\\n")
6. Supporting multiple OpenAI completion endpoints
OpenAI has two text completion (primary use case for GPT Lab) endpoints: completion and chat. The older models (text-davinci-003 and older) use the former and the newer models (gpt-3.5-turbo and gpt-4) use the latter.
The Completion endpoint takes a single input string and returns a predicted completion. A chat session can be simulated by concatenating the chat messages together:
Initial prompt message + stop_sequence + AI Response 1 + restart_sequence + User message 1 + stop_sequence + AI Response 2 + restart_sequence + … + User message N + stop_sequence
The stop_sequence ensures the model does not hallucinate and expands upon the user message. The restart_sequence, while not required by the API, ensures I can tell when AI responses stop.
The Chat endpoint takes in a list of chat messages and returns a predicted chat message. Each chat message is a dictionary that consists of two fields: role and content. There are three roles: system, user, and assistant. The initial prompt is sent as a "system" message, while the user message is sent as a "user" message. For example:
[
   {"role": "system", "content": "You are a helpful assistant."},
   {"role": "user", "content": "Who won the world series in 2020?"},
   {"role": "assistant", "content": "The Los Angeles Dodgers won the World Series in 2020."},
   {"role": "user", "content": "Where was it played?"}
]
I abstracted this complexity within my OpenAI wrapper class to simplify the app. A single function using one chat message data format is exposed to the rest of the application:
def get_ai_response(self, model_config_dict, init_prompt_msg, messages):

   submit_messages = [{'role':'system','message':init_prompt_msg,'current_date':get_current_time()}]+ messages

   new_messages = []
   bot_message = ''
   total_tokens = 0

   if model_config_dict['model'] in ('gpt-3.5-turbo', 'gpt-4'):
       try:
           response = self._get_chat_completion(model_config_dict, submit_messages)
           bot_message = response['choices'][0]['message']['content']
           total_tokens = response['usage']['total_tokens']
       except Exception as e:
           raise
   else:
       try:
           response = self._get_completion(model_config_dict, submit_messages)
           bot_message = response['choices'][0]['text']
           total_tokens = response['usage']['total_tokens']
       except Exception as e:
           raise

   new_messages = messages + [{'role':'assistant','message':bot_message.strip(),'created_date':get_current_time()}]

   return {'messages':new_messages, 'total_tokens':total_tokens}
Depending on the model, the request would be sent to different endpoints. Here's the internal function that creates a Completion call:
def _get_completion(self, model_config_dict, messages):
   model_config_validated = self._validate_model_config(model_config_dict)
   oai_message = self._messages_to_oai_prompt_str(messages)

   if model_config_validated:
       get_completion_call_string = (
       """openai.Completion.create(
           model="{0}",
           prompt="{1}",
           temperature={2},
           max_tokens={3},
           top_p={4},
           frequency_penalty={5},
           presence_penalty={6},
           stop=['{7}']
           )""").format(
               model_config_dict['model'],
               oai_message,
               model_config_dict['temperature'],
               model_config_dict['max_tokens'],
               model_config_dict['top_p'],
               model_config_dict['frequency_penalty'],
               model_config_dict['presence_penalty'],
               self.stop_sequence
           )

       try:
           completions = self._invoke_call(get_completion_call_string)
           return completions
       except Exception as e:
           raise
   else:
       if not model_config_validated:
           raise self.BadRequest("Bad Request. model_config_dict missing required fields")
It uses a mapper function to convert the list of dictionaries into the concatenated string that the model expects:
def _messages_to_oai_prompt_str(self, messages):
   msg_string = ""
   for message in messages:
       if message['role'] == 'user' or message['role'] == 'system':
           msg_string += message['message'].replace("\\"","'") + self.stop_sequence
       else:
           msg_string += message['message'].replace("\\"","'") + self.restart_sequence
   return msg_string
Abstractions like this allowed me to simplify the upstream calls to OpenAI endpoints.
7. Protecting AI assistants from potential prompt injection attacks
Part of the GPT Lab's value proposition is that users can share their assistants without sharing their exact prompts (it takes time to create a good, repeatable prompt—perfecting the initial Coach Marlon prompt took about a week).
The initial prompt isn’t stored with the rest of the session messages for security. Additionally, I vectorize each AI assistant response and compute the cosine similarity score of it and the initial prompt. A score of 0.65 or greater would trigger the AI response to be swapped out with a generic reply. This helps us ensure AI assistants aren't tricked into revealing their secret instructions (Bing? Sydney? 😅).
There are many ways to vectorize text strings, including OpenAI's embedding API. I chose to use scikit-learn's TfidfVectorizer to vectorize the text strings. The class is lightweight (preventing bloat in the Streamlit application), achieves decent results, and saves OpenAI credits for users:
from sklearn.feature_extraction.text import TfidfVectorizer
from sklearn.metrics.pairwise import cosine_similarity

def get_cosine_similarity(str1, str2):
   # Create a TfidfVectorizer object
   corpus = [str1, str2]
   vect = TfidfVectorizer(min_df=1,stop_words='english')

   tfidf = vect.fit_transform(corpus)
   # Compute the cosine similarity between the two vectors
   cos_sim = cosine_similarity(tfidf[0], tfidf[1])[0][0]

   return cos_sim
It’s worth noting that while the method described here will provide adequate protection to most prompts, it won’t eliminate all possible prompt injection attacks. For example, comparing the initial prompt to partial responses (revealed by the "give me previous five sentences" prompt injection attack method used on Bing). Plus, prompt injection attack prevention is still under active research.
8. Condensing chat sessions
By default, OpenAI large language models can handle only a limited number of tokens (2K for older models, 4K for text-davinci-003, and 8K+ for the base GPT-4 model). To ensure a smooth chatting experience for users (and that longer chat sessions don't hit the maximum model token limit), I have implemented two simple but effective session truncation methods:
- Brainstorming assistants continuously retain the last 20 messages (so the assistants will gradually forget about topics from earlier in the thread).
- Once the chat message session exceeds 60% of the model maximum token limit, coaching assistants will automatically summarize the session (using the summary prompt) and initiate a new thread with the summary up to that point and the last four messages. This approach maintains continuity in the conversation.
Implementing these approaches is straightforward. Instead of providing the exact code, I encourage you to develop your own implementations.
9. Protecting user privacy
Ensuring user privacy is a fundamental principle of GPT Lab, incorporated throughout the design.
Users are only identified in the system by one-way hash values (SHA-256 PBKDF2 with x rotations) of their OpenAI API keys. This ensures their complete confidentiality and security within the platform. Their API keys are only stored as session state variables and used during their visits to interact with OpenAI models.
Additionally, I debated whether to store session messages in the database. Ultimately, I decided to retain them, allowing users to revisit (and possibly resume) past chat sessions. While GPT Lab doesn’t collect any user information, it’s still possible for personally identifiable information (PII) or even personal-health information (PHI) to be contained in chat sessions. To ensure user privacy, I used Fernet encryption (AES-128) with a user-specific key (one-way hash value of their OpenAI API key combined with a global salt value) to encrypt and decrypt the session messages before storing and retrieving them from the database.
10. Separating development and production database
I created two databases—one for development and testing and one for production. When I develop locally, I point my local secrets.toml file to the development database. For the production environment, I point the secrets.toml to the production database. This approach allows me to get an accurate gauge of platform metrics on production and freely experiment with local schema changes without worrying about affecting overall user experiences.
11. Hosting options and considerations
I considered two hosting options: Streamlit Community Cloud and Google Cloud Run.
I appreciated the simplicity of Streamlit Community Cloud (especially the continuous deployment aspect), but it had a 1GB per application limitation, didn’t support custom domains, and didn’t provide a clear answer regarding the number of concurrent users it could handle.
So I experimented with deploying to Google Cloud Run. To get it working, I did a few things differently:
- Removed streamlit-chat component (I couldn’t get the React component to load. Also, the React component does not render Markdown, which is occasionally returned by the assistants).
- Used OS environment variable for database service account JSON (not
secrets.toml). - Created a Docker file in the directory:
FROM python:3.10-slim
ENV APP_HOME /app
WORKDIR $APP_HOME
COPY . ./
RUN pip install -r requirements.txt

EXPOSE 8080
CMD streamlit run --server.port 8080 --browser.gatherUsageStats false --server.enableWebsocketCompression true home.py
- Set up continuous deployment from my GitHub repository (I set up a Cloud Build Trigger that connects to the main branch of my repo, then attached the Cloud Build Trigger to the Cloud Run service). Here is the reference document.
Finally, I decided on Streamlit Community Cloud to minimize the overall project cost. Also, in light of the above experiment, 1GB was sufficient for the app's usage.
12. Protecting yourself as a solo developer
While it's easy to create applications with Streamlit, it's essential to consider the implications of your applications before making them public. Given the unpredictable nature of large language models and the ability for anyone to create assistants on any topic, I rated the risk level of GPT Lab relatively high. To protect myself from potential issues, I took the time to draft up Terms of Use and set up an LLC. While GPT Lab may be on the extreme end of the spectrum, the lesson here applies to all solo developers. Before making any app public, do a quick risk assessment to determine whether additional precautions are necessary for your use case.
Wrapping Up
Over the past three months, I've learned a great deal about OpenAI and successfully demonstrated that it's possible to build a reasonably complex application using Streamlit. Although there's room for improvement, GPT Lab provides a glimpse into how Streamlit can create dynamic and interconnected multi-page applications. I hope you enjoyed this article. Connect with me on Twitter or Linkedin. I'd love to hear from you.
Happy Streamlit-ing! 🎈


Comments
Continue the conversation in our forums →