
You’ve probably heard of ChatGPT, the large language model (LLM) chatbot developed by OpenAI. It took the world by storm with its uncanny ability to generate text responses to user-provided questions (also known as prompts). ChatGPT has grown to over 100 million monthly active users in just two months since its launch, making it the fastest-growing product in history.
If you're a developer and want to build using the same technology as ChatGPT, then read on! This post will get you up to speed, from getting your API key to building LLM tools and a chatbot in pure Python using only the OpenAI library.
OpenAI capabilities
Before proceeding further, it's worth noting the various possibilities of OpenAI. At a high level, the OpenAI API provides an interface to the following product offerings via its API endpoints using either (1) curl or (2) openai Python library:
- Text. Generative Pre-Trained Transformers (GPT) can generate LLM responses in the form of document text, computer code, answers to questions, conversational text, and so on by accepting user-provided inputs (prompts). OpenAI provides different flavors of GPT, particularly GPT3, GPT3.5 (the engine driving ChatGPT), and GPT4.
- Image. The DALL·E model can generate, manipulate, or create variations of images as guided by input prompts.
- Embeddings. Text embeddings provide a numerical representation of text that can be used for semantic search, clustering, recommendations, classification, anomaly detection, and so on. OpenAI's
text-embedding-ada-002provides this capability. - Speech to text. The Whisper model enables the transcription and translation of user-provided audio files through its API endpoints.
- Fine-tuning. OpenAI models can be fine-tuned for better results by supplying a foundational model with a compilation of training instances, effectively offering a larger volume of examples than what can be achieved by few-shot learning (i.e., prompts with a few training examples).
GPT for Text Generation
OpenAI refers to text generation as "completions," specifically text completion. This naming convention stems from how language models generate text by using word probability, one word at a time, to complete initial starting words and form complete sentences.
An alternative to completions is "chat completions"—GPT models optimized for conversational text. You may be most familiar with this GPT type, as the underlying GPT 3.5 and their flagship GPT 4 are powering the very popular ChatGPT.
A benefit of chat completions is that they’re less prone to prompt injection attacks, as user-provided content is separate from instruction prompts.
Get your own OpenAI API key
Follow these steps to obtain your API key from OpenAI:
- Go to https://openai.com/
- Click on Menu > Developers > Overview
- Click on your Profile image (top right) > View API keys
- Click on
+ Create new secret key - Optionally, enter a name for the API key for future reference
That's all you need to do to create your own OpenAI API key, which will begin with sk-.
Here is how to get your own OpenAI API key:

For more information on safely using API keys, read this post.
Install the OpenAI Python library
To use the OpenAI API for building your projects and tools, you must install the OpenAI Python library. You can do this by using pip as follows:
pip install openai
Set the OpenAI API key on a local computer
In the previous step, you generated an OpenAI API key. Instead of hardcoding the API key each time, code an LLM tool and save the API key to memory. To do this, save the API key as an environment variable—the memory of your operating system that you can access from the command line or from your Python code.
Depending on your operating system, you can set the environmental variable with varying commands. This article by Michael Schade shows how to do this on various operating systems, such as Windows, Linux, and Mac OSX.
Set the API key
To set the API key as an environment variable named OPENAI_API_KEY, enter the following command in the command line (I did this for my local installation on a Mac OSX):
echo "export OPENAI_API_KEY='sk-xxxxxxxxxx'" >> ~/.zshrc
These commands instruct the computer to set the API key sk-xxxxxxxxxx as a variable called OPENAI_API_KEY using the export command. To save the previous command to a file, the echo command was used with >> followed by the file path ~/.zshrc (~ refers to the current working directory, which is typically located at /home/username).
Update with the newly defined variable
To update the shell with the newly defined variable, enter the following command:
source ~/.zshrc
Call the API key from the environment variable
To confirm that your API key is present in the environment variable, call it from the command line using the following command:
echo $OPENAI_API_KEY
You should be able to see the API key as the output returned:
sk-xxxxxxxxxx
To use the OpenAI API from your Python code, call it by accessing the environment variable via os.environ['OPENAI_API_KEY']:
# Import prerequisite libraries
import os
import openai

# Setting the API key
openai.api_key = os.environ['OPENAI_API_KEY']

# Perform tasks using OpenAI API
openai.Model.list() # List all OpenAI models
OpenAI for text generation
Of all the available models for text generation in OpenAI, use the following:
- Chat Completions (
gpt-4,gpt-3.5-turbo) - Completions (
text-davinci-003,text-davinci-002,davinci,curie,babbage,ada)
As mentioned earlier, the chat completions API will be used as the default for text generation going forward, while the completions API will be deprecated.
Use the Chat Completion API
Let's use the Chat Completions API by providing it with an input prompt. In this example, use “Hello!”
# Import prerequisite libraries
import os
import openai

# Setting the API key
openai.api_key = os.getenv("OPENAI_API_KEY")
# Define the user prompt message
prompt = "Hello!"
# Create a chatbot using ChatCompletion.create() function
completion = openai.ChatCompletion.create(
  # Use GPT 3.5 as the LLM
  model="gpt-3.5-turbo",
  # Pre-define conversation messages for the possible roles
  messages=[
    {"role": "system", "content": "You are a helpful assistant."},
    {"role": "user", "content": prompt}
  ]
)
# Print the returned output from the LLM model
print(completion.choices[0].message)
The code snippet above produces the following output: "Hello! How can I assist you today?”
{
  "role": "assistant",
  "content": "Hello! How can I assist you today?"
}
model and messages. They allow you to specify the LLM model (GPT 3.5) and the pre-defined conversation messages, which consist of system and user. Here, assistant wasn’t specified.Create a blog outline generator
By making a small adjustment to the system and prompt messages, you can create a generator for blog outlines:
import os
import openai

#openai.api_key = os.getenv("OPENAI_API_KEY")

prompt = "Please generate a blog outline on how a beginner can break into the field of data science."

completion = openai.ChatCompletion.create(
  model="gpt-3.5-turbo",
  messages=[
    {"role": "system", "content": "You are a helpful assistant with extensive experience in data science and technical writing."},
    {"role": "user", "content": prompt}
  ]
)

print(completion.choices[0].message)
The code snippet mentioned above works in both a Colab or Jupyter Notebook environment, as well as in a command line interface. For the latter, if you save it as a file (for instance, as blog.py), you can run it in the command line by typing python blog.py:

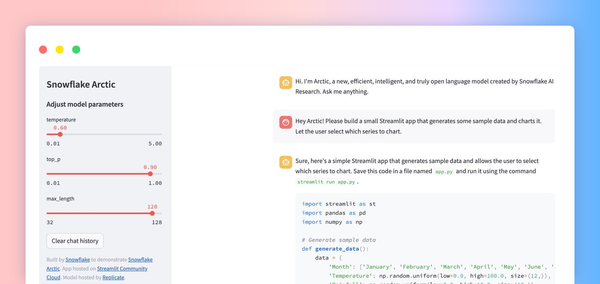
Create a simple ChatGPT-like chatbot
You can create your chatbot using the OpenAI API. It's a simpler version without a fancy graphical user interface (GUI). Instead of entering prompts into a text box, you provide them as an input argument to a function.
The following code snippet provides an example of creating a simple ChatGPT-like chatbot (with detailed explanations as in-line comments). This chatbot even has a memory of the conversation history!
import openai

# Initialize the chat messages history
messages = [{"role": "assistant", "content": "How can I help?"}]

# Function to display the chat history
def display_chat_history(messages):
    for message in messages:
        print(f"{message['role'].capitalize()}: {message['content']}")

# Function to get the assistant's response
def get_assistant_response(messages):
    r = openai.ChatCompletion.create(
        model="gpt-3.5-turbo",
        messages=[{"role": m["role"], "content": m["content"]} for m in messages],
    )
    response = r.choices[0].message.content
    return response

# Main chat loop
while True:
    # Display chat history
    display_chat_history(messages)

    # Get user input
    prompt = input("User: ")
    messages.append({"role": "user", "content": prompt})

    # Get assistant response
    response = get_assistant_response(messages)
    messages.append({"role": "assistant", "content": response})
To run the above code in the command line, save it as a file, such as chatbot.py, then execute it using the command python chatbot.py:
Spice up the LLM-generated response
To add creativity and variety to the LLM-generated response, experiment with the temperature or top_p parameters.
The temperature parameter can have values between 0 and 1. A value of 0 would lead to a conservative response (i.e., selecting only high-probability words). In contrast, values closer to 1 would lead to a more creative reply (i.e., choosing less probable words).
The top_p parameter can also have values between 0 and 1. It represents the cumulative probability of top-ranking probable words and helps reduce less likely words from the LLM-generated response.
For more information about these parameters, read this OpenAI forum post.
Wrapping up
Thank you for reading! This post has laid the groundwork for using the OpenAI Python library to create a useful LLM tool for blog ideation and a simple chatbot. With this new knowledge and set of skills, you're ready to build impactful generative AI tools to address any real-world problem that interests you.
If you have any questions, post them in the comments below or contact me on Twitter at @thedataprof, on LinkedIn, or on my YouTube channel Data Professor.
Happy coding! 🤖


Comments
Continue the conversation in our forums →