
Hey Streamlit community! 👋
I'm Steve Krawczyk, one of the co-founders of Hegel AI. We build open-source tools for working with large language models (LLMs) and vector databases. In this post, I'll provide insights into our PromptTools Playground, a project we've created to allow developers to experiment with multiple prompts and models simultaneously using our open-source library.
I'll guide you through the app's features and the ways we've implemented them:
- Creating a grid for inputs and outputs
- Building a dynamic sidebar for app configuration
- Creating shareable links (experimental)
Why PromptTools Playground?
PromptTools is a library designed for experimenting with, testing, and evaluating LLMs and VectorDBs. It provides a user-friendly interface for constructing and executing requests to LLMs. And it speeds up our work with LLMs and prompts for our applications and to compare new open-source models with GPT-3.5 and 4.
How it can help you
- For some use cases, running an instance of Llama 2 on your laptop may suffice. But for others, you might need to use OpenAI. If you experiment early in development, you can determine the optimal fit to improve performance and save costs.
- Optimizing prompts can be challenging. You can make informed decisions quickly by experimenting with multiple prompts and comparing responses. We support various model providers, including OpenAI, Anthropic, HuggingFace, Google, and local models through LlamaCpp. Users can compare templates, instructions, and messages and evaluate models head-to-head in the same table.
- Setting up and running such experiments can require writing custom code for each LLM and prompting strategy you wish to try. PromptTools simplifies the process of testing LLMs and prompts without investing significant upfront time and effort—they abstract the less relevant parts, allowing you to focus on what matters.
Example use case
Some of our users use LLMs to generate outbound sales emails. They experiment with various prompt templates that include variables, then pass them into an LLM to create the email. For example, they may use templates such as the following:
Users typically test different versions of a template across many cases to determine which one will work best when they take the prompts into production.
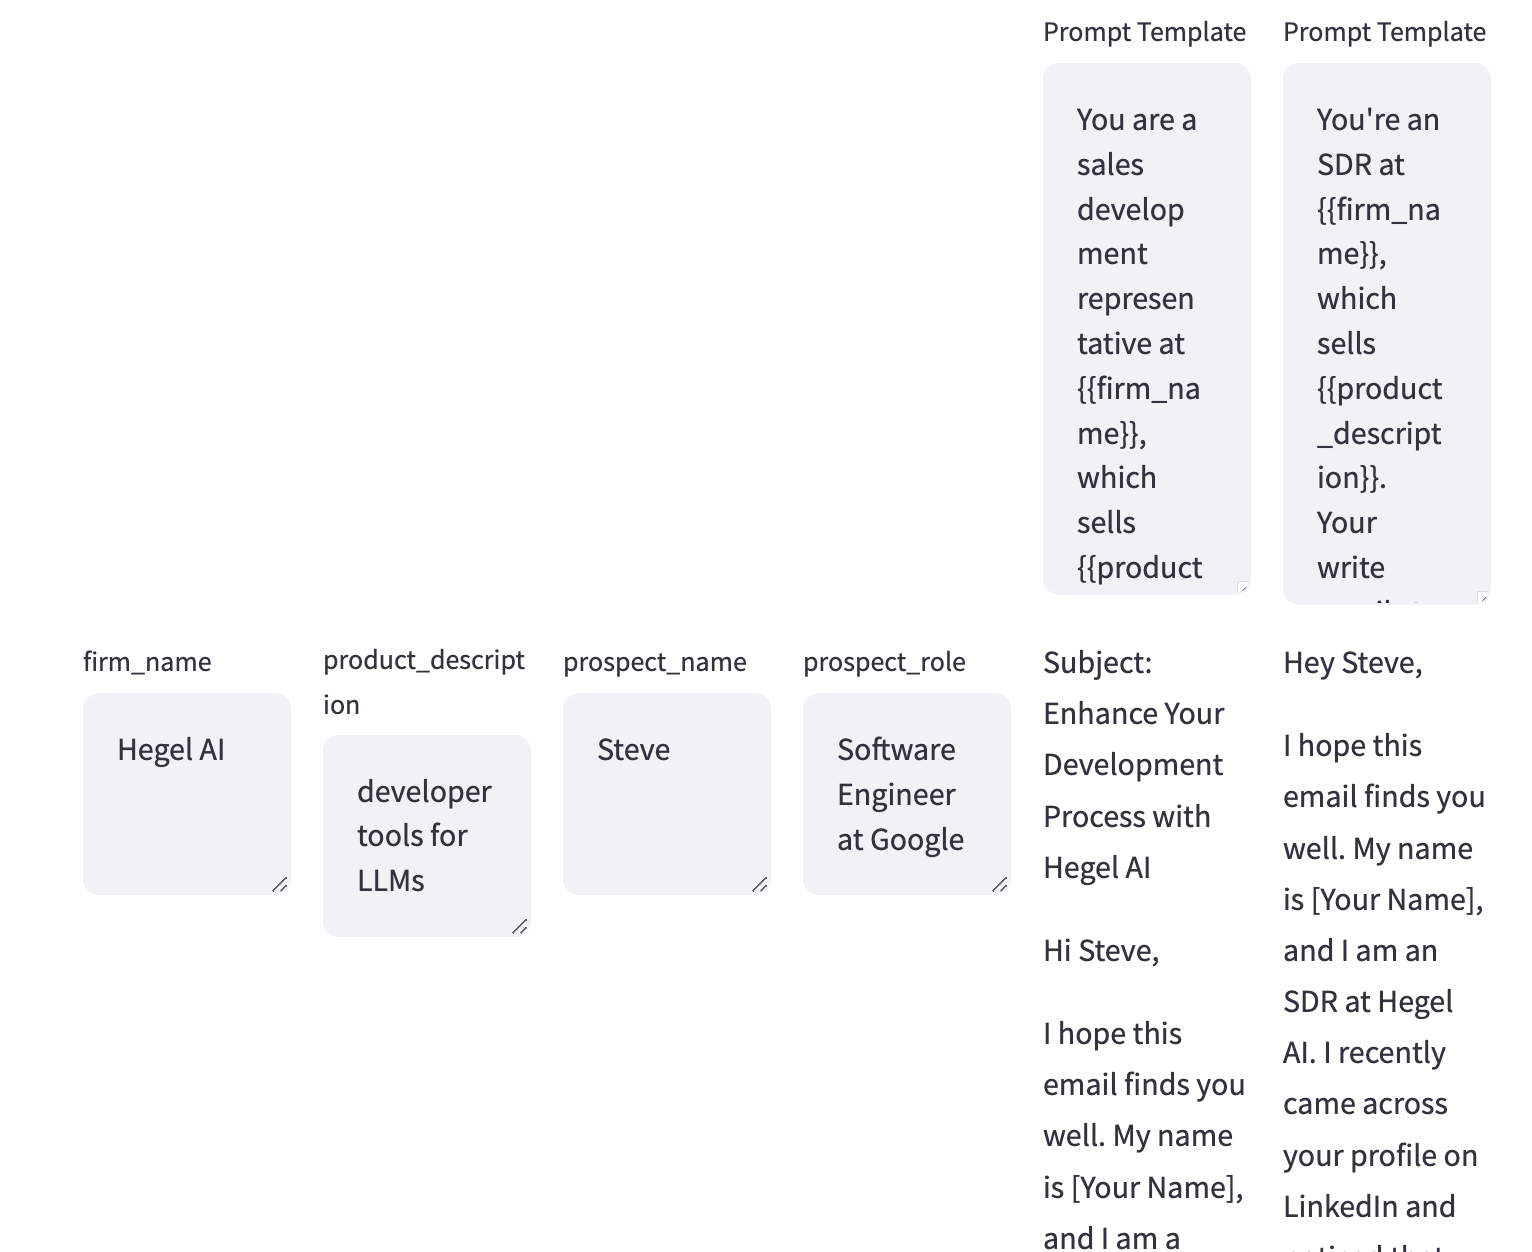
Before PromptTools, they'd run the prompts one at a time on a single model, and the results had to be manually tracked. With PromptTools, they can run all prompts simultaneously, and the results can be viewed on a single page. This speeds up the iteration process, whether you're using LLMs for productivity and drafting or testing a prompt for a production system.
Now let's get to building the app.
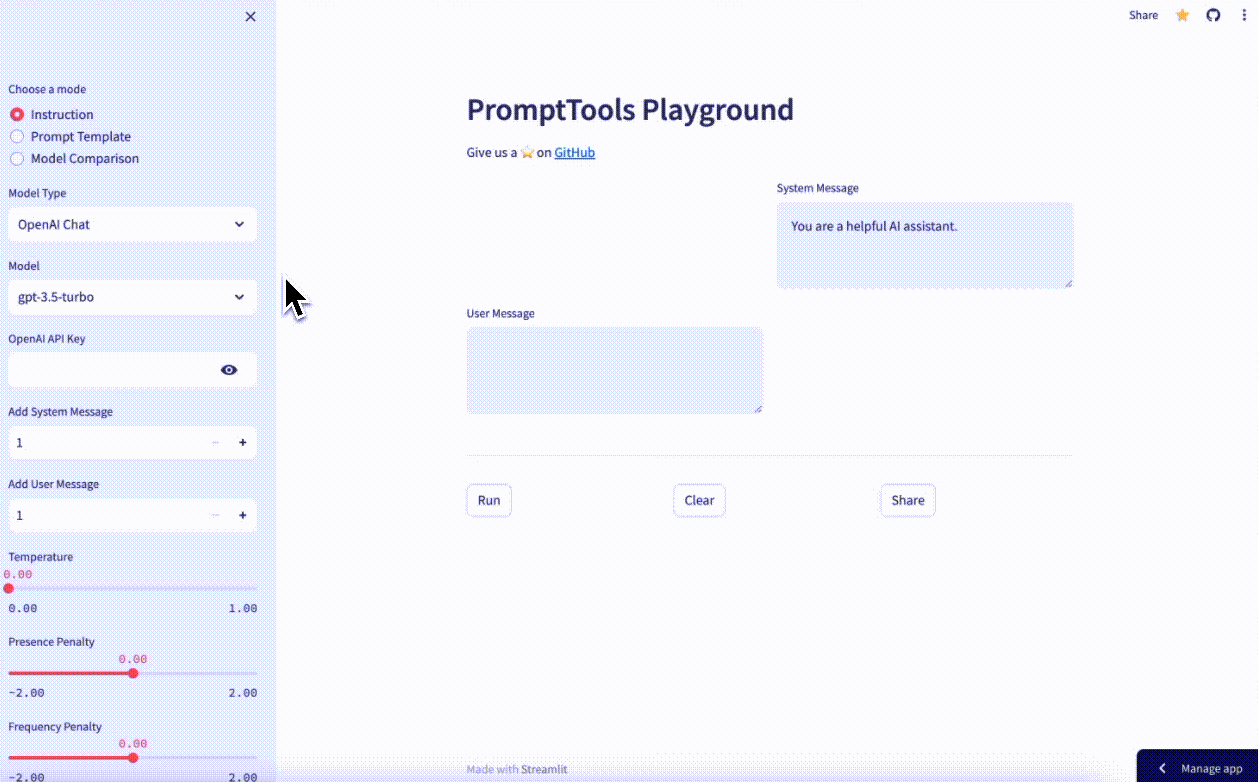
1. Creating a grid for inputs and outputs
The core idea behind our UI is that users can iterate over two lists simultaneously to experiment with LLM inputs, such as system and user messages, prompt templates and variables, or models and prompts. We then utilize the Cartesian product of these lists to craft a set of requests that are sent and displayed for manual evaluation.
At first, we tried to use the dataframe component. But it was hard to align the dataframe with the input cells to create a "table" of inputs and outputs. So we switched to columns and placeholder cells for the output. By default, the components of a Streamlit app are displayed vertically. We used columns to arrange the components horizontally as well.
Here is the code to display the outputs:
    # Add placeholders for output
    placeholders = [[st.empty() for _ in range(instruction_count + 1)] for _ in range(prompt_count)]

    cols = st.columns(instruction_count + 1)

    # Create top row for instructions or system messages
    with cols[0]:
        a = None
    instructions = []
    for j in range(1, instruction_count + 1):
        with cols[j]:
            instructions.append(
                st.text_area(
                    "System Message",
                    value="You are a helpful AI assistant.",
                    key=f"col_{j}",
                )
            )

    # Create rows for prompts, and output placeholders
    prompts = []
    for i in range(prompt_count):
        cols = st.columns(instruction_count + 1)
        with cols[0]:
            prompts.append(
                st.text_area(
                    "User Message",
                    key=f"row_{i}"
                )
            )
        for j in range(1, instruction_count + 1):
            with cols[j]:
                placeholders[i][j] = st.empty()  # placeholders for the future output
        st.divider()
To make a table listing instructions and prompts, we created a column for each instruction and another for prompts. Next, we iterated over the number of rows equal to the number of prompts. Each row contained a prompt input cell and as many output cells as there were instructions.
Here is the resulting table:
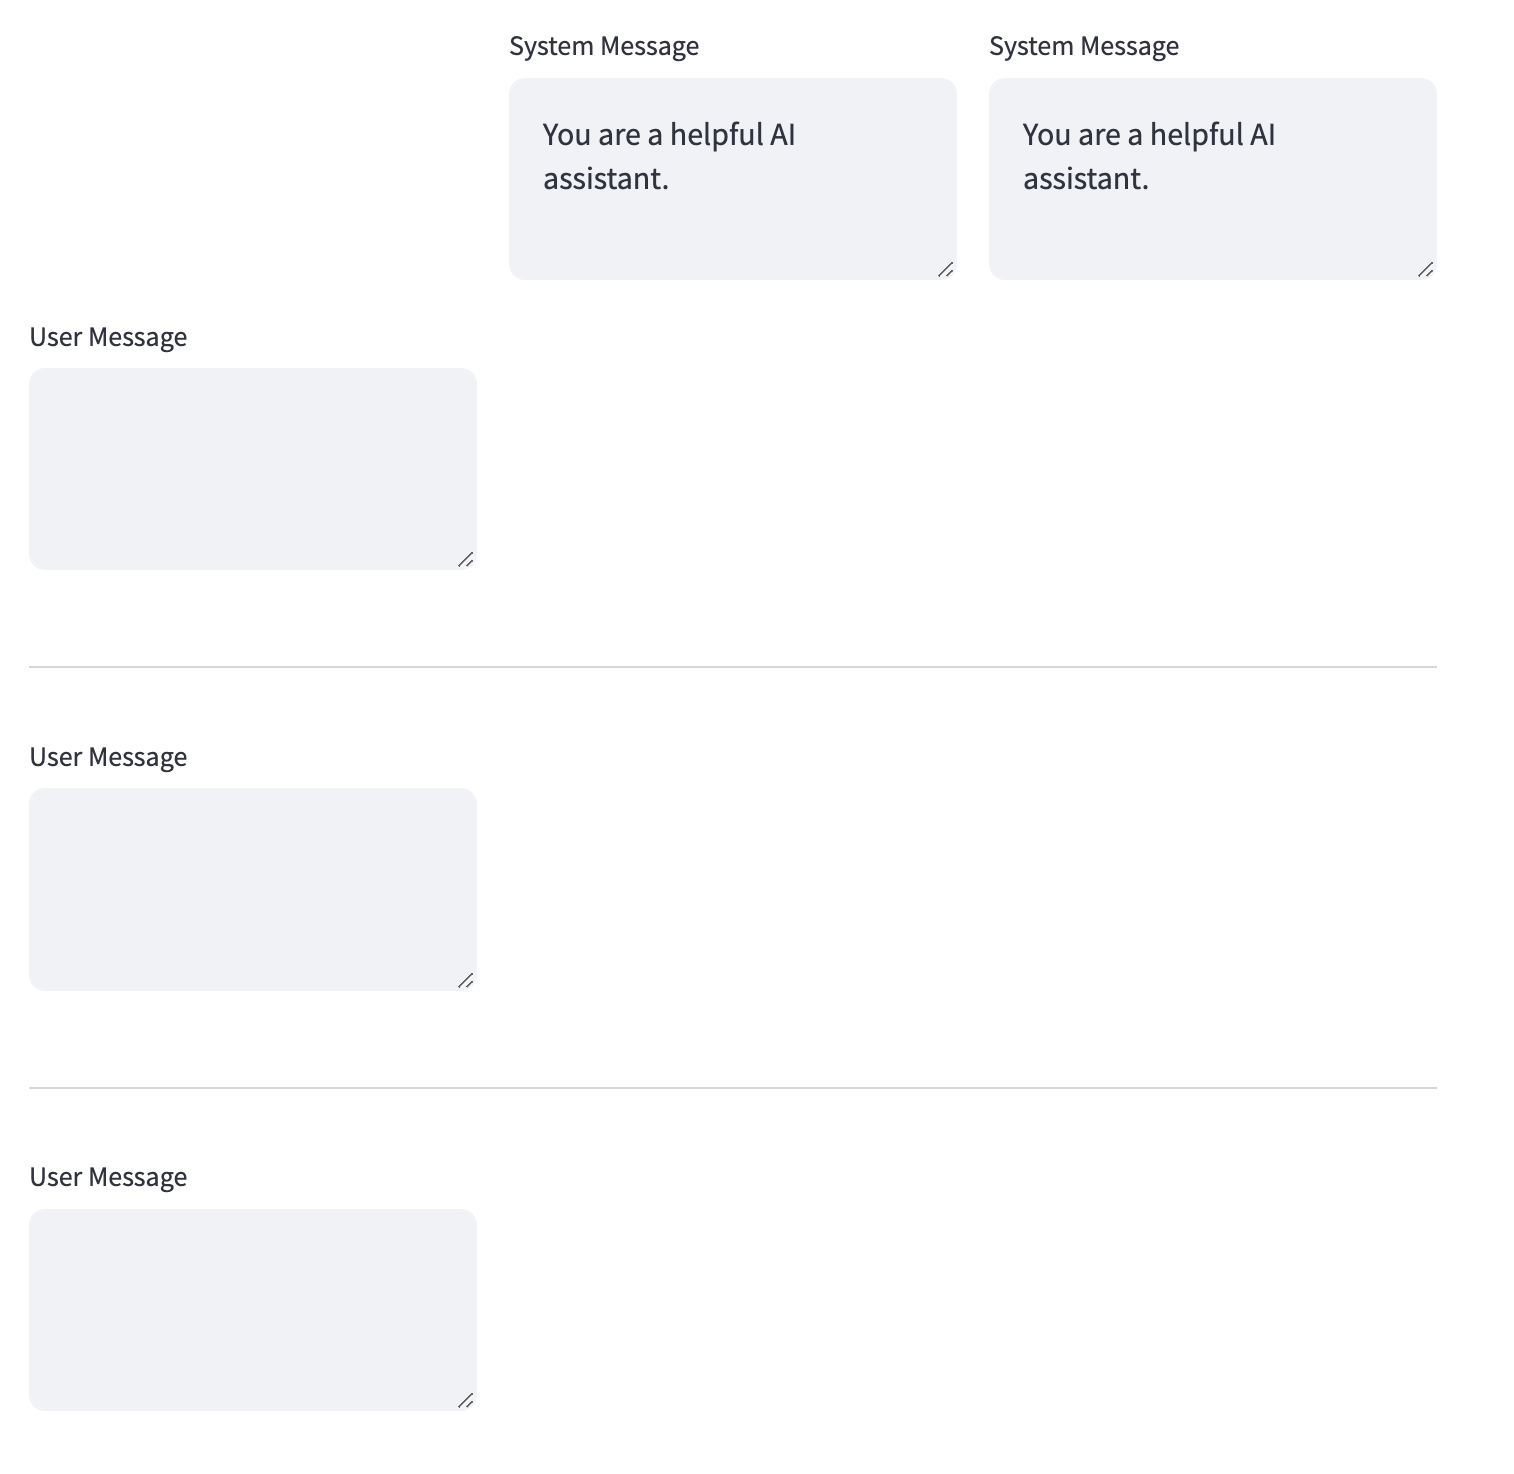
This allows our users to easily visualize how a system and user message are mapped onto the outputs we create.
2. Building a dynamic sidebar for app configuration
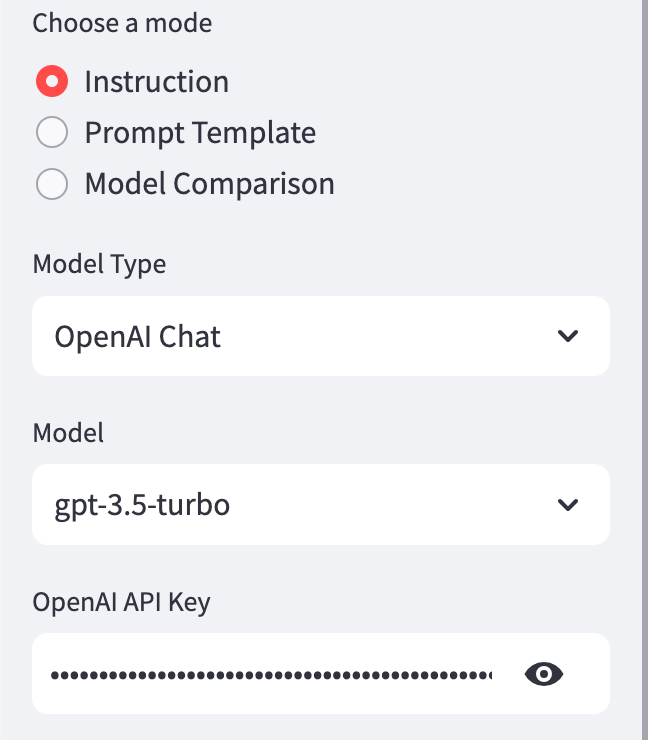
Streamlit has a handy sidebar component where most configuration UI is kept separate from system and user messages. In our case, the inputs displayed on this sidebar are dynamic. When running the app in "Instruction" mode, you'll see something like this:

But, if you're running in "Model Comparison" mode, you'll need to enter all the API keys for the models you're testing on the sidebar and configure the individual models in the first row of the table.
To implement a sidebar with dynamic input fields, use this code:
with st.sidebar:
    mode = st.radio("Choose a mode", MODES)
    if mode != "Model Comparison":
        model_type = st.selectbox(
            "Model Type", MODEL_TYPES
        )
        model, api_key = None, None
        if model_type in {"LlamaCpp Chat", "LlamaCpp Completion"}:
            model = st.text_input("Local Model Path", key="llama_cpp_model_path")
        elif model_type == "OpenAI Chat":
            model = st.selectbox(
                "Model",
                OPENAI_CHAT_MODELS
            )
            api_key = st.text_input("OpenAI API Key", type='password')
        elif model_type == "OpenAI Completion":
            model = st.selectbox(
                "Model",
                OPENAI_COMPLETION_MODELS
            )
            api_key = st.text_input("OpenAI API Key", type='password')
    else:
        model_count = st.number_input("Add Model", step=1, min_value=1, max_value=5)
        prompt_count = st.number_input("Add Prompt", step=1, min_value=1, max_value=10)
        openai_api_key = st.text_input("OpenAI API Key", type='password')
        anthropic_api_key = st.text_input("Anthropic Key", type='password')
        google_api_key = st.text_input("Google PaLM Key", type='password')
        hf_api_key = st.text_input("HuggingFace Hub Key", type='password')
It's important to understand the Streamlit execution model: after every user interaction, the app reruns top-to-bottom. So you need to organize your UI components in order of conditional dependency, with components at the top determining which components we display later.
3. Creating shareable links
Our application also enables users to create and share links for their experiment setup with others. This is done by using the experimental_get_query_params() function from Streamlit:
params = st.experimental_get_query_params()
Next, set defaults using the provided query parameters:
if 'mode' not in st.session_state and 'mode' in params:
        st.session_state.mode = unquote(params["mode"][0])
mode = st.radio("Choose a mode", MODES, key="mode")
One concern with using query parameters as defaults is that users may need to edit these inputs. Streamlit reruns every time a user interacts with the app, causing the query parameters to be reread and used to set input values every time. To prevent this, modify the app to clear the query parameters after reading them. This way, they're only used to populate the app once:
params = st.experimental_get_query_params()
st.experimental_set_query_params()
Users can make changes by setting these values once without modifying the code repeatedly.
st.code to display the link, which users can then copy.if share:
try:
pyperclip.copy(link)
except pyperclip.PyperclipException:
st.write("Please copy the following link:")
st.code(link)
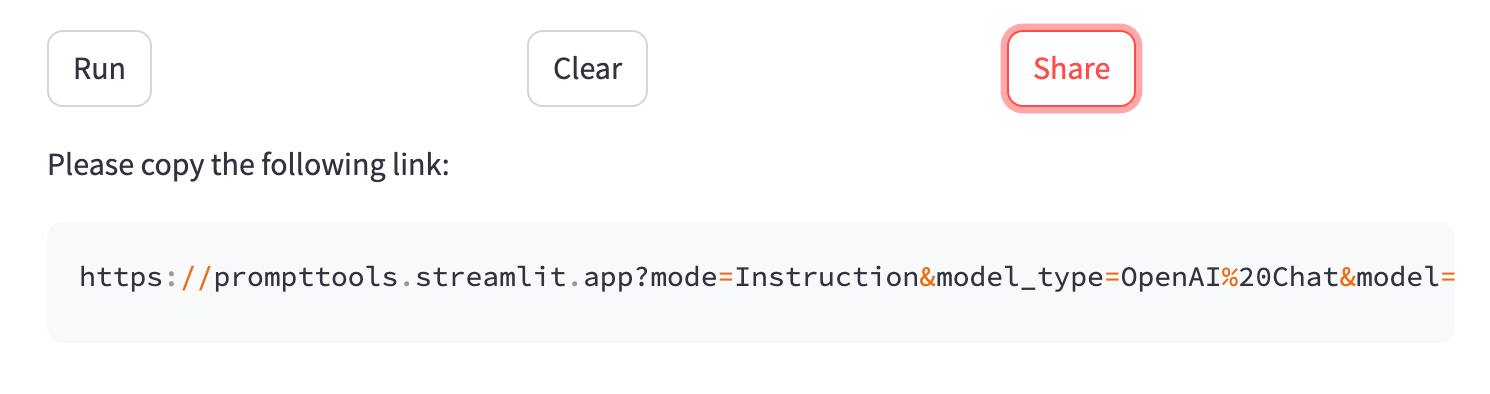
This is the easiest way to make links shareable for locally and cloud-hosted app versions.
Best practices for using PromptTools
When writing and evaluating prompts for LLMs, there are a few things to keep in mind:
- The same prompts can perform differently on different models. So it's worth trying multiple prompts when comparing models and checking where each model's strengths lie.
- Parameters like temperature can have just as much of an impact on the model output as the prompt itself. If a model isn't giving you the desired results after trying multiple prompts, try tweaking other settings in the sidebar to see how they impact the model's response quality.
- The evaluation depends on the specific use case. While benchmarks can generally indicate a model's power, you won't know if the model can perform well on your particular use case until you create a test set and decide on your evaluation criteria. If you want to run evaluations automatically, you can use our SDK to run experiments at scale.
Prompt engineering still requires patience and experimentation, but with PromptTools, you can move faster from your first idea to a working prompt and model!
Wrapping up
We used a few Streamlit tricks to make our app and plan to introduce more features. We hope this will be of great benefit to the community, and we'll continue to develop new features, including support for experimentation with vector databases and chains, storing experiments in a database using st.experimental_connection, and loading test data from files or other sources.
If you found this interesting or helpful, check out the app, give our GitHub repo a star ⭐, and join our Discord community. Refer to our notebook examples when you're ready to move from the playground to production code. We provide functionality to auto-evaluate and validate your outputs.
Happy coding! 😎


Comments
Continue the conversation in our forums →