Hello everyone! 👋
My name is Akaz. I’m a student with a strong interest in data science and programming.
Have you ever had an experience where you didn't like an existing app? I love pixel art and wanted to convert images into pixel art. But none of the existing apps converted them just as I wanted. So I solved this problem by creating PixelArt-Converter.
In this post, I’ll show you how to make your own pixel art converter app in five easy steps:
- Create the program base
- Turn an image into dots
- Make pixel art more like handwriting
- Make variables modifiable
- Use additional filters
1. Create the program base
1-1. Install Streamlit and modules
Fill in the code in the console (skip the items that are already installed):
pip install pipenv
pipenv --python 3.10
pipenv install streamlit
pipenv install numpy
pipenv install opencv-python-headless
pipenv install pillow
pipenv shell
1-2. Fill in the code
Create a new directory and create main.py. Fill in the following code in the created main.py:
import streamlit as st
import streamlit.components.v1 as components
import numpy as np
import cv2
from PIL import Image
import csv
import os
import pandas as pd
class Converter():
def __init__(self) -> None:
self.color_dict = {}
class Web():
def __init__(self) -> None:
self.draw_text()
def draw_text(self):
st.set_page_config(
page_title="Pixelart-Converter",
page_icon="🖼️",
layout="centered",
initial_sidebar_state="expanded",
)
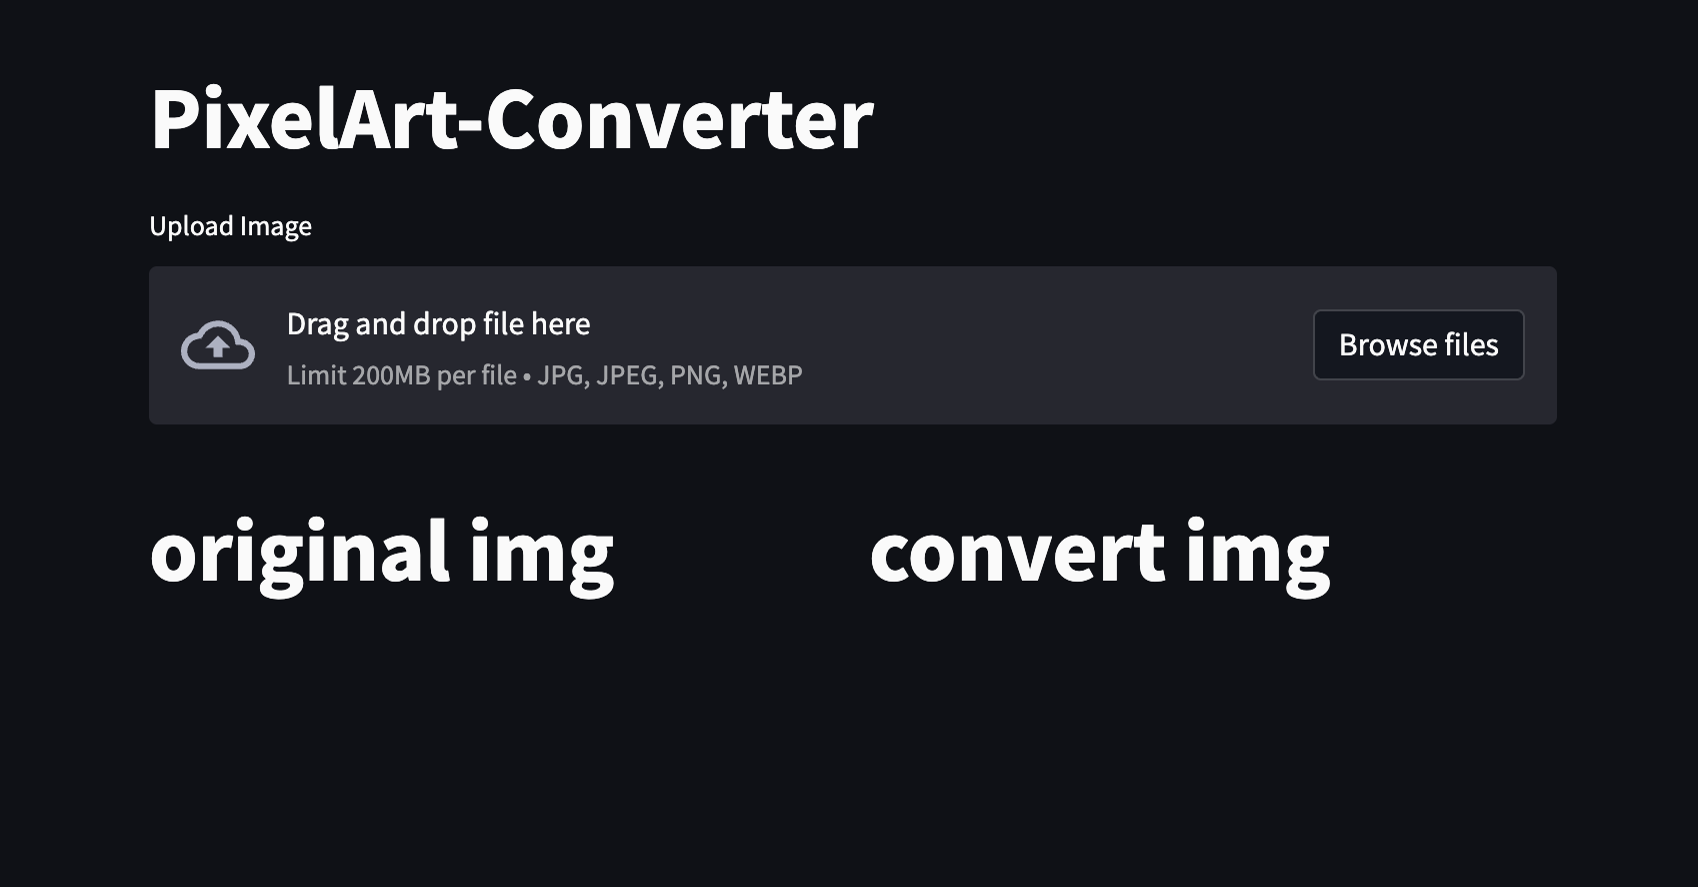
st.title("PixelArt-Converter")
self.upload = st.file_uploader("Upload Image", type=['jpg', 'jpeg', 'png', 'webp'])
self.original, self.converted = st.columns(2)
self.original.title("original img")
self.converted.title("convert img")
if __name__ == "__main__":
web = Web()
converter = Converter()
if web.upload != None:
img = Image.open(web.upload)
img = np.array(img)
web.original.image(web.upload)
Now that the foundation is complete, you'll use this foundation to create programs.
1-3. Run the program
Enter the following commands into the console to execute the program:
streamlit run main.py
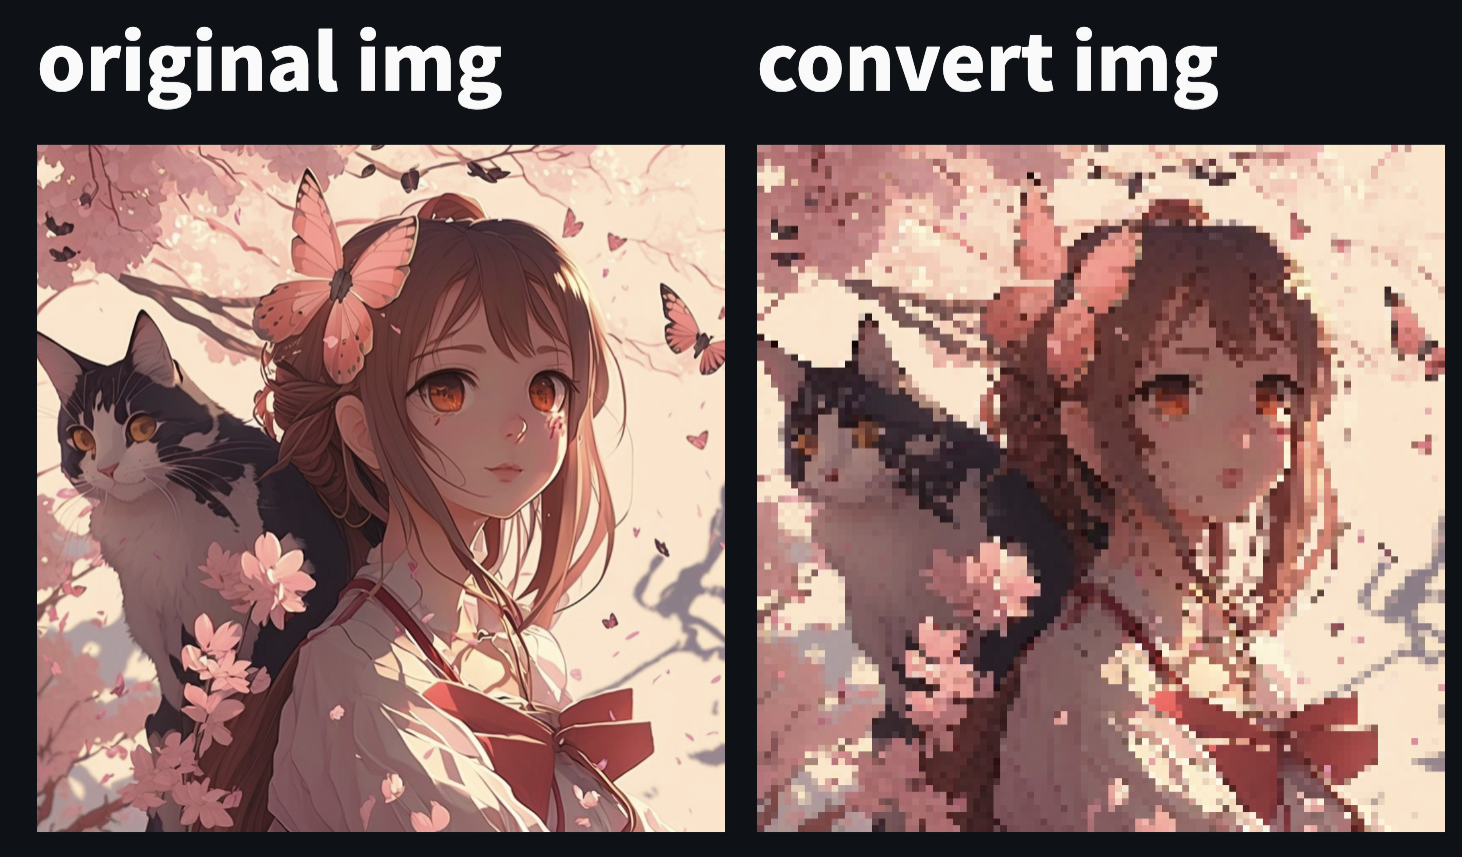
2. Turn an image into dots
As it turns out, mosaicing an image makes it pixel art.
2-1. Mosaic
Add the function below to the Converter class:
def mosaic(self, img, ratio=0.1):
    small = cv2.resize(img, None, fx=ratio, fy=ratio, interpolation=cv2.INTER_NEAREST)
    return cv2.resize(small, img.shape[:2][::-1], interpolation=cv2.INTER_NEAREST)
This mosaic function takes an image as an argument and performs mosaicing. The smaller the value of the ratio, the larger the mosaic.
Next, create a place to use the mosaic function. Add the following program at the end of if __name__:
img = converter.mosaic(img)
web.converted.image(img)
2-2. Execute mosaic processing
To execute the mosaic processing you've just added, enter the following command:
streamlit run main.py
Now you've taken care of the mosaic! One step closer to completion. 🥳
3. Make pixel art more like handwriting
You can mimic how pixel art is created to make it look more like hand-drawn pixel art.
3-1. Create a color palette
Hand-drawn pixel art often has a small number of colors. Therefore, create a color palette using a CSV file. The directory should be color/palette.csv:
255,127,127
255,191,127
255,255,127
127,255,127
127,191,255
127,127,255
0,0,0
255,255,255
128,128,128
The CSV above shows the color palette. The color palette uses RGB—one color per line.
3-2. Prepare for using the color palette
3-2-1. Create a function to read CSV
To use the color palette, the program must read a CSV. For this, add the following code to the Converter class:
def read_csv(self, path):
    with open(path) as f:
        reader = csv.reader(f)
        color = [[int(v) for v in row] for row in reader]
        return color
This code is a function to read a CSV. It reads it and returns an array.
3-2-2. Create a function to check colors from an image
Add the following code to Converter in main.py:
def color_change(self, r, g, b, color_pallet):
    if (r, g, b) in self.color_dict:
        return self.color_dict[(r, g, b)]
    # 最も近い色を見つける
    min_distance = float('inf')
    color_name = None
    for color in color_pallet:
        distance = (int(r) - color[0]) ** 2 + (int(g) - color[1]) ** 2 + (int(b) - color[2]) ** 2
        if distance < min_distance:
            min_distance = distance
            color_name = color
    self.color_dict[(r, g, b)] = color_name
    return color_name
This function returns the closest color from the color palette when RGB is specified. The code below stores the converted RGBs in a dictionary as they're processed. If the RGB to be converted is already registered in the dictionary, the registered RGB is used to speed up the process:
#This code block is for illustration purposes.
if (r, g, b) in self.color_dict:
    return self.color_dict[(r, g, b)]
~~~~~
self.color_dict[(r, g, b)] = color_name
Then this code uses the least-squares approximation to determine the closest color:
#This code block is for illustration purposes.
min_distance = float('inf')
color_name = None
for color in color_pallet:
    distance = (int(r) - color[0]) ** 2 + (int(g) - color[1]) ** 2 + (int(b) - color[2]) ** 2
    if distance < min_distance:
        min_distance = distance
        color_name = color
3-2-3. Use the color_change function
Add the following code to the Converter in main.py:
def convert(self, img, option, custom=None):
    w, h = img.shape[:2]
    changed = img.copy()
    # 選択されたcsvファイルを読み込む
    color_pallet = []
    if option != "Custom":
        color_pallet = self.read_csv("./color/"+option+".csv")
    else:
        if custom == [] or custom == None:
            return
        color_pallet = custom

    for height in range(h):
        for width in range(w):
            color = self.color_change(img[width][height][0], img[width][height][1], img[width][height][2], color_pallet)
            changed[width][height][0] = color[0]  # 赤
            changed[width][height][1] = color[1]  # 緑
            changed[width][height][2] = color[2]  # 青
    return changed
This function uses color_change, which was created earlier to change colors. Specifically, an array of images converted to RGB is passed to color_change to convert the colors. The function returns an array containing the converted colors, and all colors are converted.
3-3. Use a color palette
Add the following code above web.converted.image(img) in if__name__:
img = converter.convert(img,"palette")
Adding this code will add a color palette. The second argument asks for the name of the CSV file, so you can change it by replacing "palette.csv" with the name of your desired file.
Next, let's change the ratios and palettes on the website.
Here is all the code so far:
import streamlit as st
import streamlit.components.v1 as components
import numpy as np
import cv2
from PIL import Image
import csv
import os
import pandas as pd

class Converter():
    def __init__(self) -> None:
        self.color_dict = {}

    def mosaic(self, img, ratio=0.1):
        small = cv2.resize(img, None, fx=ratio, fy=ratio, interpolation=cv2.INTER_NEAREST)
        return cv2.resize(small, img.shape[:2][::-1], interpolation=cv2.INTER_NEAREST)

    def read_csv(self, path):
        with open(path) as f:
            reader = csv.reader(f)
            color = [[int(v) for v in row] for row in reader]
            return color

    def color_change(self, r, g, b, color_pallet):
        if (r, g, b) in self.color_dict:
            return self.color_dict[(r, g, b)]
        # 最も近い色を見つける
        min_distance = float('inf')
        color_name = None
        for color in color_pallet:
            distance = (int(r) - color[0]) ** 2 + (int(g) - color[1]) ** 2 + (int(b) - color[2]) ** 2
            if distance < min_distance:
                min_distance = distance
                color_name = color
        self.color_dict[(r, g, b)] = color_name
        return color_name

    def convert(self, img, option, custom=None):
        w, h = img.shape[:2]
        changed = img.copy()
        # 選択されたcsvファイルを読み込む
        color_pallet = []
        if option != "Custom":
            color_pallet = self.read_csv("./color/"+option+".csv")
        else:
            if custom == [] or custom == None:
                return
            color_pallet = custom

        for height in range(h):
            for width in range(w):
                color = self.color_change(img[width][height][0], img[width][height][1], img[width][height][2], color_pallet)
                changed[width][height][0] = color[0]  # 赤
                changed[width][height][1] = color[1]  # 緑
                changed[width][height][2] = color[2]  # 青
        return changed

class Web():
    def __init__(self) -> None:
        self.draw_text()

    def draw_text(self):
        st.set_page_config(
            page_title="Pixelart-Converter",
            page_icon="🖼️",
            layout="centered",
            initial_sidebar_state="expanded",
        )
        st.title("PixelArt-Converter")
        self.upload = st.file_uploader("Upload Image", type=['jpg', 'jpeg', 'png', 'webp'])
        self.original, self.converted = st.columns(2)
        self.original.title("original img")
        self.converted.title("convert img")

if __name__ == "__main__":
    web = Web()
    converter = Converter()
    if web.upload != None:
        img = Image.open(web.upload)
        img = np.array(img)
        web.original.image(web.upload)
        img = converter.mosaic(img)
        img = converter.convert(img,"pallet")
        web.converted.image(img)

4. Make variables modifiable
Let's make the ratio and the color palette changeable.
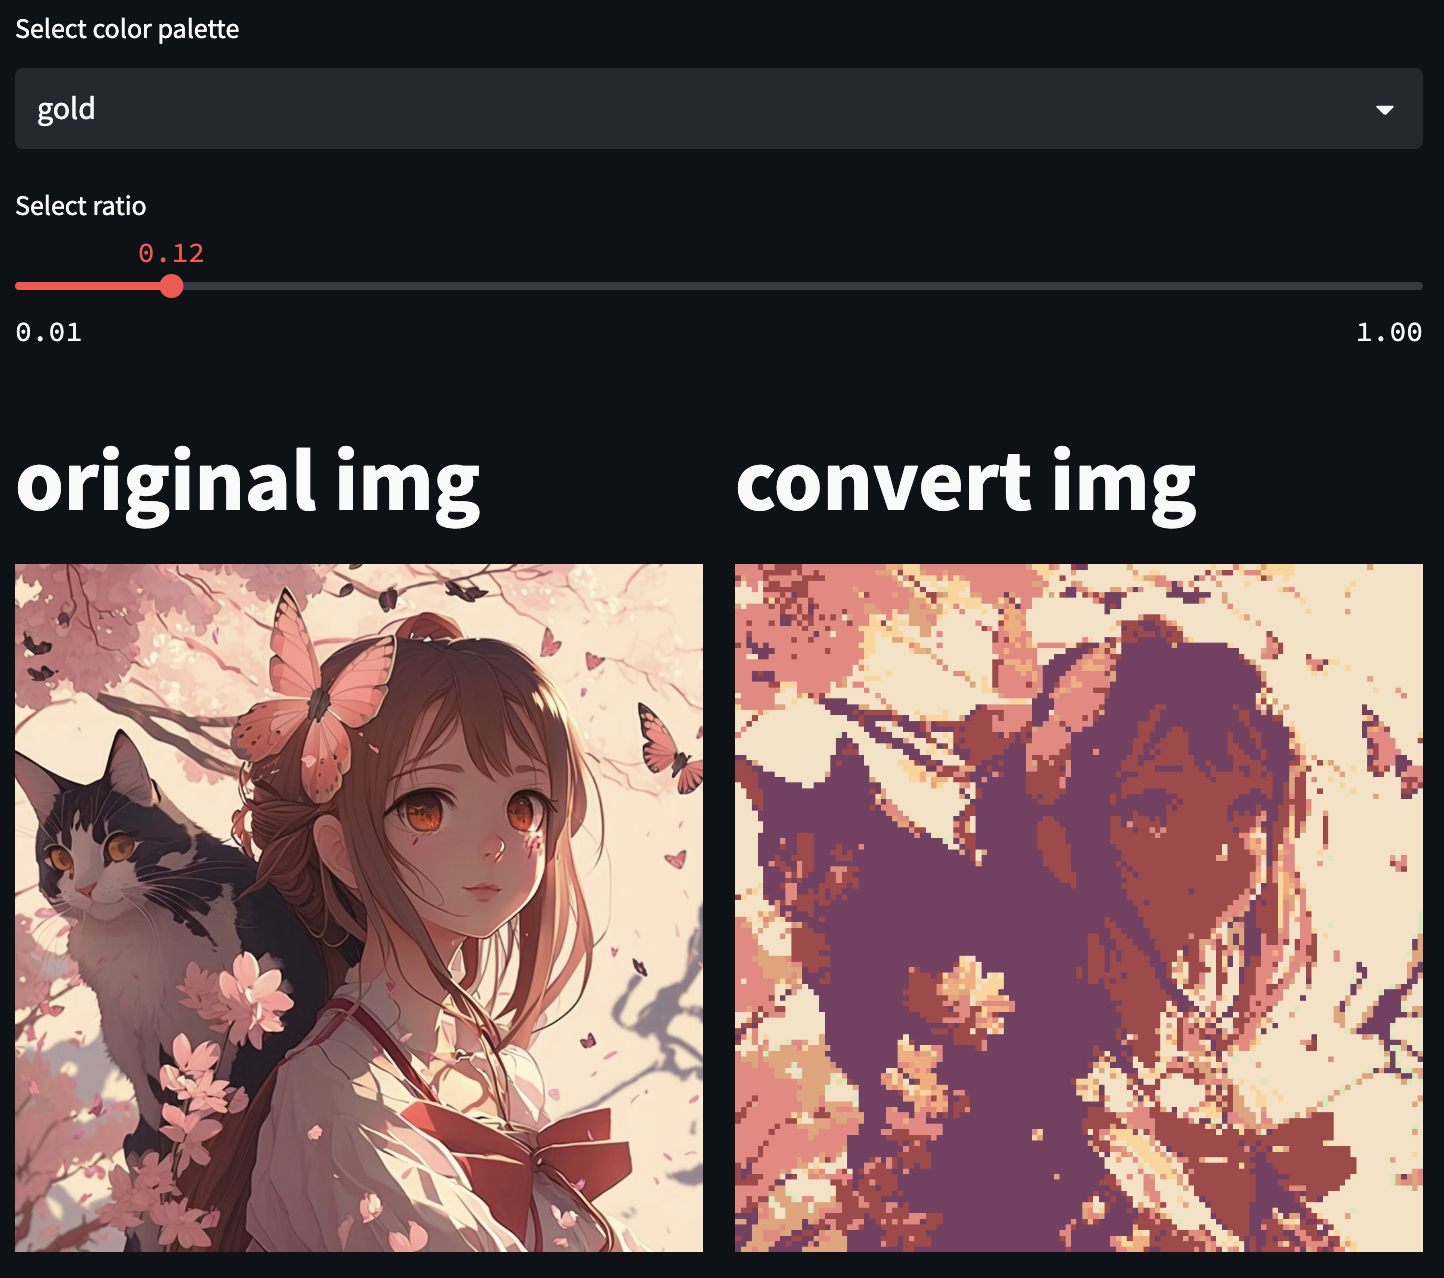
4-1. Add a slider for the ratio
Add a slider using st.slider. Add the following code under self.upload in the draw_text function:
self.ratio = st.slider('Select ratio', 0.01, 1.0, 0.3, 0.01)
The arguments of st.slider are as follows:
| Arguments | Function |
|---|---|
| First Argument | Set Label |
| Second Argument | Minimum Value |
| Third Argument | Maximum Value |
| Fourth Argument | Default Value |
| Fifth Argument | Step |
After completing the previous step, the next one is to apply the values obtained from Streamlit. If you set the second argument of img = converter.mosaic(img) to web.ratio, the image will be updated when the slider is changed:
# Changed code
img = converter.mosaic(img, web.ratio)
When done, run the program. If the image changes when you adjust the slider, you've succeeded!
4-2. Add a select box for the color palette
Create a select box using st.selectbox. Add the following code under self.upload in the draw_text function:
self.color = st.selectbox("Select color palette", ("palette",))
The code above describes the title above the selectbox and the content that can be selected in the selectbox. To add a color palette, add a filename to the second argument tuple.
To use the variables obtained in the select box, replace img = converter.convert(img, "palette",) with the following code:
img = converter.convert(img,web.color)
The string currently selected in the selectbox is stored in the web.color variable. Before executing the code, you can create a new CSV file in the color directory and add it to the selectbox. Once complete, run the code. If a box is added that allows you to select a color palette, then you did it right!
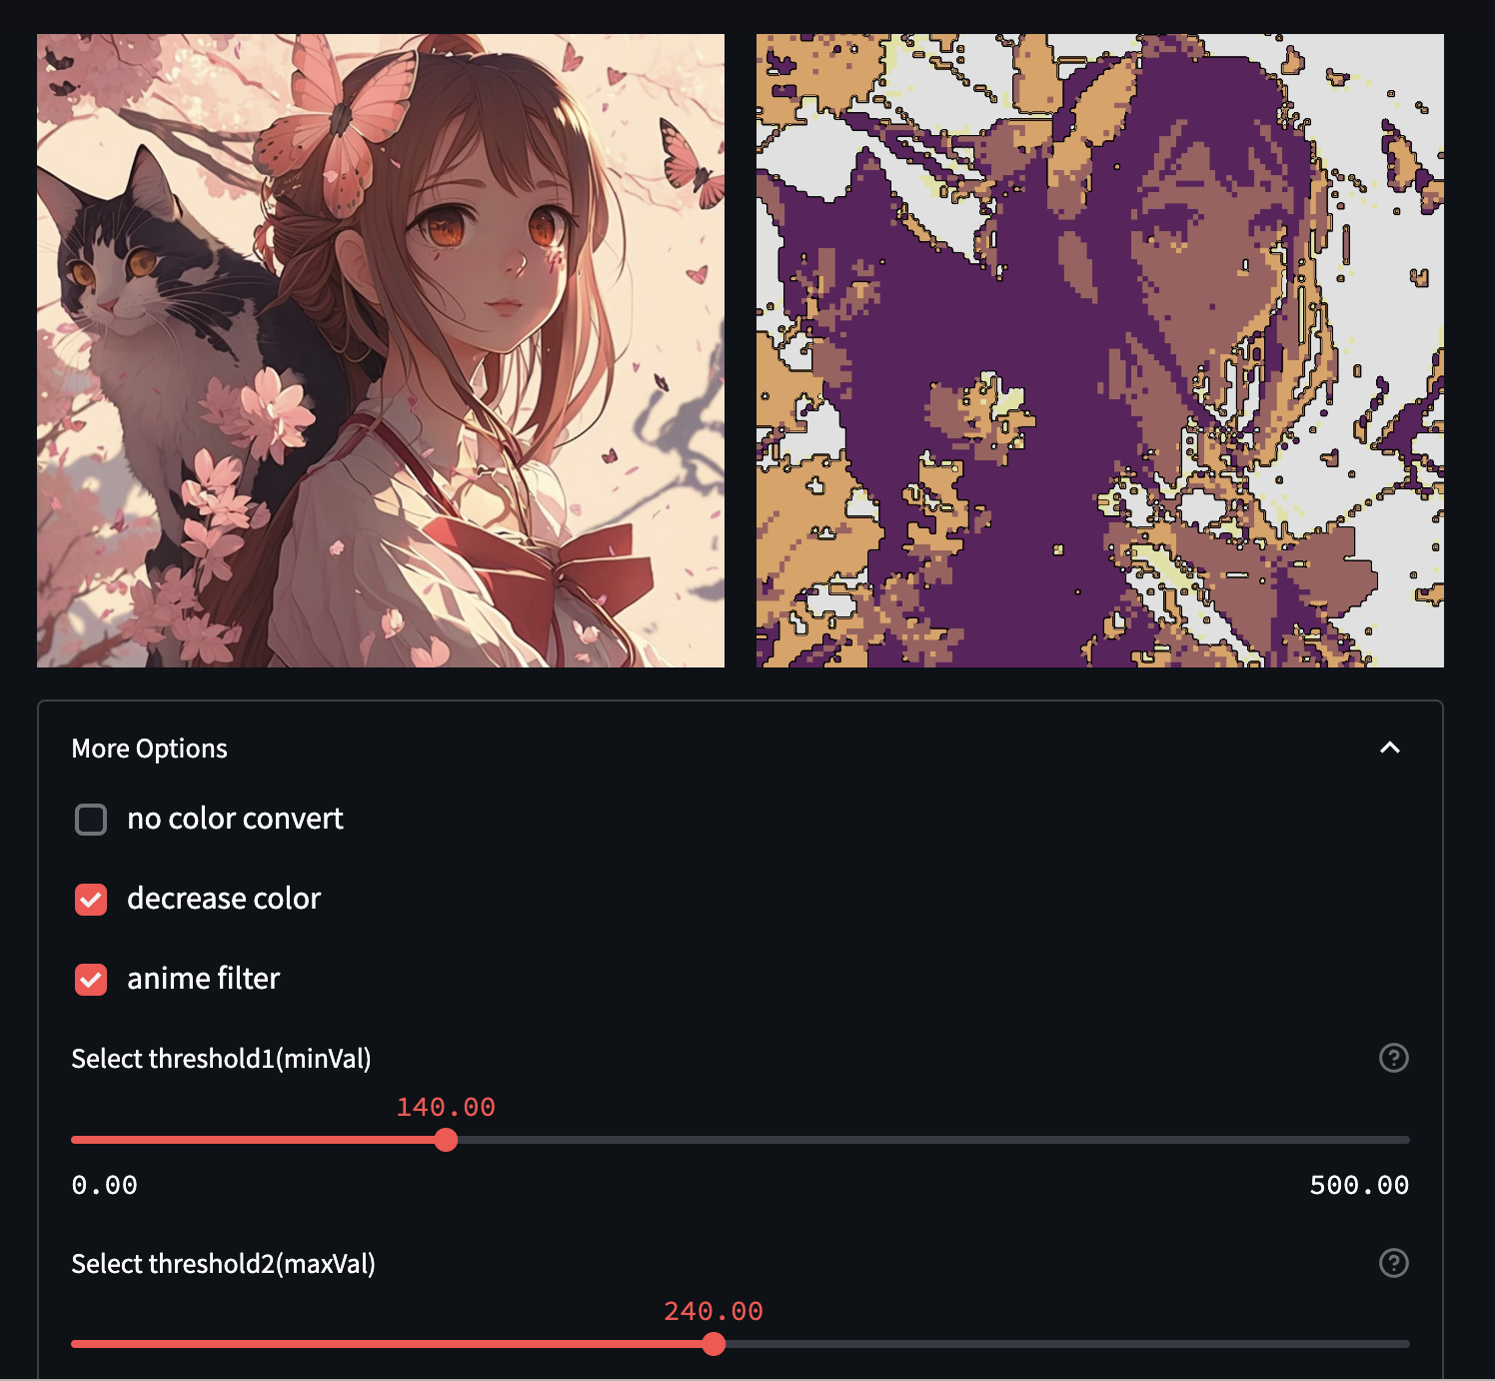
5. Use additional filters
PixelArt-Converter provides three options for converting images:
- The "no palette" option, which uses a mosaic process to create a pixel art-like image without relying on a color palette or color reduction
- An edge filter to further enhance the conversion process
- A color reduction process
5-1. Add no palette
5-1-1. Add a function
No palette is implemented using st.checkbox. Add the following functions to the web class:
def more_options(self):
		with st.expander("More Options", True):
        self.no_convert = st.checkbox('no color convert')
This function creates an expander that contains a checkbox. When the checkbox is clicked, the value is entered into self.no_convert.
5-1-2. Call a function
To call the function you just created, add the following code to the bottom of the draw_text function:
self.more_options()
Adding this code will cause more_options to be called.
5-1-3. Make it usable
Add the following condition to img = converter.convert(img, web.color) to prevent color conversion from being performed:
if web.no_convert == False:
    img = converter.convert(img, web.color)
5-2. Add color reduction
If the palette isn't processed, pixel art undergoes a subtractive process. To create a subtractive process, add the following code to the Converter class.
5-2-1. Add a function
def decreaseColor(self, img):
    dst = img.copy()

    idx = np.where((0 <= img) & (64 > img))
    dst[idx] = 32
    idx = np.where((64 <= img) & (128 > img))
    dst[idx] = 96
    idx = np.where((128 <= img) & (192 > img))
    dst[idx] = 160
    idx = np.where((192 <= img) & (256 > img))
    dst[idx] = 224

    return dst
This function performs a color reduction of an image and returns the result.
5-2-2. Add a checkbox
Create a checkbox to add color reduction processing. Add the following code to the expander of more_options:
self.decreaseColor = st.checkbox("decrease color")
The checkbox is created in the same location as the no_convert created earlier.
5-2-3. Make it usable
Add the following code above web.converted.image(img) in "if name == "main":
if web.decrease:
    img = converter.decreaseColor(img)
Adding this code will perform the color reduction process.
5-3. Add an edge filter
5-3-1. Add a function
Add the function anime_filter to the class Converter to implement an edge filter. In the PixelArt-Converter, this filter is referred to as the "animated filter":
def anime_filter(self, img, th1=50, th2=150):
    # アルファチャンネルを分離
    bgr = img[:, :, :3]
    if len(img[0][0]) == 4:
        alpha = img[:, :, 3]

    # グレースケール変換
    gray = cv2.cvtColor(bgr, cv2.COLOR_BGR2GRAY)

    # ぼかしでノイズ低減
    edge = cv2.blur(gray, (3, 3))

    # Cannyアルゴリズムで輪郭抽出
    edge = cv2.Canny(edge, th1, th2, apertureSize=3)

    # 輪郭画像をRGB色空間に変換
    edge = cv2.cvtColor(edge, cv2.COLOR_GRAY2BGR)

    # 差分を返す
    result = cv2.subtract(bgr, edge)

    # アルファチャンネルを結合して返す
    if len(img[0][0]) == 4:
        return np.dstack([result, alpha])
    else:
        return result
5-3-2. Add checkboxes
Add the following checkboxes to more_options as before:
self.edge_filter = st.checkbox('anime filter')
5-3-3. Make it usable
Add the following code above web.converted.image(img) if __name__ == "main":
if web.edge_filter:
	img = converter.anime_filter(img)
Here is the full code :
import streamlit as st
import streamlit.components.v1 as components
import numpy as np
import cv2
from PIL import Image
import csv
import os
import pandas as pd

class Converter():
    def __init__(self) -> None:
        self.color_dict = {}

    def mosaic(self, img, ratio=0.1):
        small = cv2.resize(img, None, fx=ratio, fy=ratio, interpolation=cv2.INTER_NEAREST)
        return cv2.resize(small, img.shape[:2][::-1], interpolation=cv2.INTER_NEAREST)

    def read_csv(self, path):
        with open(path) as f:
            reader = csv.reader(f)
            color = [[int(v) for v in row] for row in reader]
            return color

    def color_change(self, r, g, b, color_pallet):
        if (r, g, b) in self.color_dict:
            return self.color_dict[(r, g, b)]
        # 最も近い色を見つける
        min_distance = float('inf')
        color_name = None
        for color in color_pallet:
            distance = (int(r) - color[0]) ** 2 + (int(g) - color[1]) ** 2 + (int(b) - color[2]) ** 2
            if distance < min_distance:
                min_distance = distance
                color_name = color
        self.color_dict[(r, g, b)] = color_name
        return color_name

    def convert(self, img, option, custom=None):
        w, h = img.shape[:2]
        changed = img.copy()
        # 選択されたcsvファイルを読み込む
        color_pallet = []
        if option != "Custom":
            color_pallet = self.read_csv("./color/"+option+".csv")
        else:
            if custom == [] or custom == None:
                return
            color_pallet = custom

        for height in range(h):
            for width in range(w):
                color = self.color_change(img[width][height][0], img[width][height][1], img[width][height][2], color_pallet)
                changed[width][height][0] = color[0]  # 赤
                changed[width][height][1] = color[1]  # 緑
                changed[width][height][2] = color[2]  # 青
        return changed

    def decreaseColor(self, img):
        dst = img.copy()

        idx = np.where((0 <= img) & (64 > img))
        dst[idx] = 32
        idx = np.where((64 <= img) & (128 > img))
        dst[idx] = 96
        idx = np.where((128 <= img) & (192 > img))
        dst[idx] = 160
        idx = np.where((192 <= img) & (256 > img))
        dst[idx] = 224

        return dst

    def anime_filter(self, img, th1=50, th2=150):
        # アルファチャンネルを分離
        bgr = img[:, :, :3]
        if len(img[0][0]) == 4:
            alpha = img[:, :, 3]

        # グレースケール変換
        gray = cv2.cvtColor(bgr, cv2.COLOR_BGR2GRAY)

        # ぼかしでノイズ低減
        edge = cv2.blur(gray, (3, 3))

        # Cannyアルゴリズムで輪郭抽出
        edge = cv2.Canny(edge, th1, th2, apertureSize=3)

        # 輪郭画像をRGB色空間に変換
        edge = cv2.cvtColor(edge, cv2.COLOR_GRAY2BGR)

        # 差分を返す
        result = cv2.subtract(bgr, edge)

        # アルファチャンネルを結合して返す
        if len(img[0][0]) == 4:
            return np.dstack([result, alpha])
        else:
            return result

class Web():
    def __init__(self) -> None:
        self.draw_text()

    def draw_text(self):
        st.set_page_config(
            page_title="Pixelart-Converter",
            page_icon="🖼️",
            layout="centered",
            initial_sidebar_state="expanded",
        )
        st.title("PixelArt-Converter")
        self.upload = st.file_uploader("Upload Image", type=['jpg', 'jpeg', 'png', 'webp'])
        self.color = st.selectbox("Select color palette", ("cold","gold"))
        self.ratio = st.slider('Select ratio', 0.01, 1.0, 0.3, 0.01)
        self.original, self.converted = st.columns(2)
        self.original.title("original img")
        self.converted.title("convert img")
        self.more_options()

    def more_options(self):
        with st.expander("More Options", True):
            self.no_convert = st.checkbox('no color convert')
            self.decrease = st.checkbox('decrease color')
            self.edge_filter = st.checkbox('anime filter')

if __name__ == "__main__":
    web = Web()
    converter = Converter()
    if web.upload != None:
        img = Image.open(web.upload)
        img = np.array(img)
        web.original.image(web.upload)
        img = converter.mosaic(img, web.ratio)
        if web.no_convert == False:
            img = converter.convert(img, web.color)
        if web.decrease:
            img = converter.decreaseColor(img)
        if web.edge_filter:
            img = converter.anime_filter(img)
        web.converted.image(img)
And here is a cool video of the app:
@streamlitofficial App of the day! 🖼️ Check out the PixelArt-Converter app by Akaz Dayo—made in 272 lines of code! #python #code #developer #streamlit #pixelart
♬ original sound - Streamlit
Bonus. What to check if the program fails
A list of things to check in case your program doesn't work:
- Changes are not updated. Make sure the program is saved!
- Conditions are not applied. Check that the indentation is correct.
- File cannot be loaded. Check that the filename is correct.
- Function not executed. Check that you are putting the code in the correct place.
- Program cannot be executed. Check that the directory you are opening in the console is correct.
Wrapping up
Thank you for reading my post! I hope you found PixelArt-Converter interesting. If you have any questions, please post them in the comments below or contact me on Twitter.
Happy Streamlit-ing! 🎈


Comments
Continue the conversation in our forums →