
If you have a Streamlit app but don’t want to pay a monthly fee to host it on a commercial cloud platform, one option is to migrate it to Streamlit Community Cloud. It’s FREE!
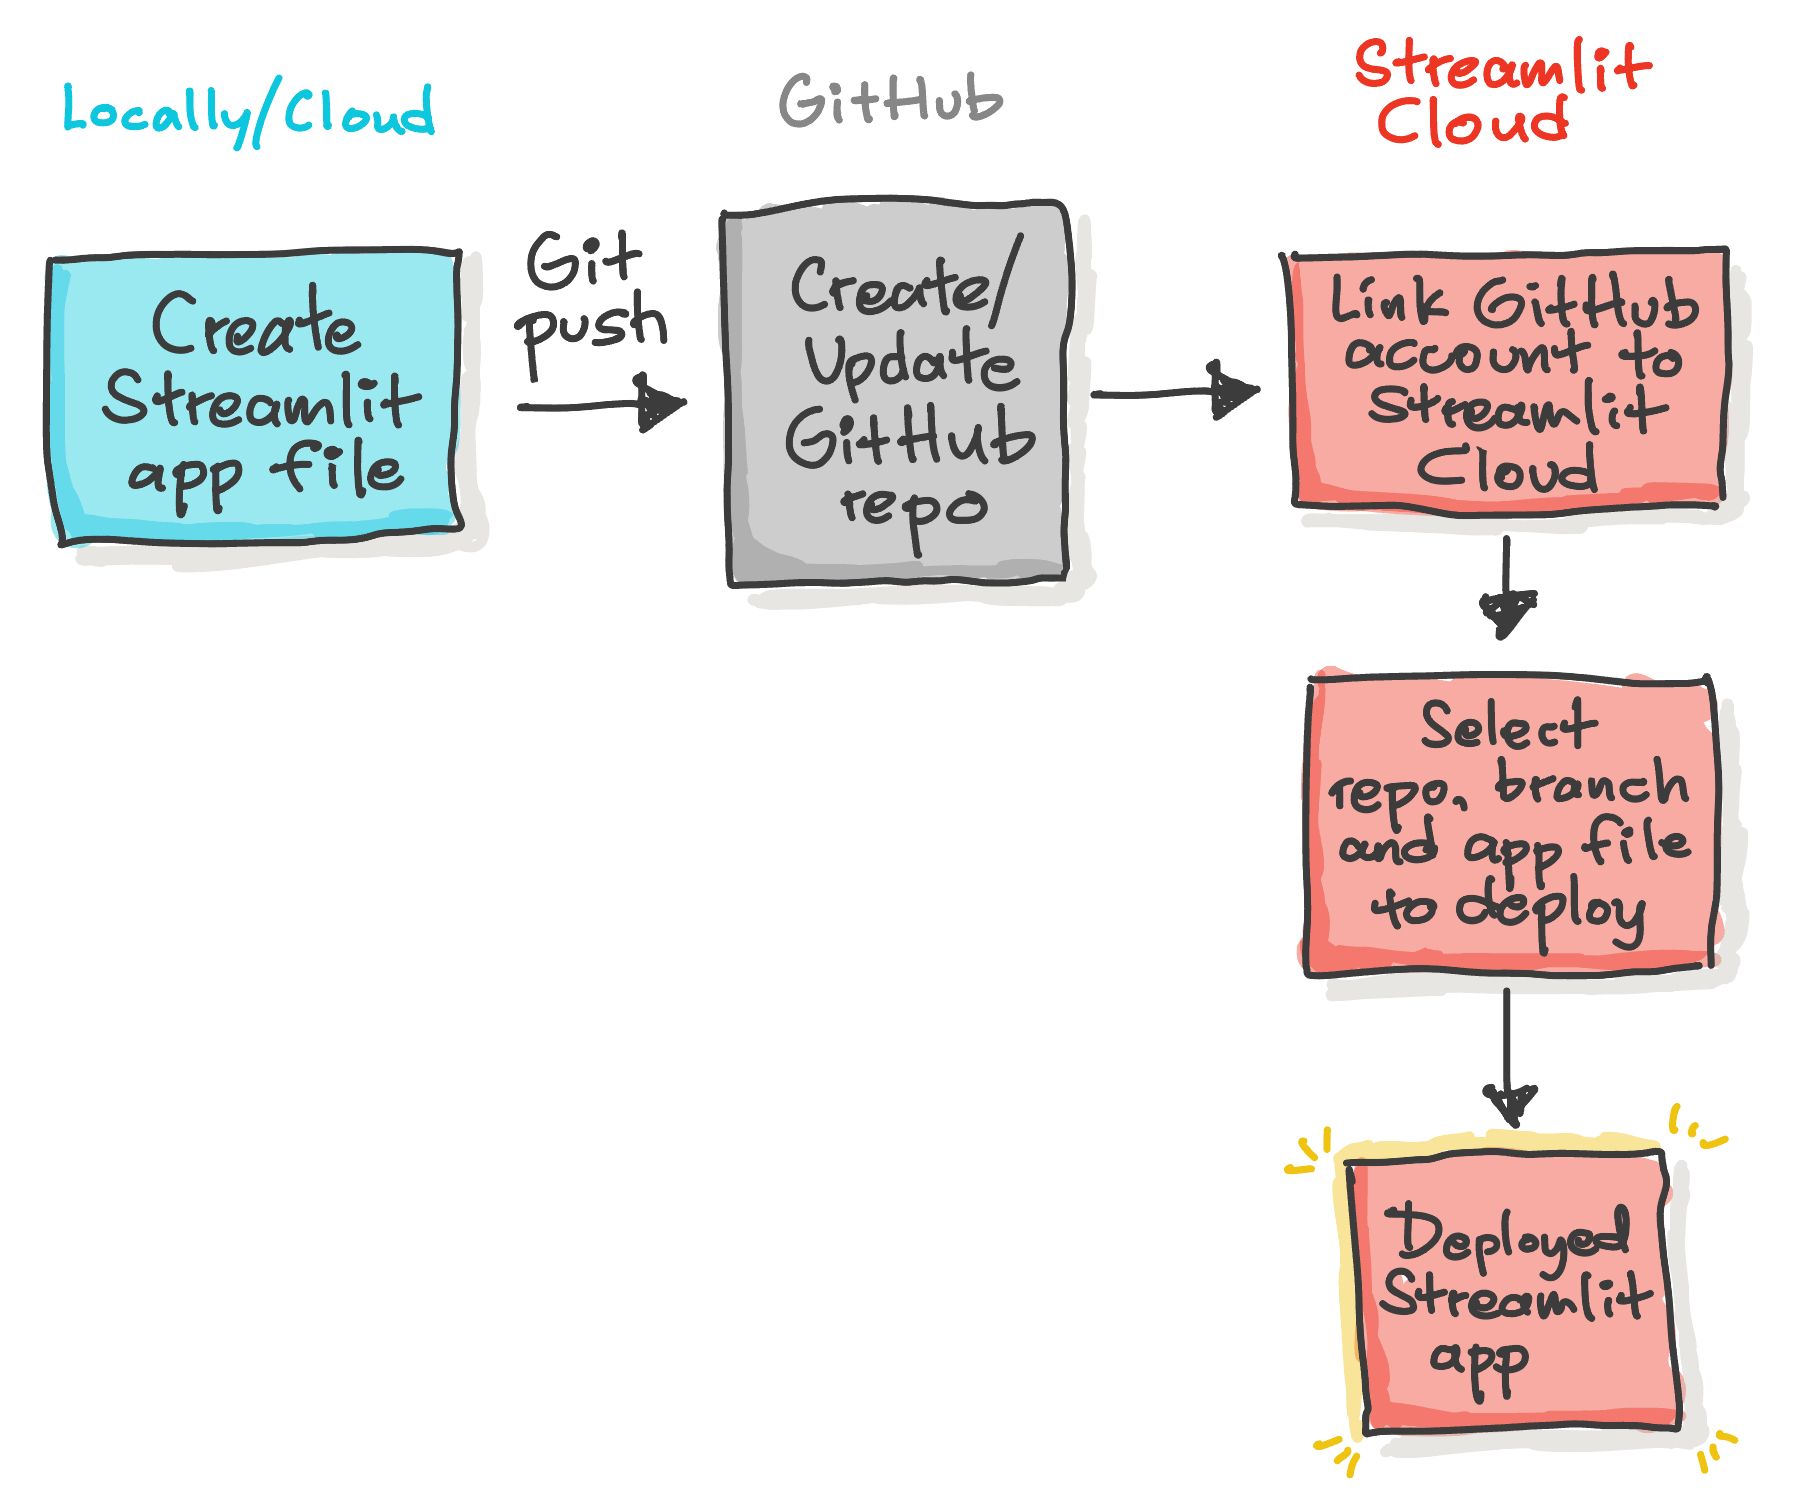
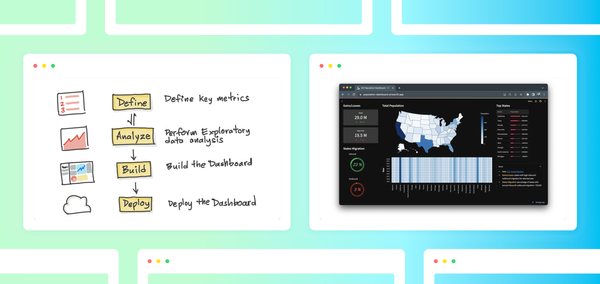
In this post, I’ll show you how to build a demo app and deploy it to Community Cloud step-by-step:
- Step 1. Create a simple Streamlit app
- Step 2. Set up an account on Community Cloud
- Step 3. Connect your account to GitHub
- Step 4. Create a GitHub repo of your app
- Step 5. Deploy your app in a few clicks
Can’t wait to see it in action? Here's the demo app and the repo code.
But before we get to the fun stuff, let’s talk about…
Why deploy your apps to the internet?
Deploying your apps to the internet allows users to access them from a web browser—without having to set up a coding environment and installing dependencies.
You have two options:
- Manually set up a virtual private server for deploying your app.
- Host the app in a GitHub repository and deploy it to a cloud platform.
The first option gives you full control. You can set up everything locally. But it can take time—for both the setup and the maintenance (like keeping OS up-to-date, etc.).
The second option is the simplest. Just push your app to GitHub. If it’s properly configured with a cloud platform, it’ll automatically update your code changes.
Why use Community Cloud?
Here’s why you might want to use Community Cloud to host your apps:
| Advantages | Description |
|---|---|
| Free | You can deploy Streamlit apps for free! |
| Deploy in one click | Your fully hosted app is ready to be shared in under a minute. |
| Keep your code in your repo | No changes to your development process. Your code stays on GitHub. |
| Live updates | Your apps update instantly when you push code changes. |
| Securely connect to data | Connect to all your data sources using secure protocols. |
| Restrict access to apps | Authenticate viewers with per-app viewer allow-lists. |
| Easily manage your apps | View, collaborate, and manage all your apps in a single place. |
Step 1. Create a simple Streamlit app
First, let’s make a simple app that prints out Hello world! . It takes only two lines of code (for a deeper dive, read this post).
Go ahead and create a streamlit_app.py file:
import streamlit as st

st.write('Hello world!')
Step 2. Set up an account on Community Cloud
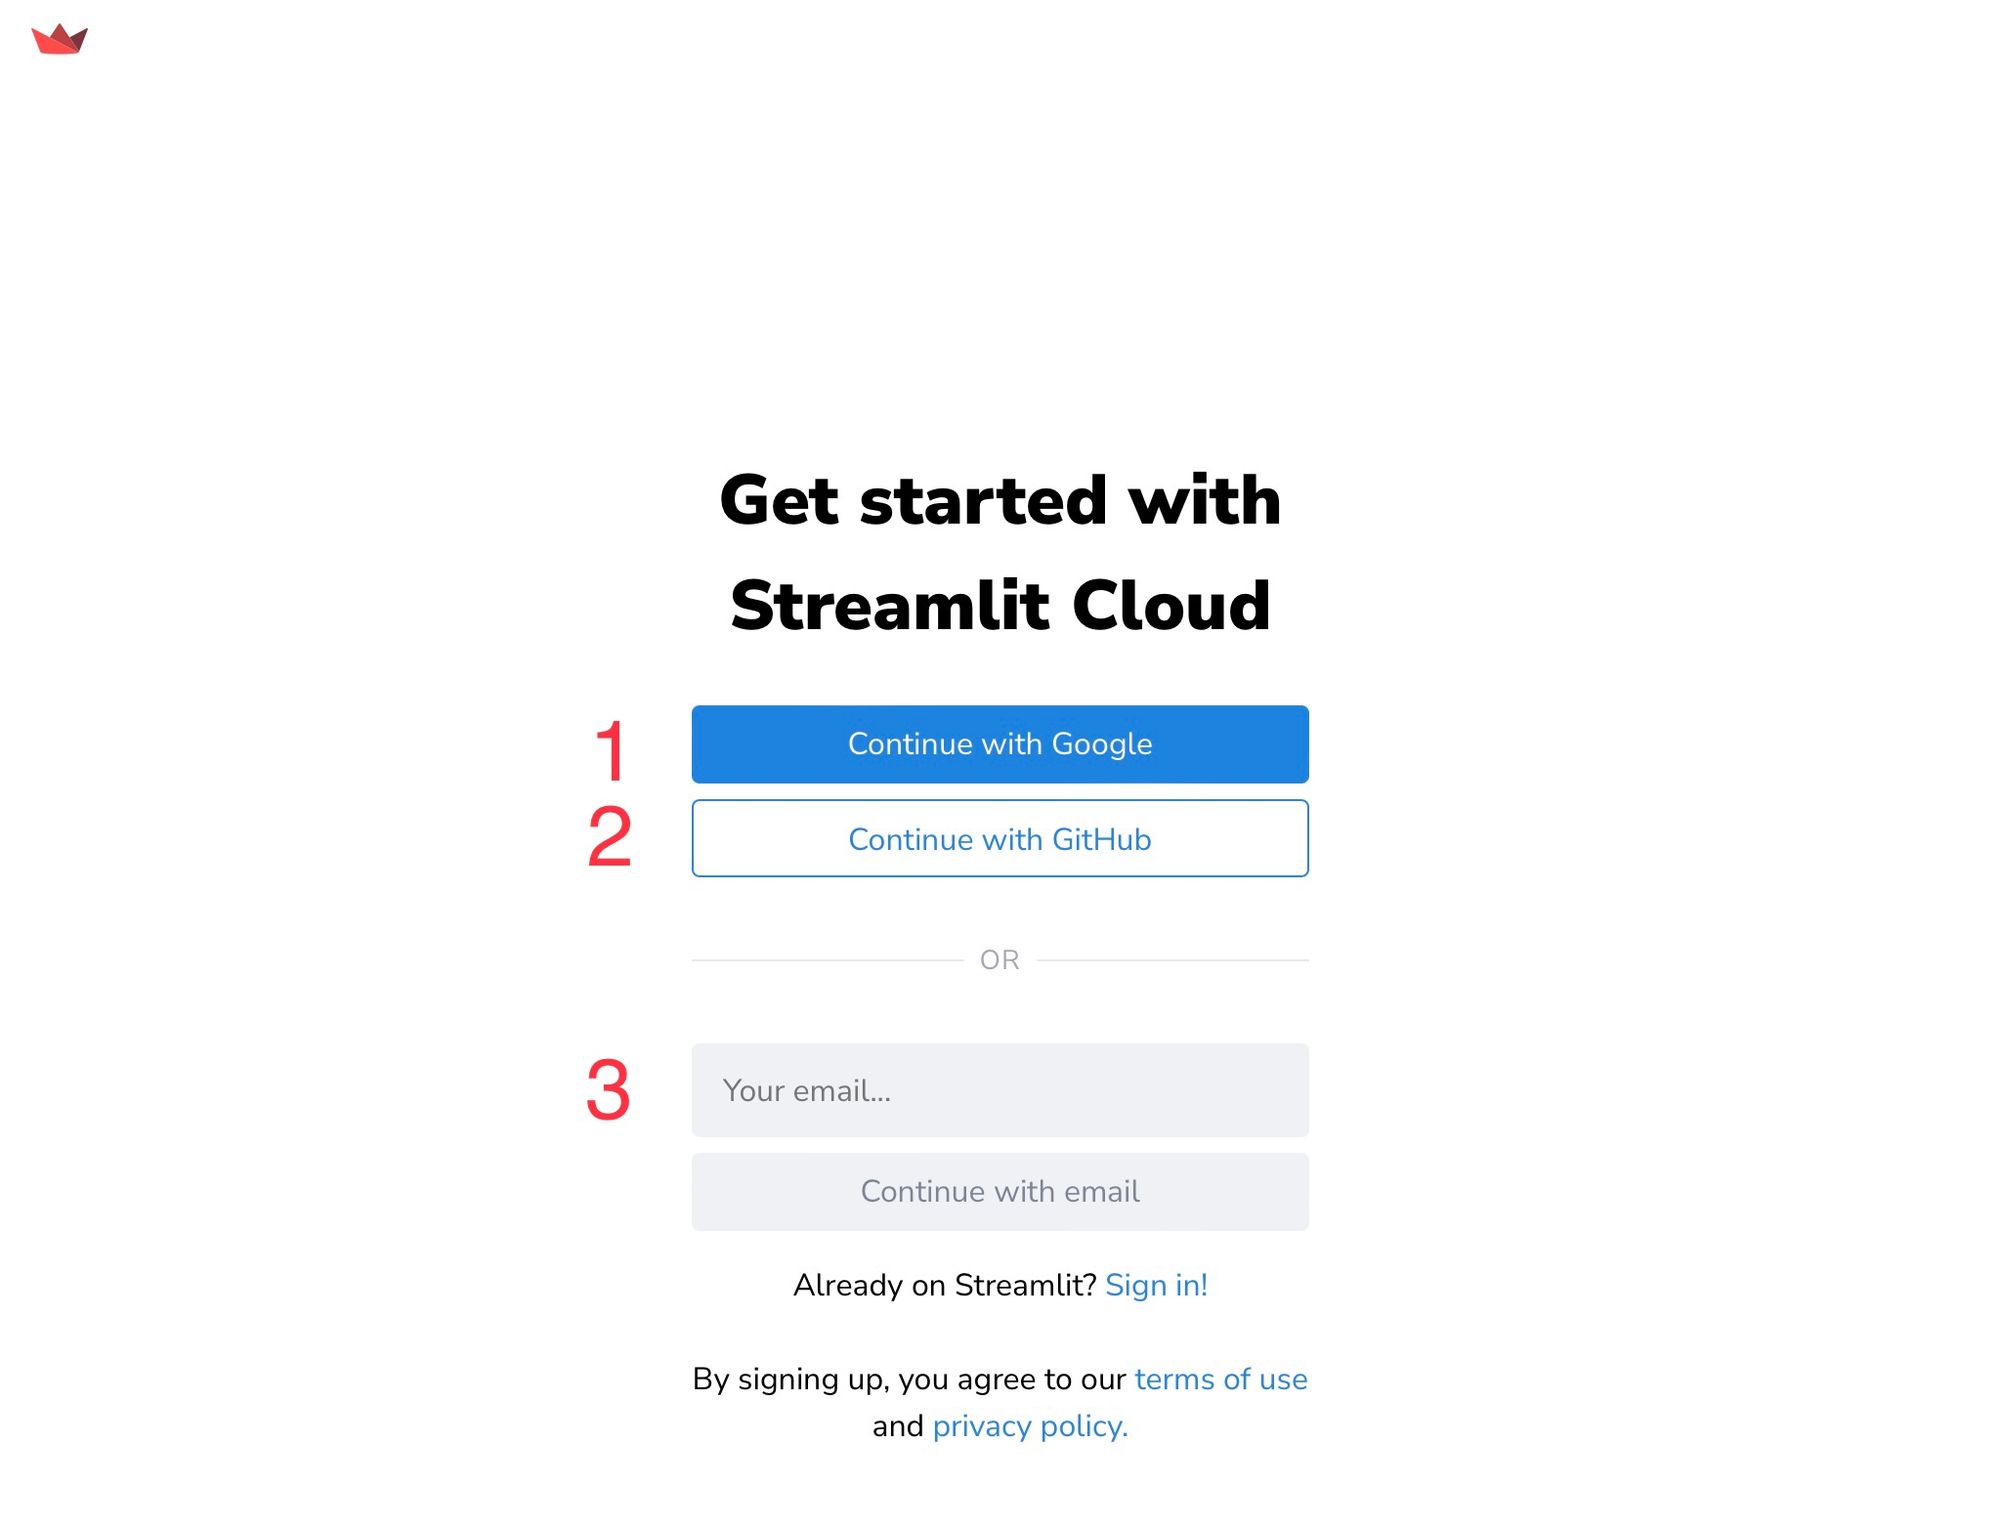
Go to Community Cloud and click “Sign up” to create a free account with your existing Google, GitHub, or email account:
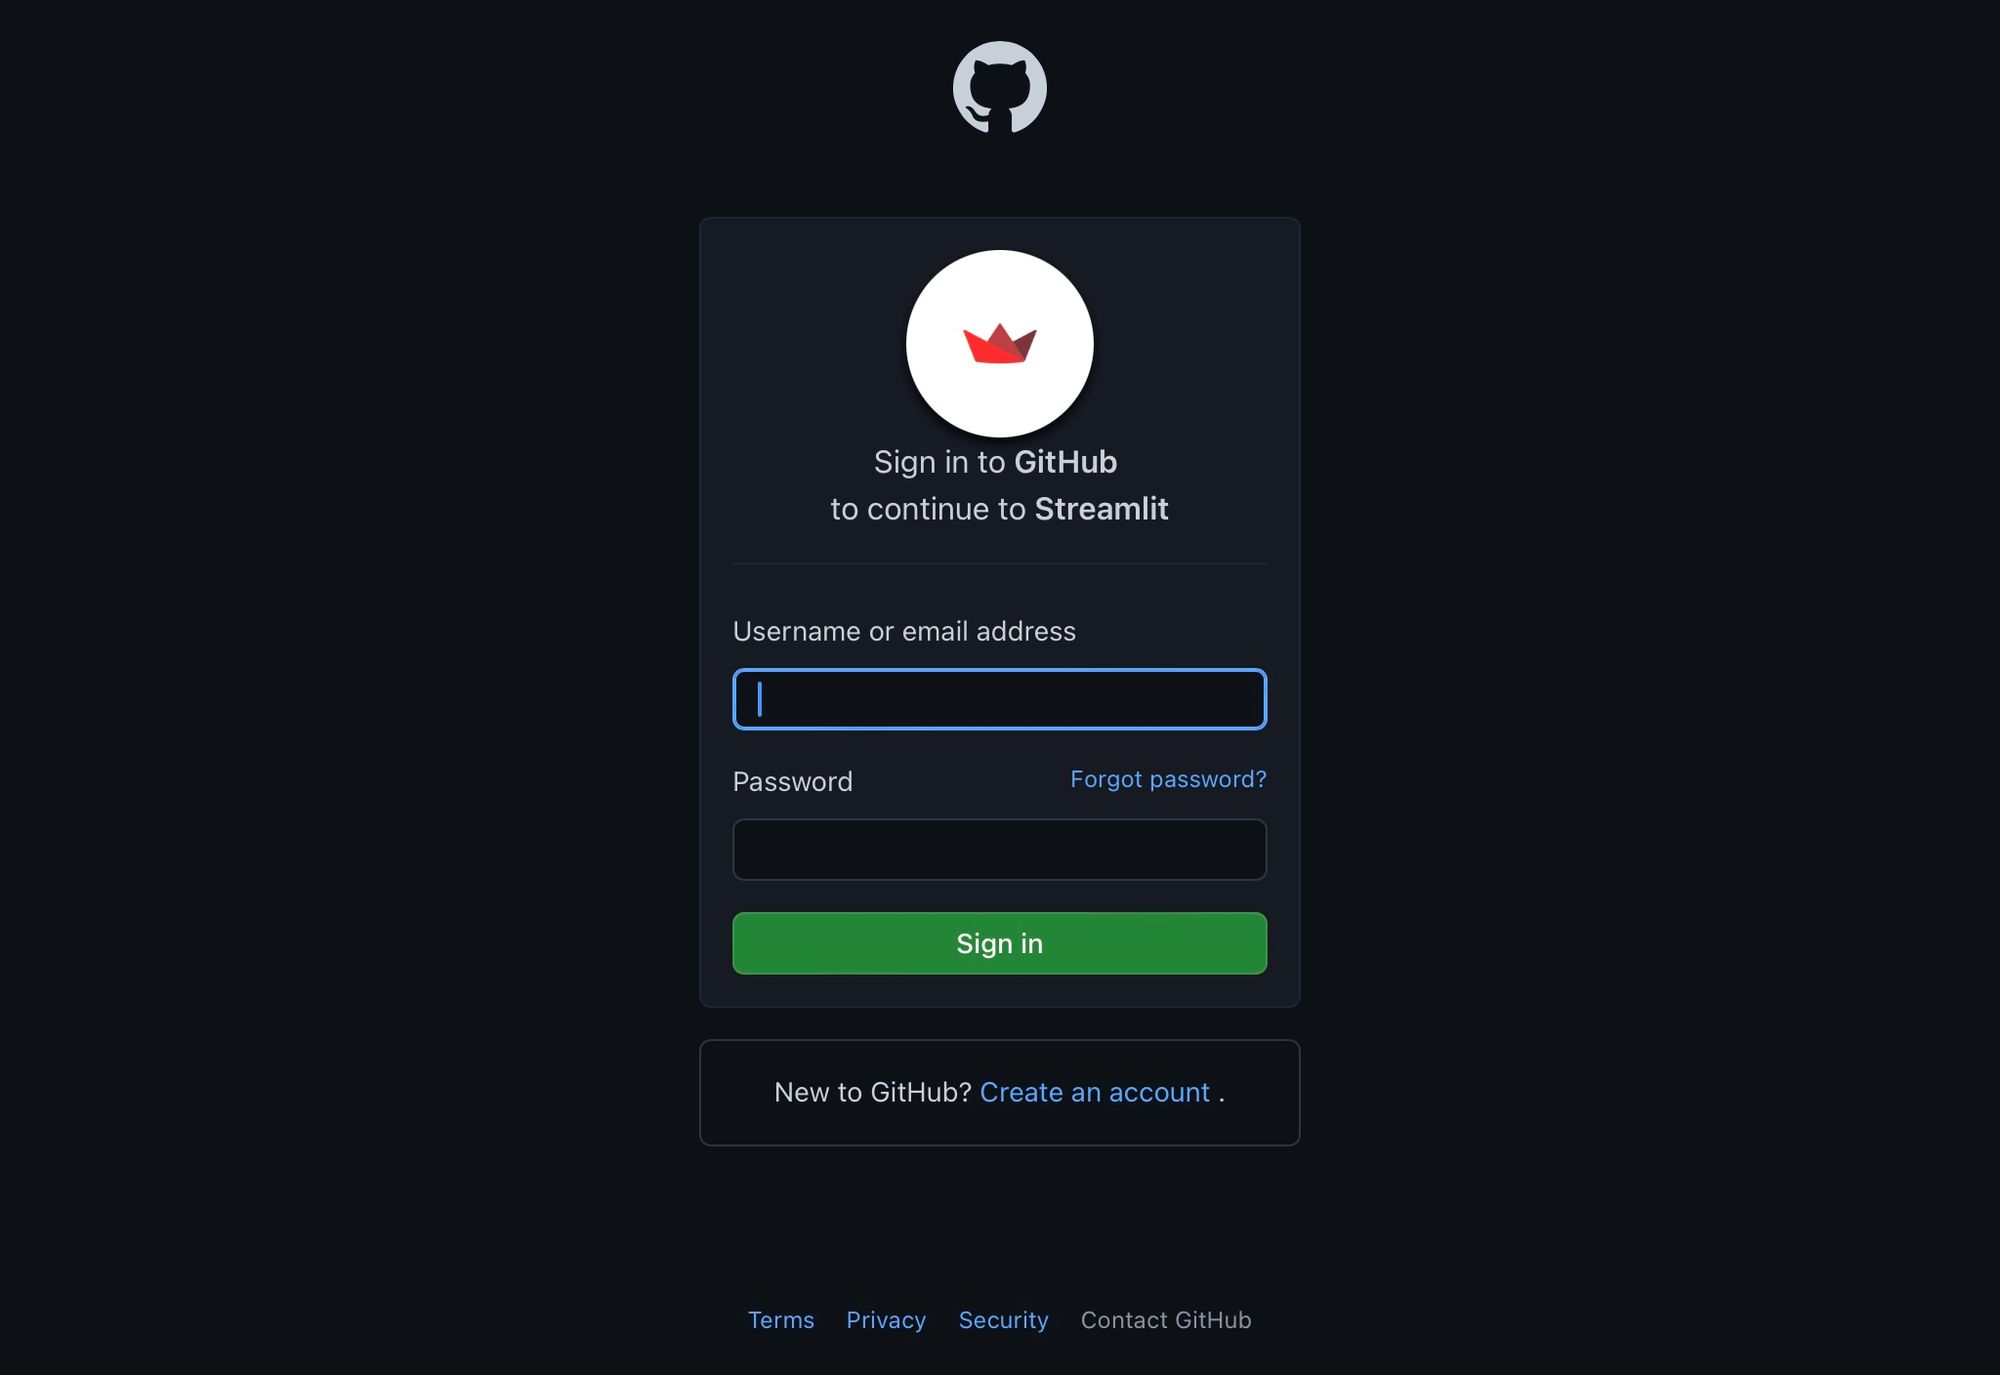
Next, enter your GitHub credentials and click on “Authorize streamlit” to let Streamlit access your GitHub account:
Finally, enter your information and click “Continue”:

Congratulations! You have signed up for your workspace in Community Cloud.
Step 3. Connect your account to GitHub
There are two options to connect your Community Cloud account to GitHub:
Option 1
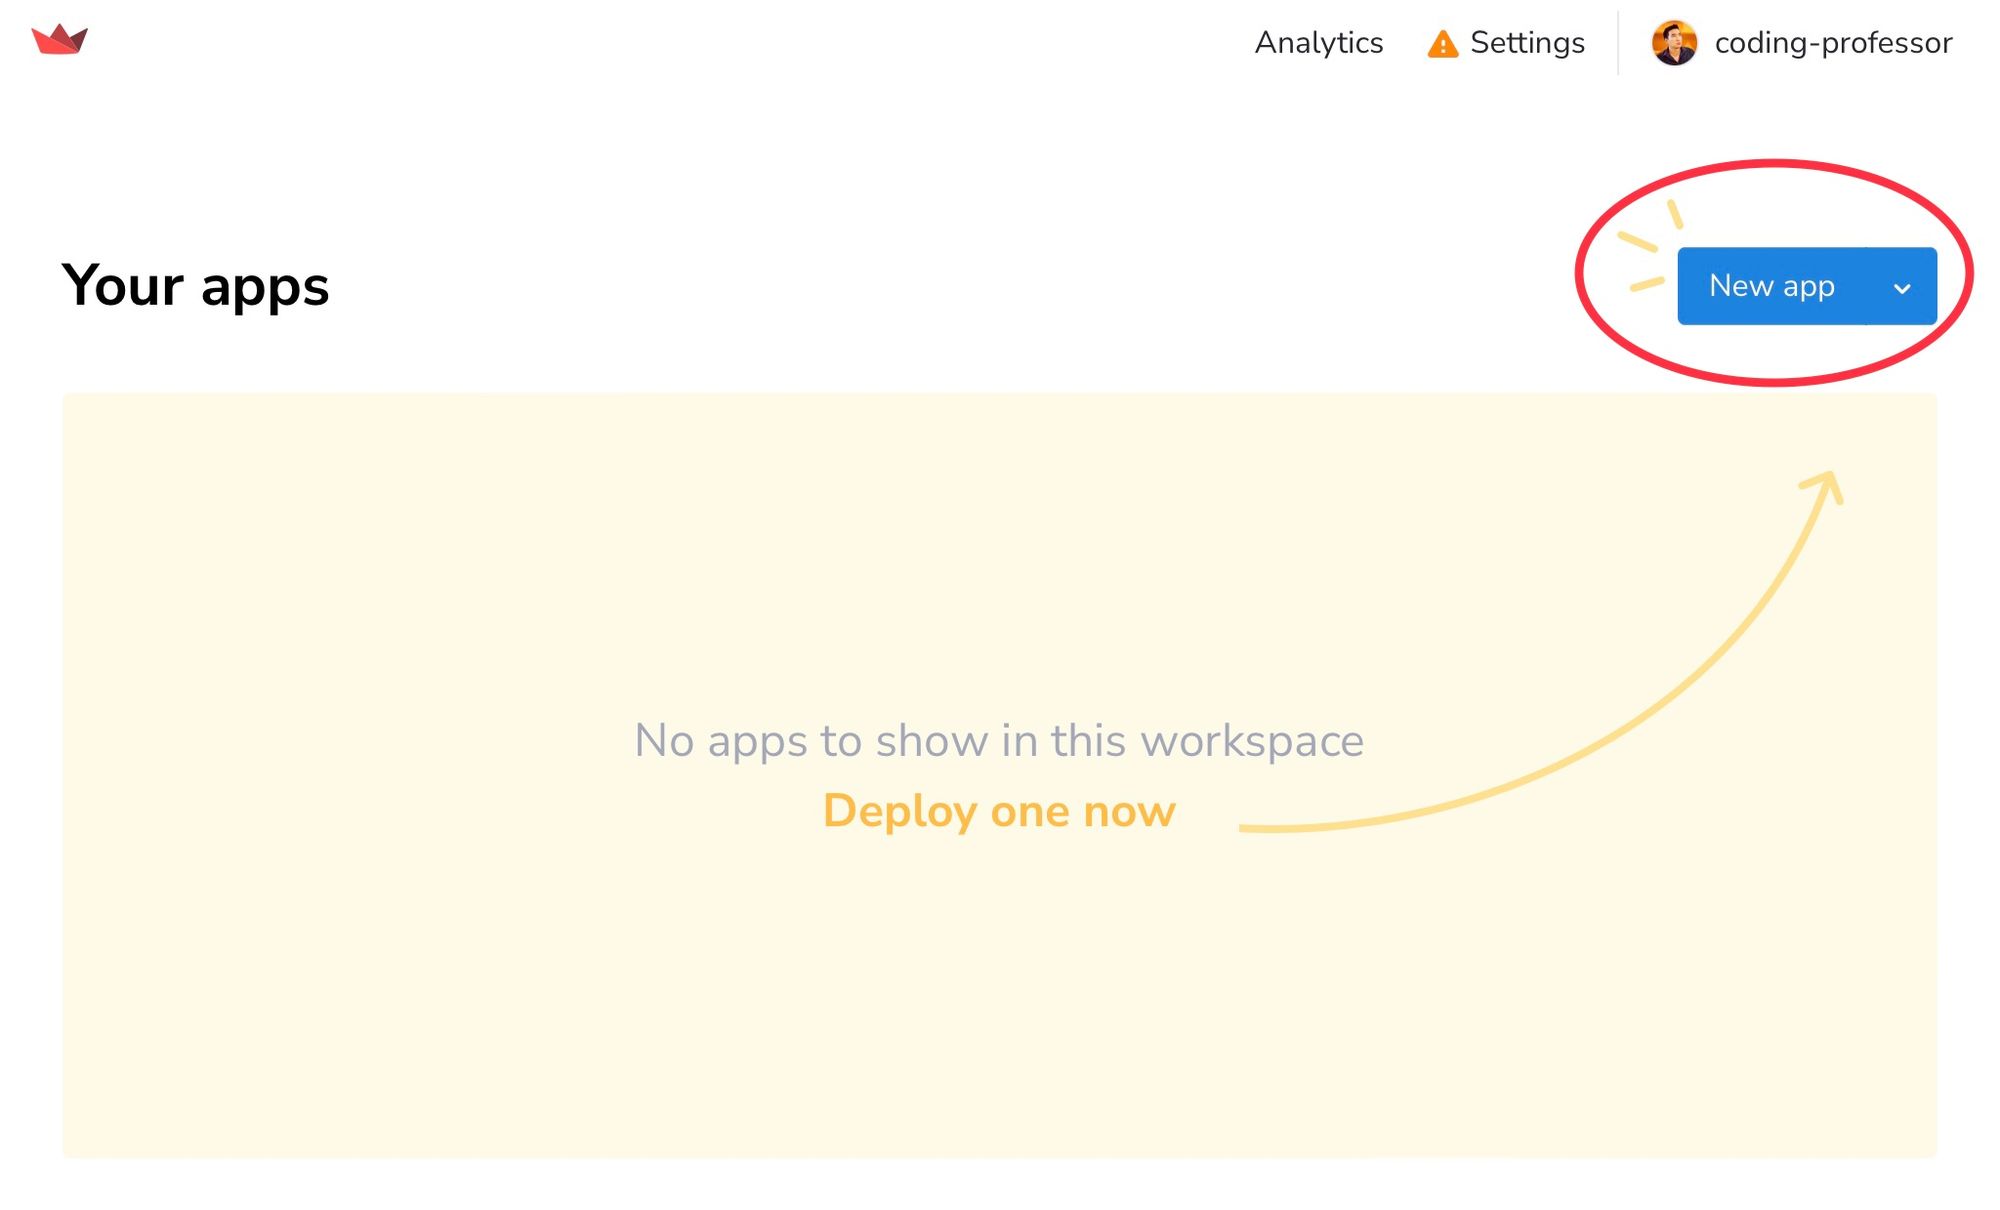
Click on “New app”:
On the authorization page, click on “Authorize streamlit."
Option 2
Click “Settings,” then “Linked accounts,” then “Allow access”:
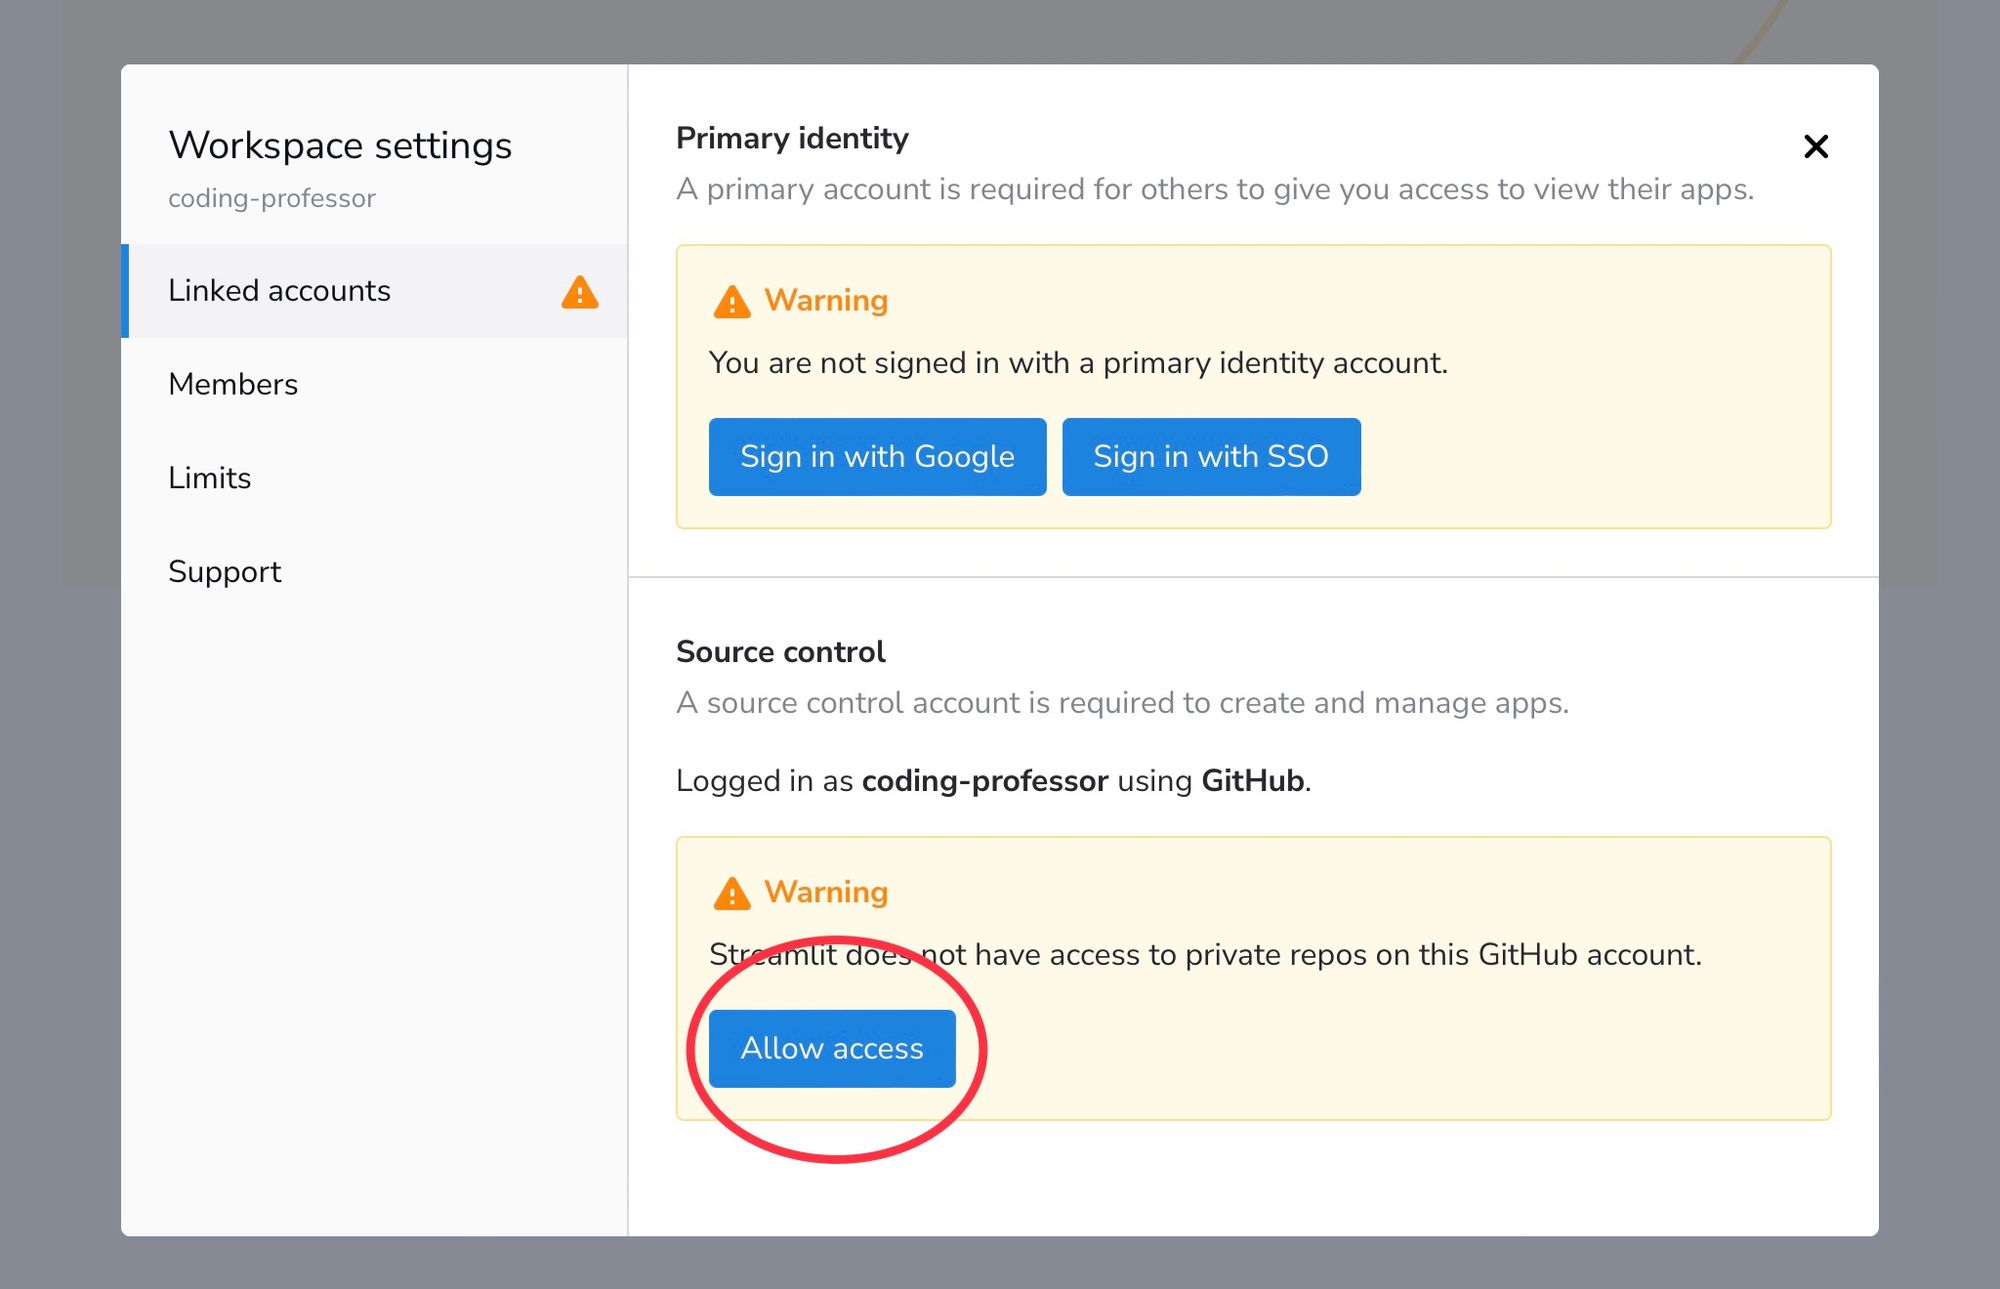
This will let Community Cloud deploy your Streamlit apps from your GitHub repositories. On the authorization page, click “Authorize streamlit."
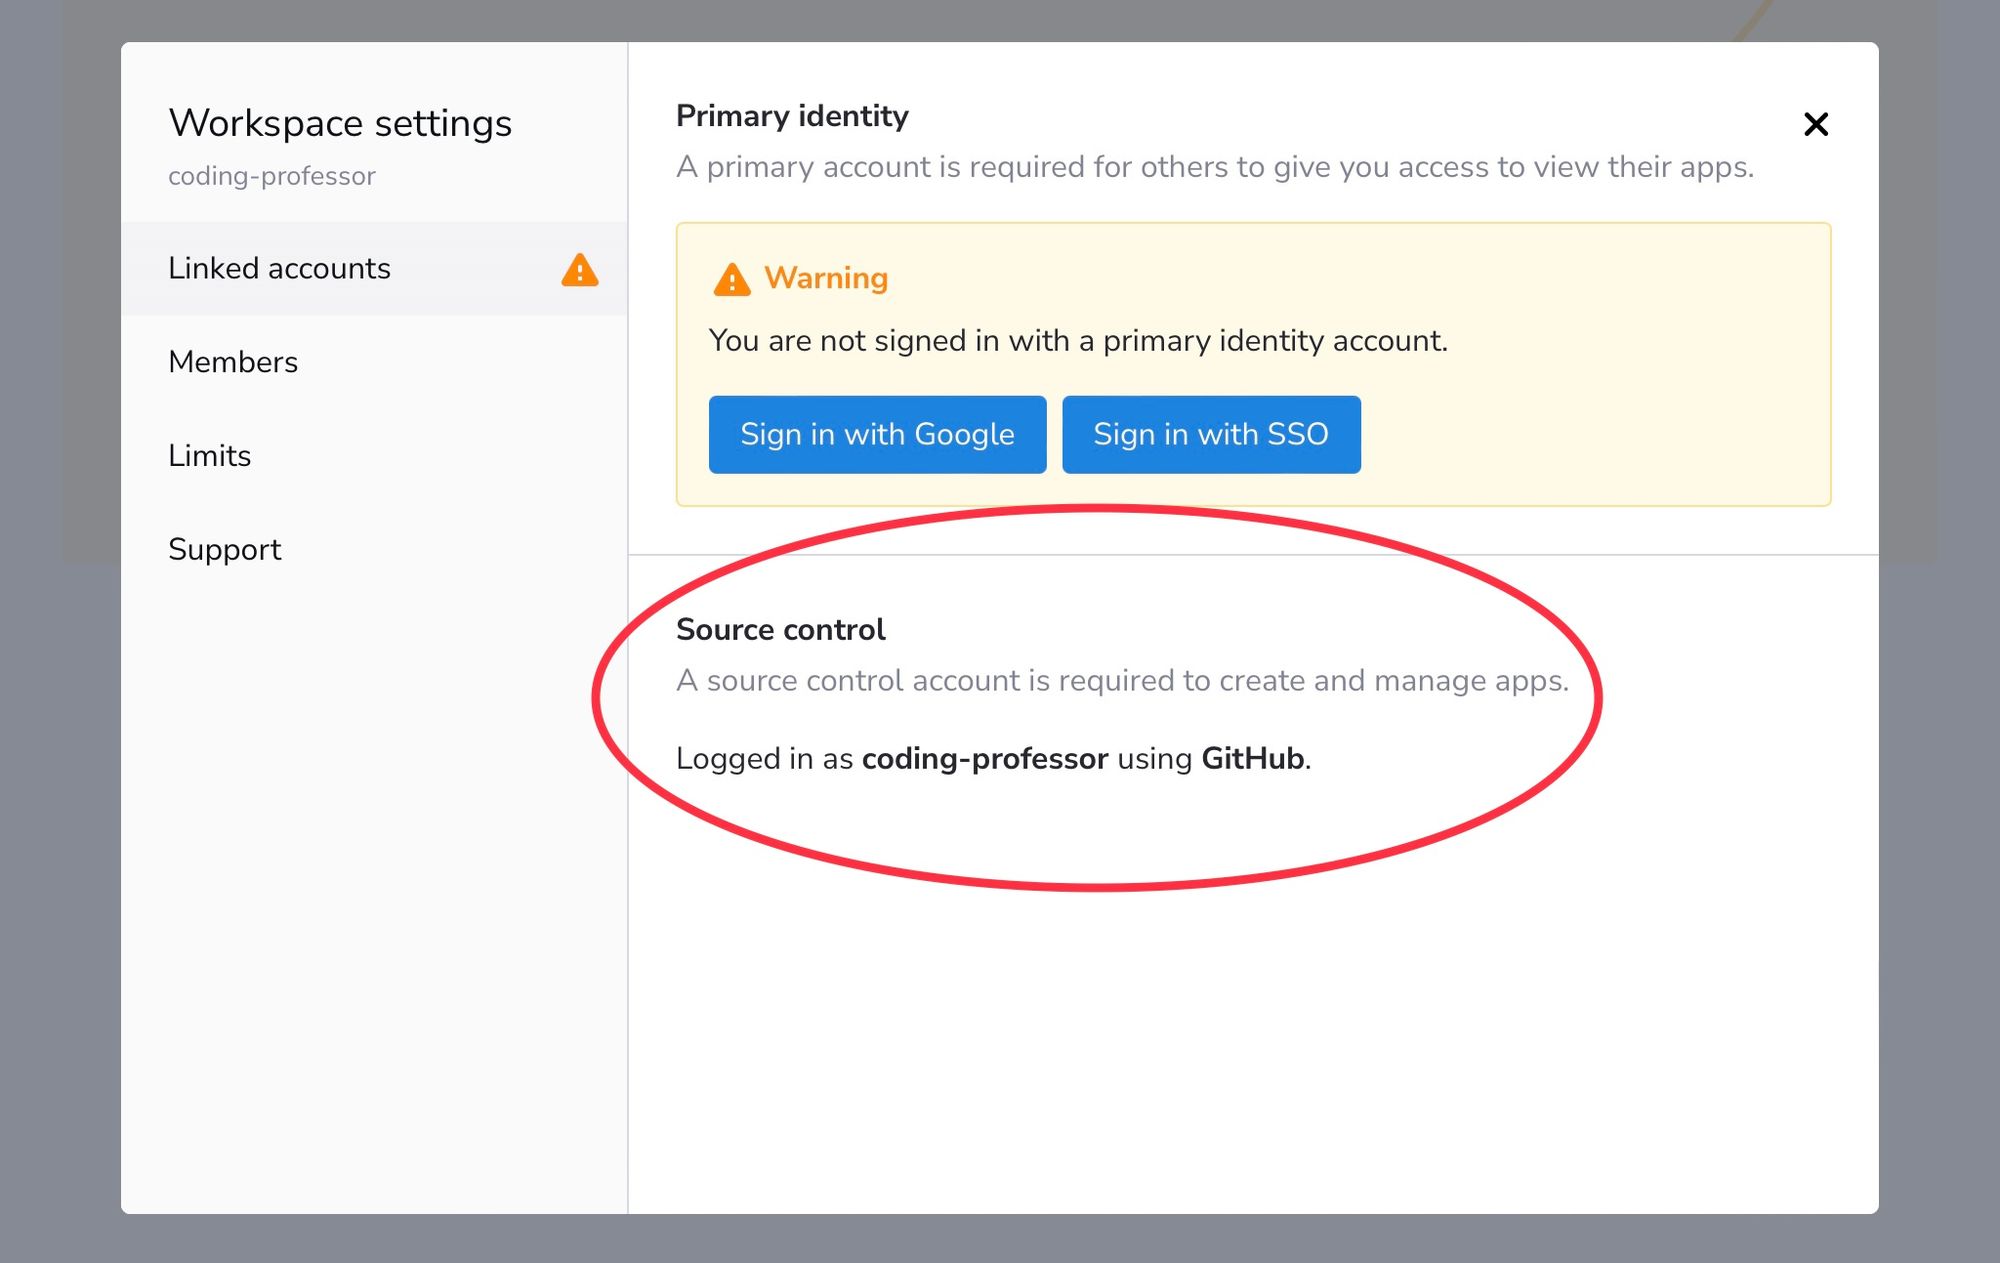
GitHub-linked account
Once you log in, Community Cloud will get access to your GitHub account:
Now you’re ready to deploy Streamlit apps!
But first, let’s create a GitHub repo.
Step 4. Create a GitHub repo of your app
Click “+” and then “New repository”:
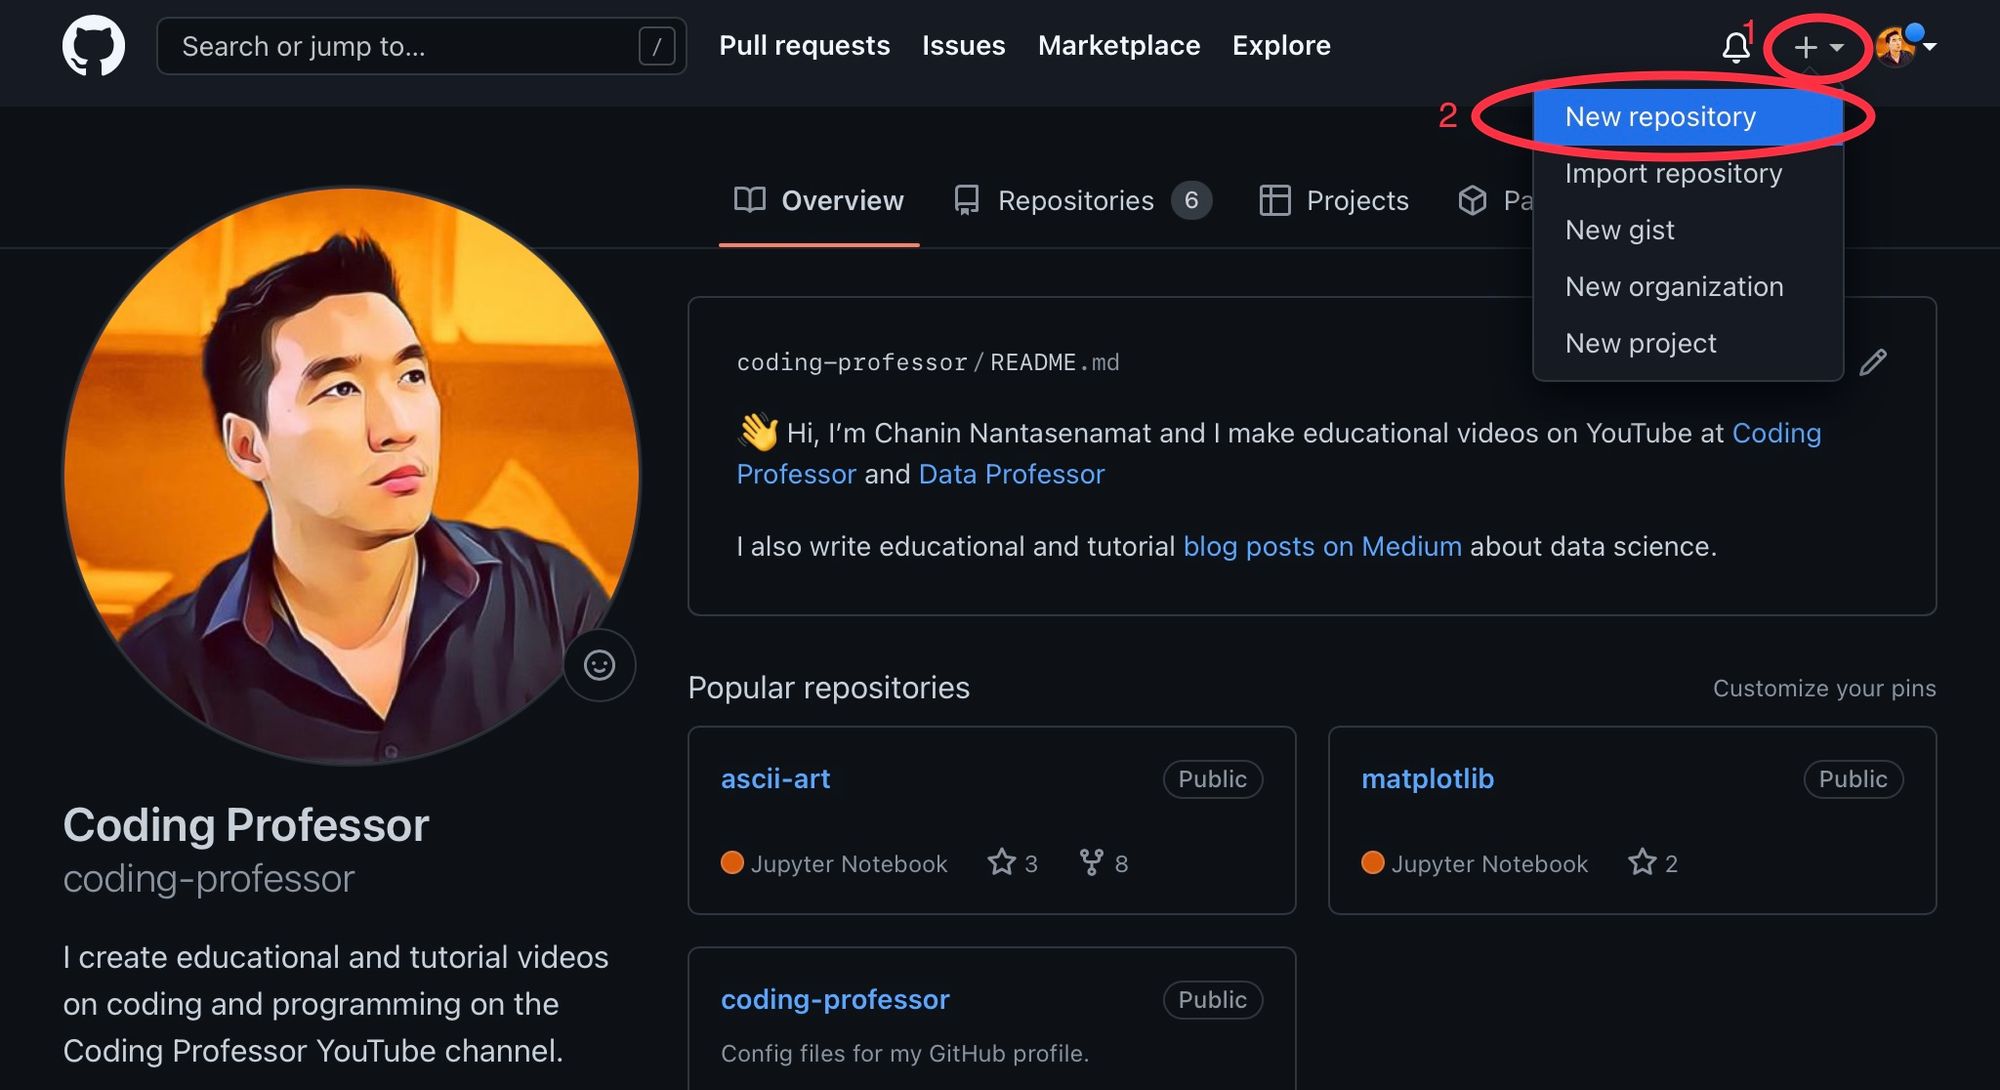
This will bring you to the “Create a new repository” page.
In the field “Repository name” type in st-hello-world, click “Public,” check “Add a README file” (your new repo will get a README.md file), and click “Create repository”:

Your repo is all set up!
Now create your app file:
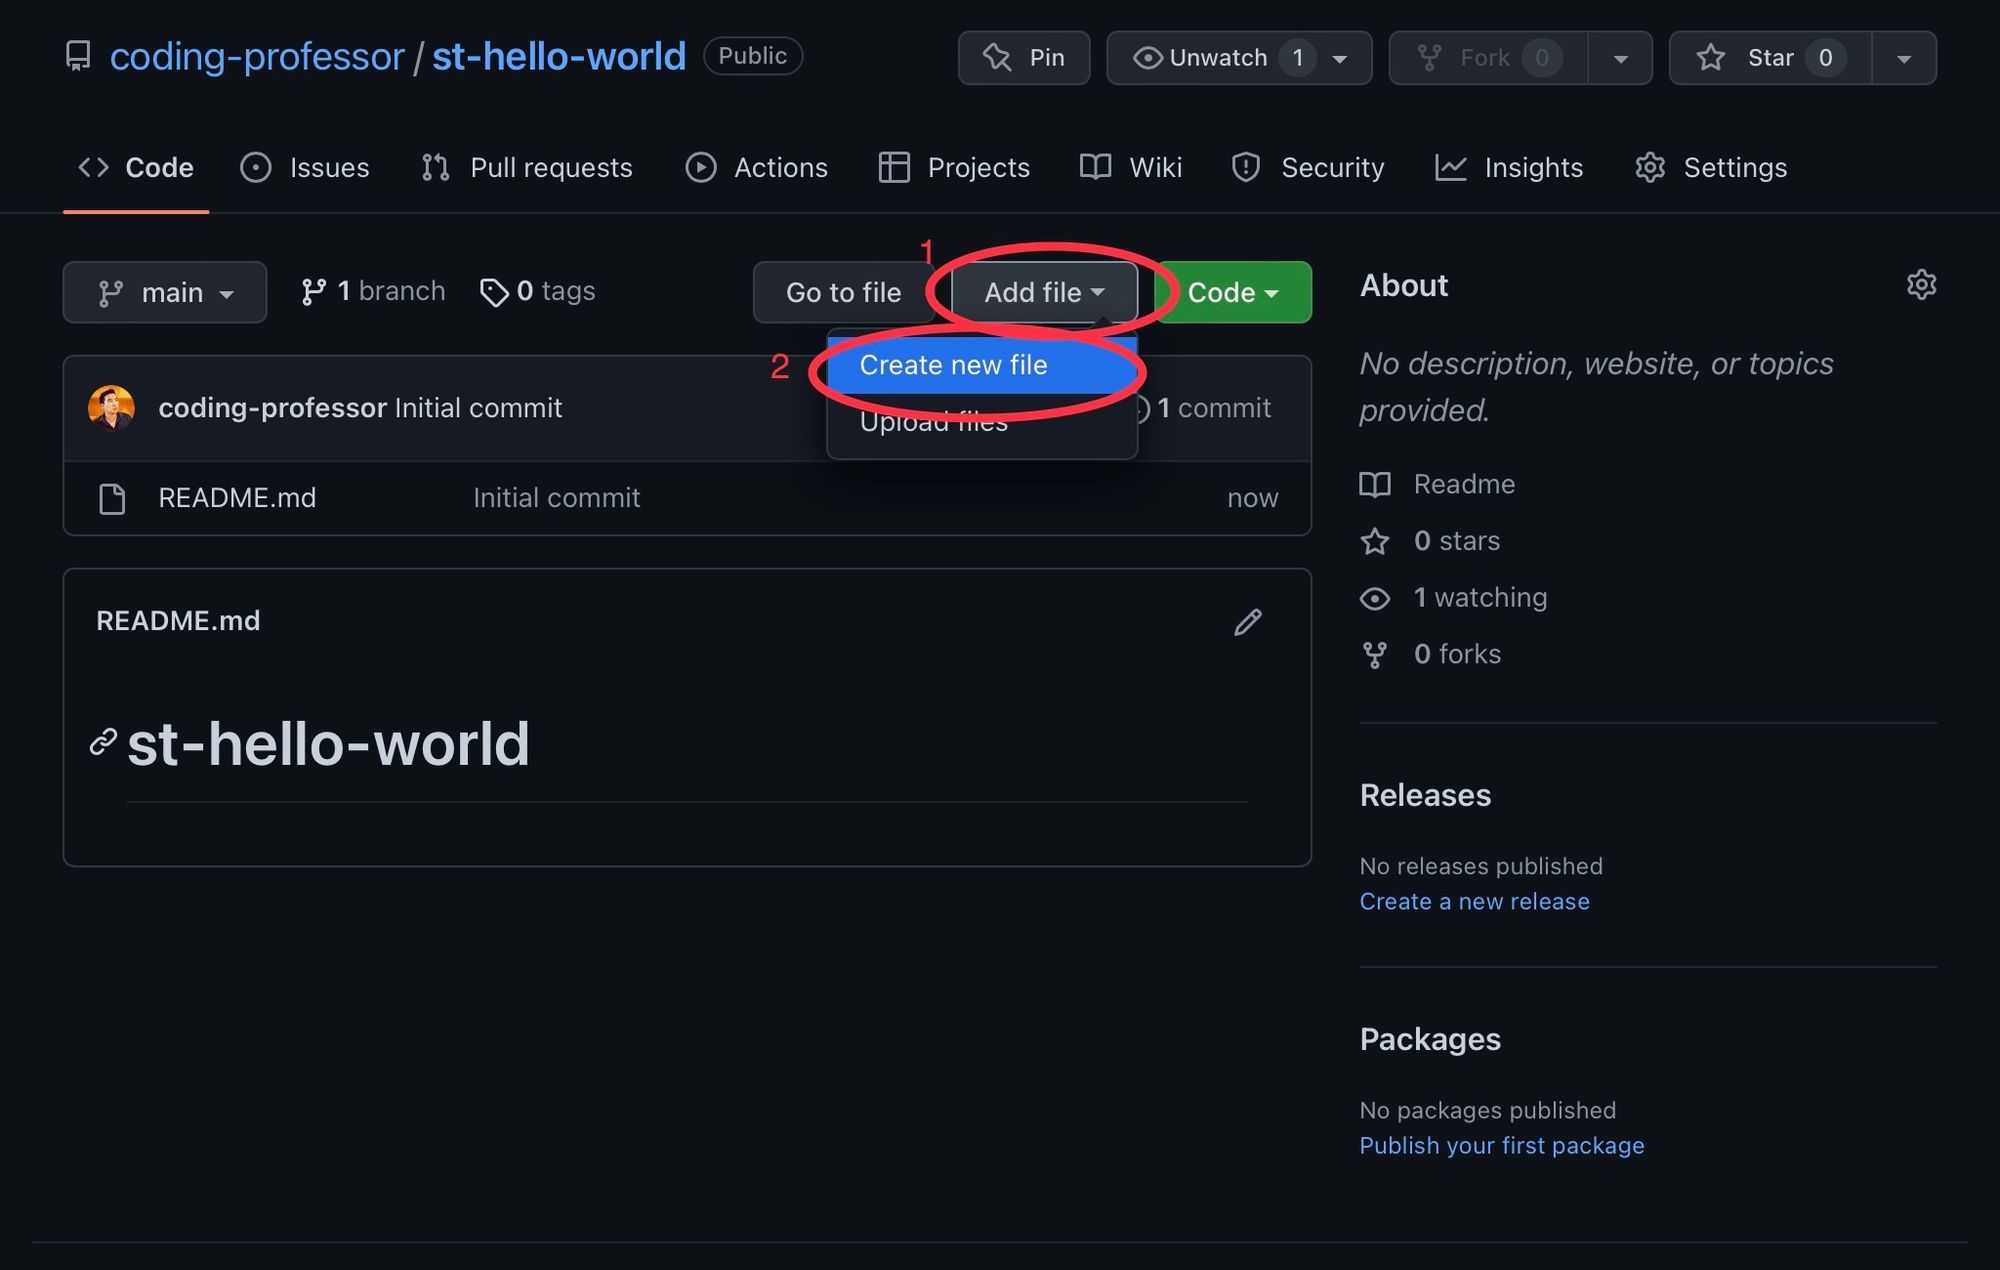
Next, create the streamlit_app.py:
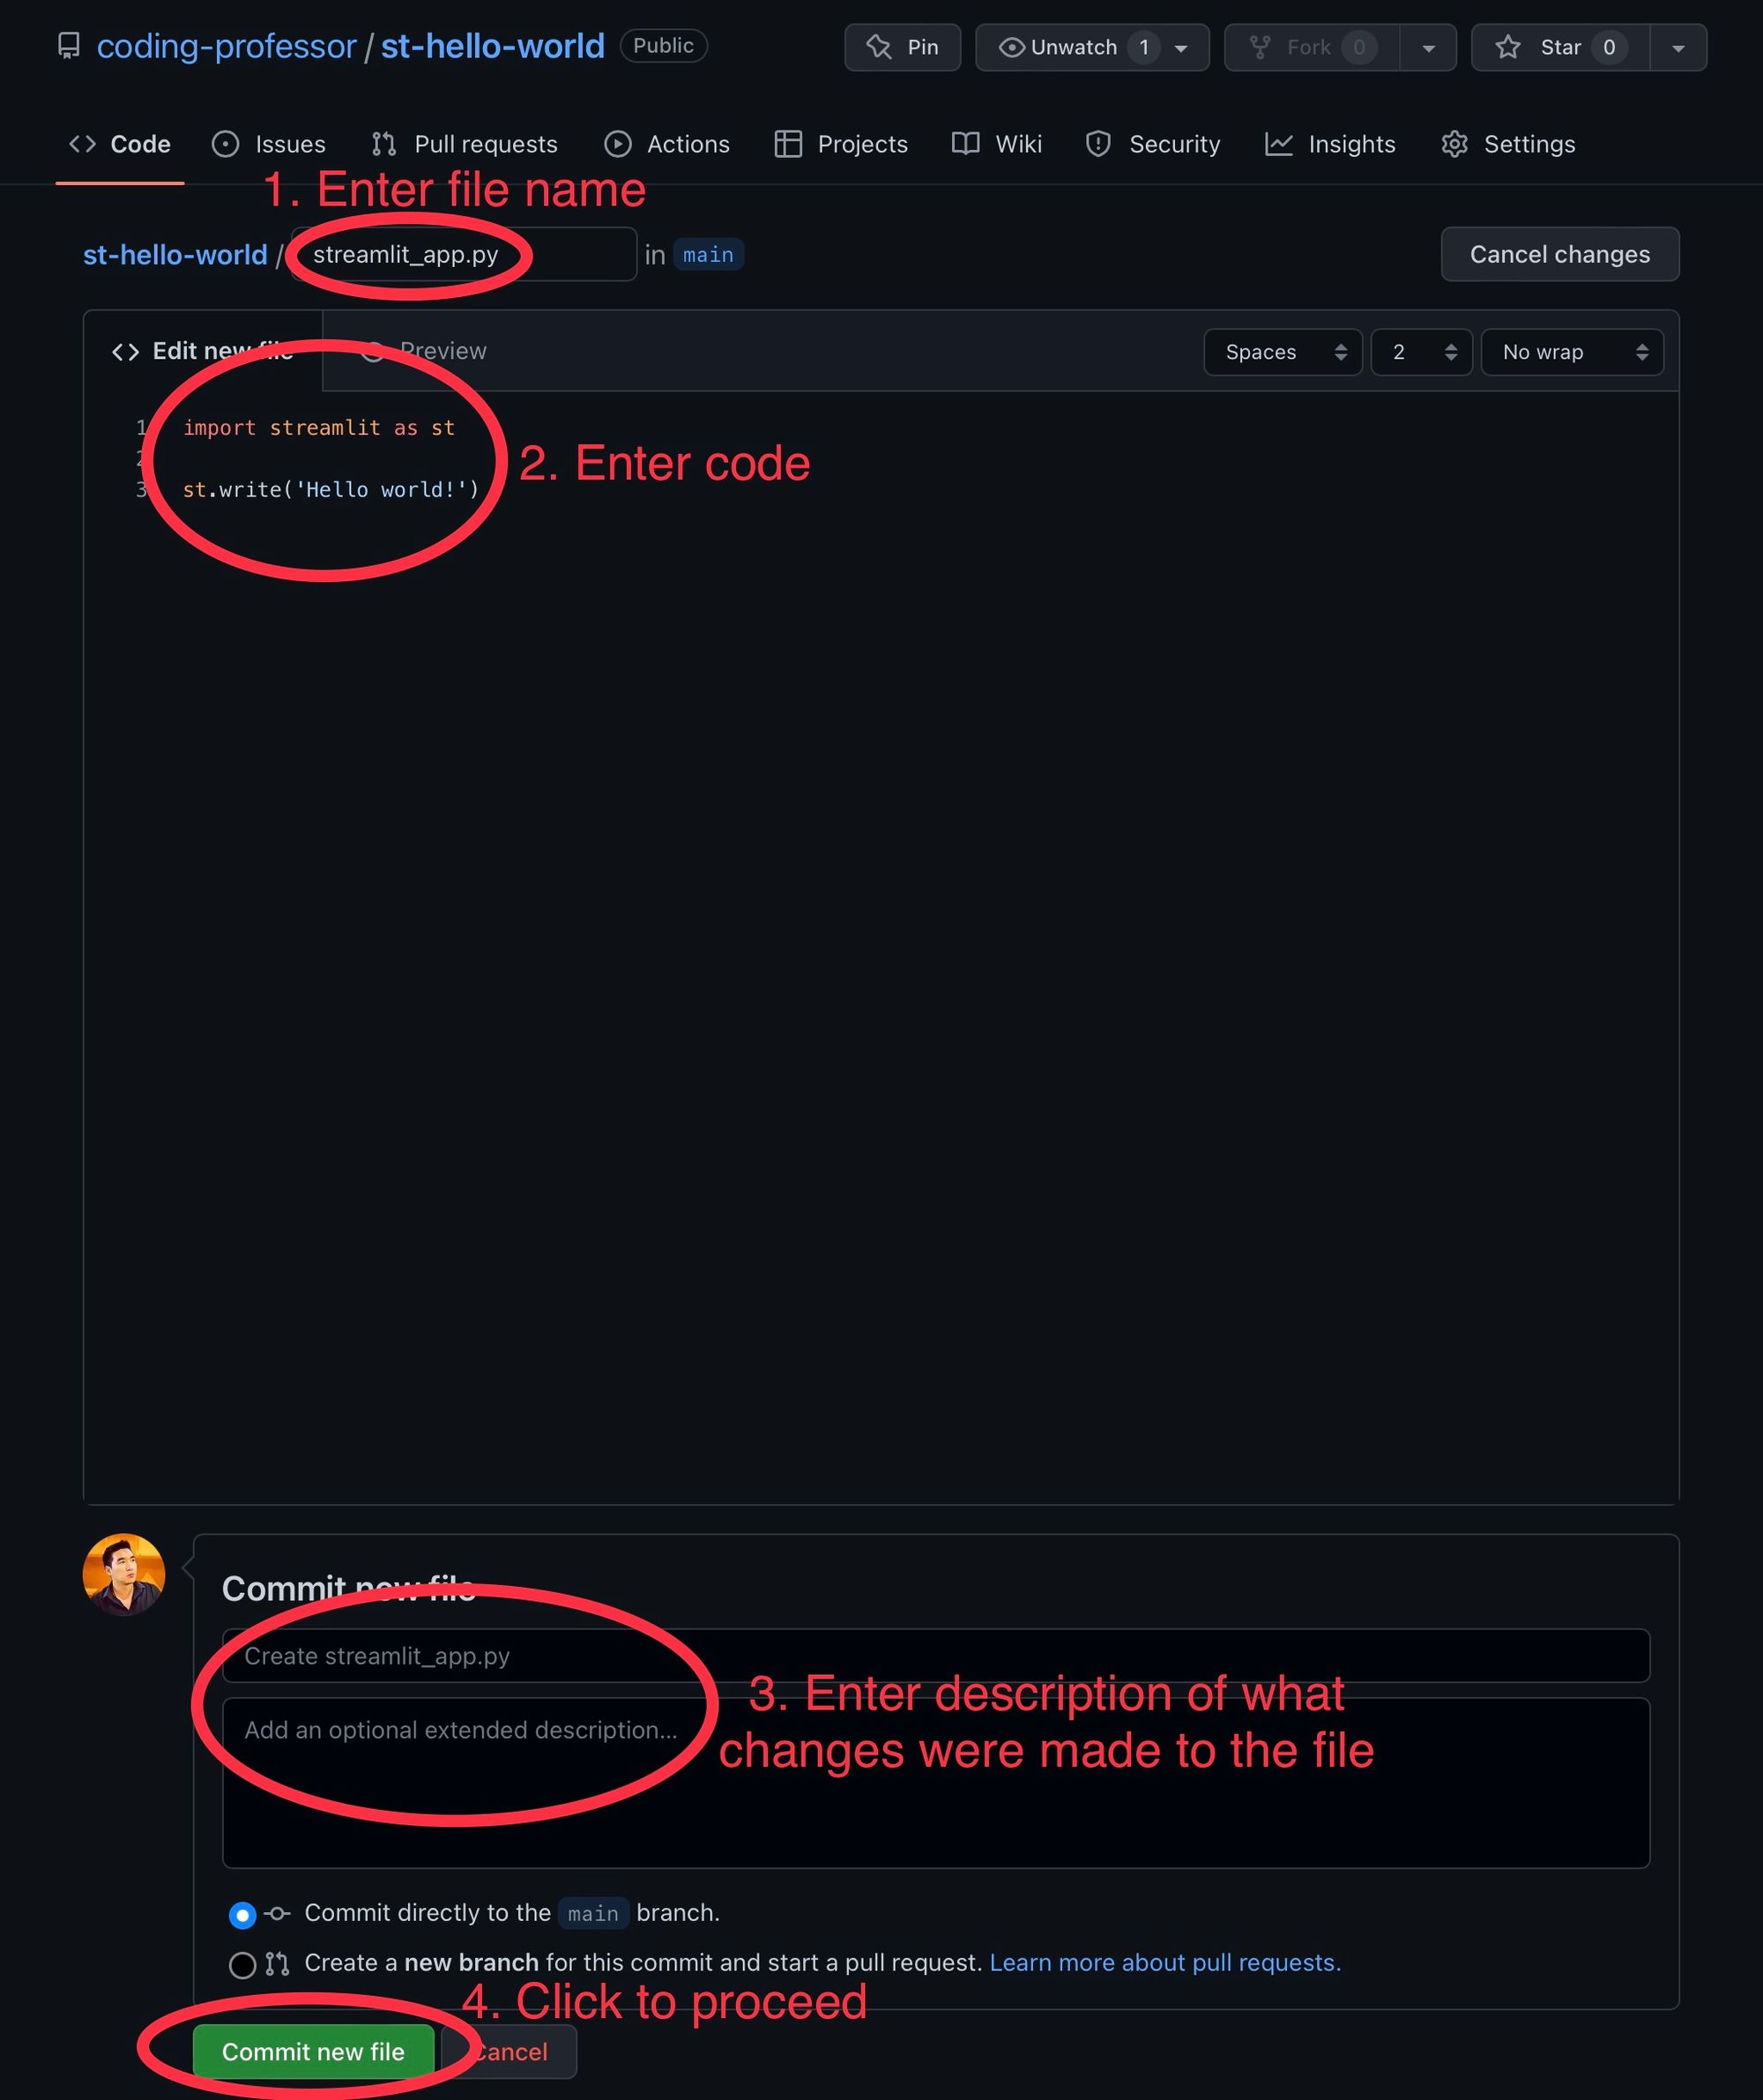
Your GitHub repo will be populated with README.md and streamlit_app.py files.
Next, head back to Community Cloud:

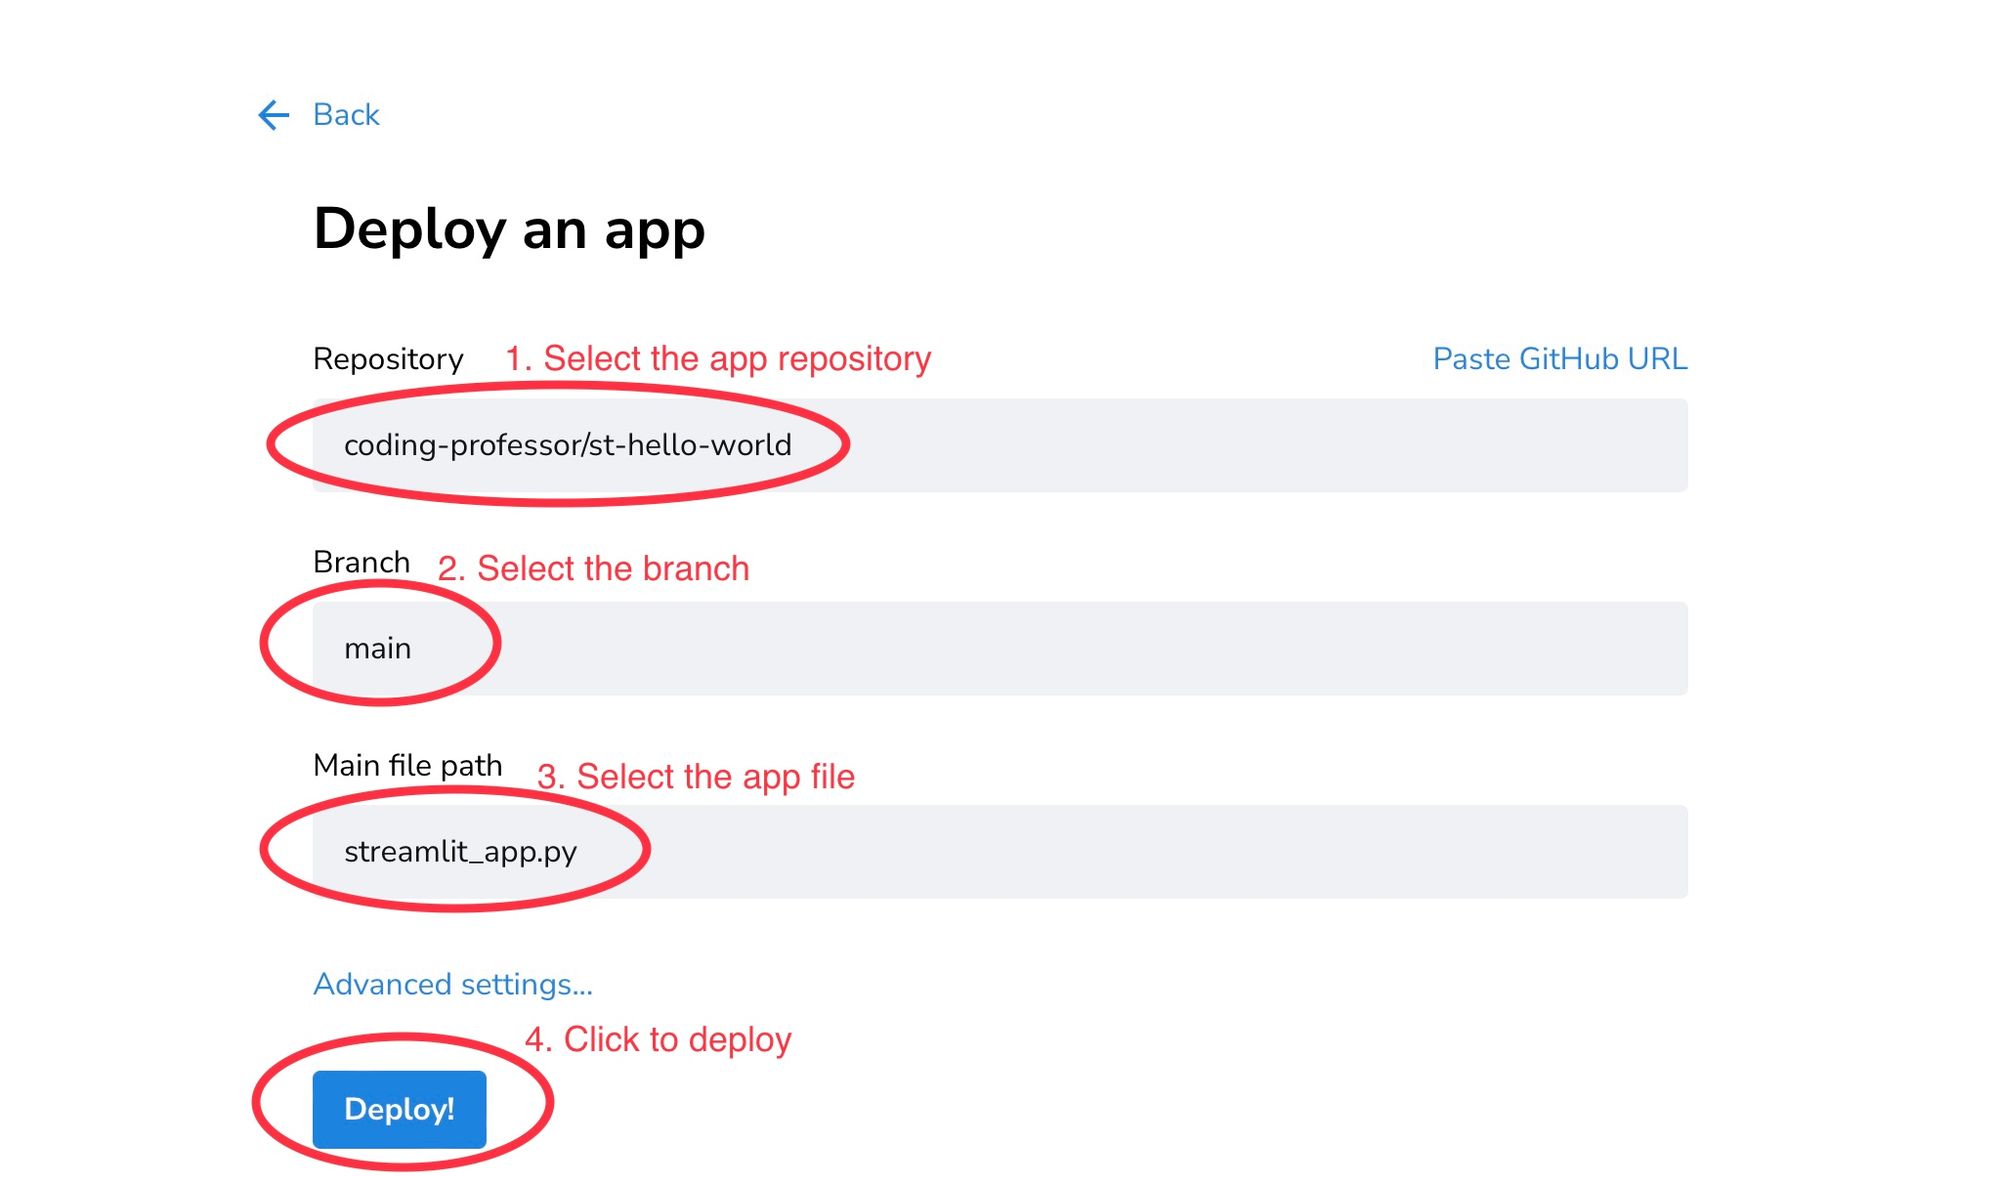
Step 5. Deploy your app in a few clicks
At last, here comes the fun part. You get to deploy your app!
Click “New app" and fill out the information for your app:
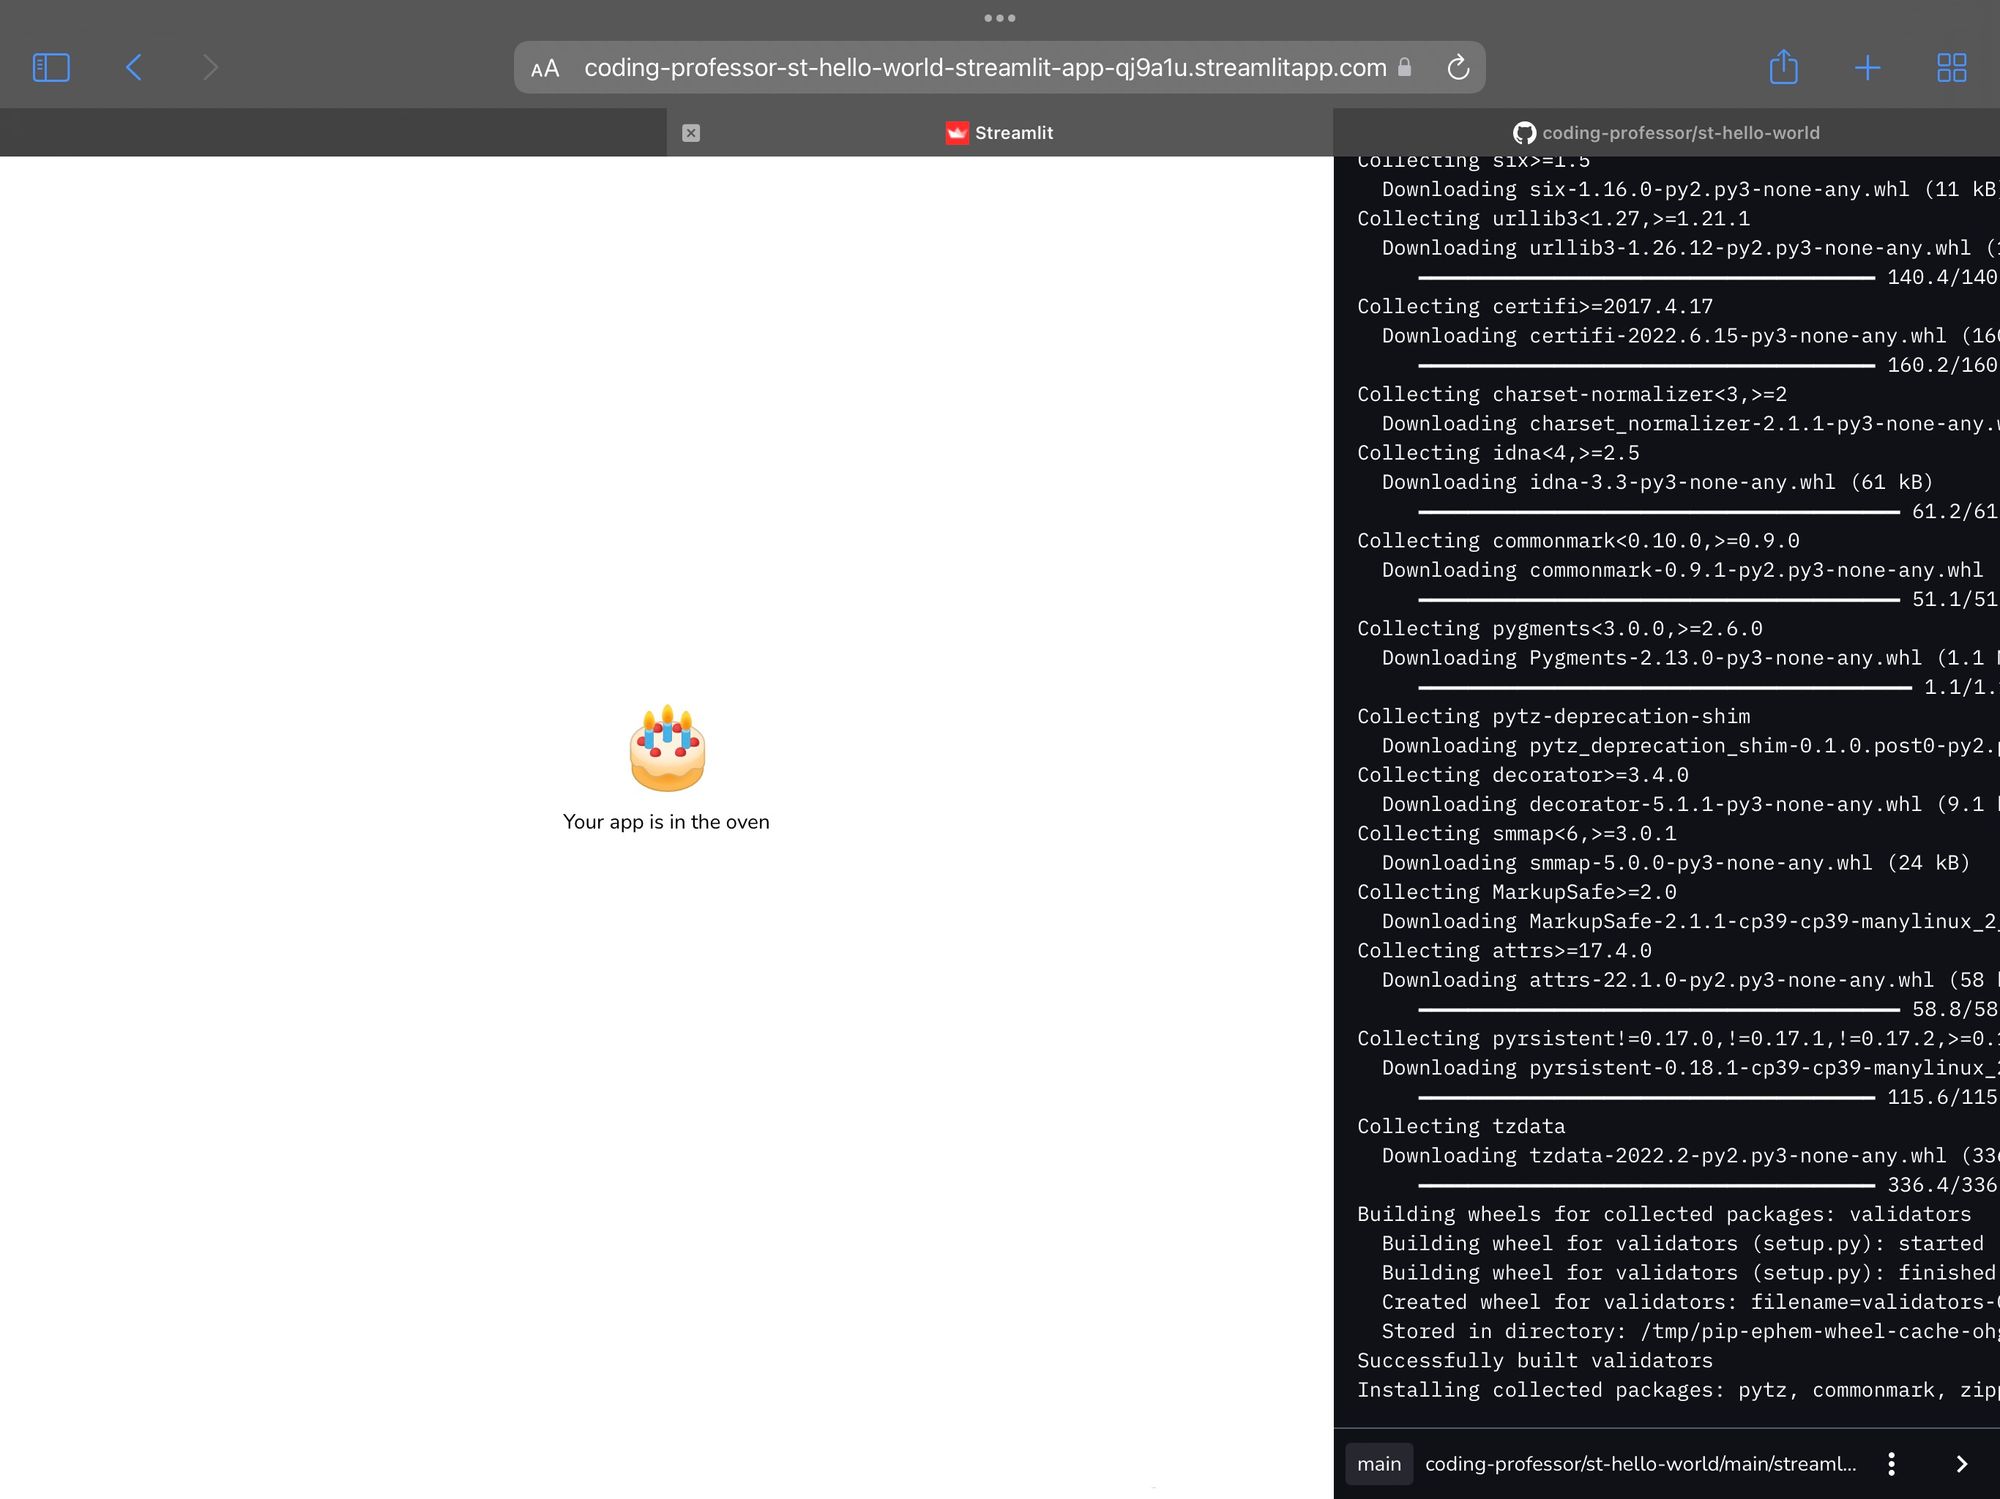
This will spin up a new server. You’ll see the message, “Your app is in the oven.”
In the bottom right-hand corner, click “Manage app” to see the log messages (use them for debugging and troubleshooting errors):

The side menu displays all log messages in real-time:
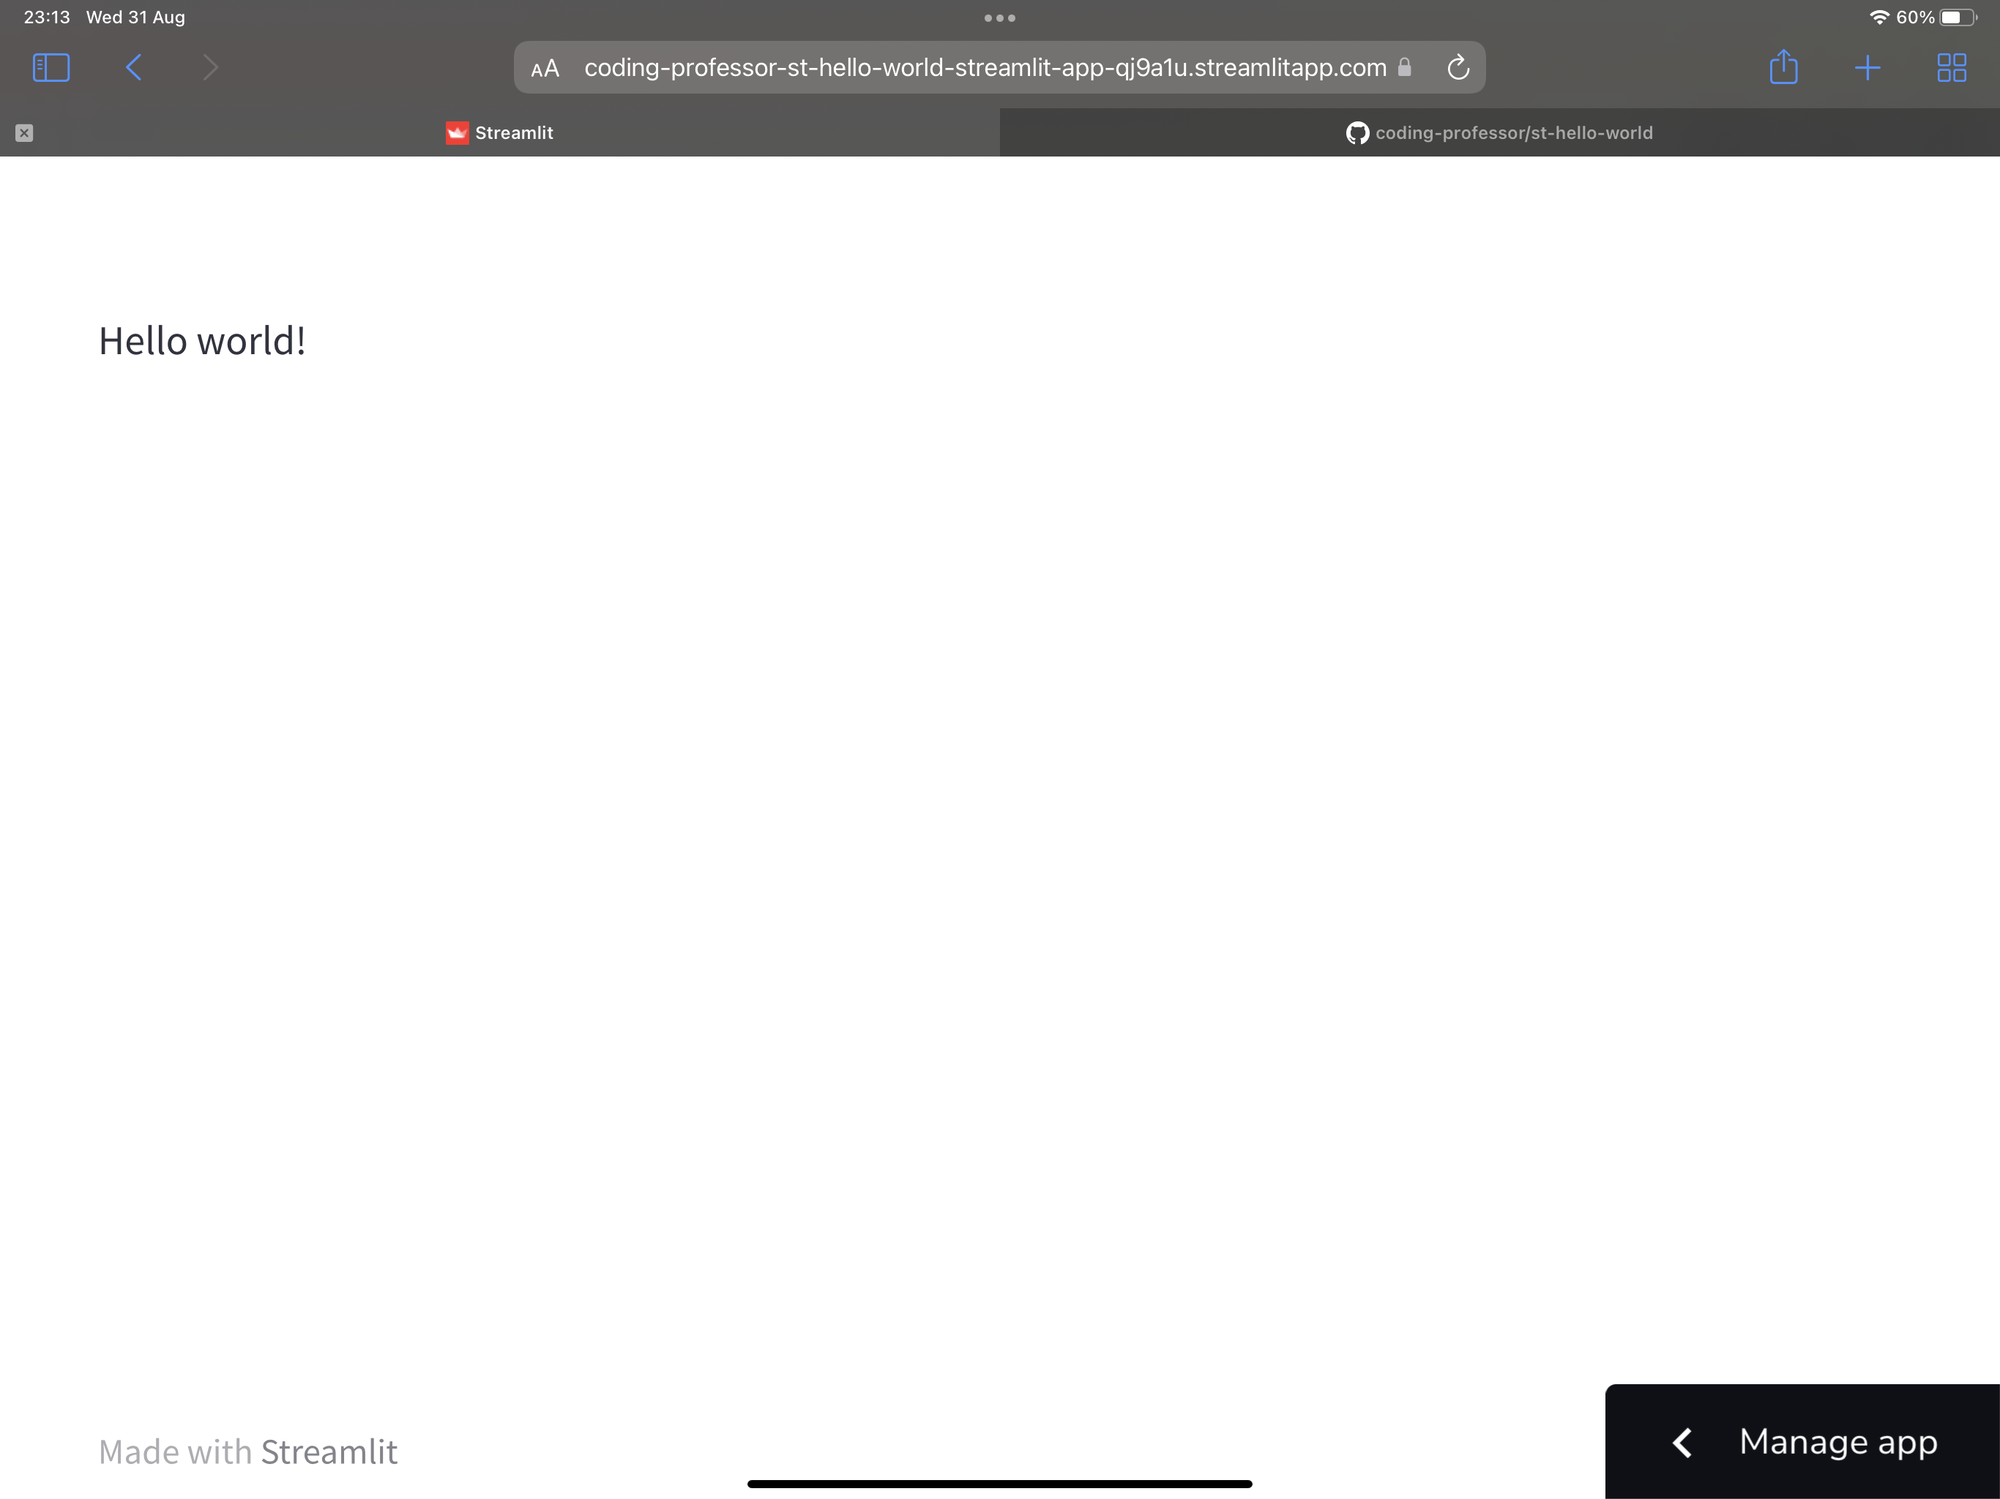
Once your app finishes compiling, you’ll see the output. In our example, it’ll be a simple message: Hello world!
Wrapping up
Congratulations! You have successfully deployed your app to Streamlit Community Cloud. Now you can share the app URL with the community.
If a tutorial video is your thing, check out the following video:
Read more about:
- Self-hosting Streamlit apps on your own servers (AWS, Azure, etc.).
- Different Streamlit use cases from the community.
If you have any questions, please leave them in the comments below or contact me on Twitter at @thedataprof or on LinkedIn.
Happy Streamlit-ing! 🎈


Comments
Continue the conversation in our forums →