
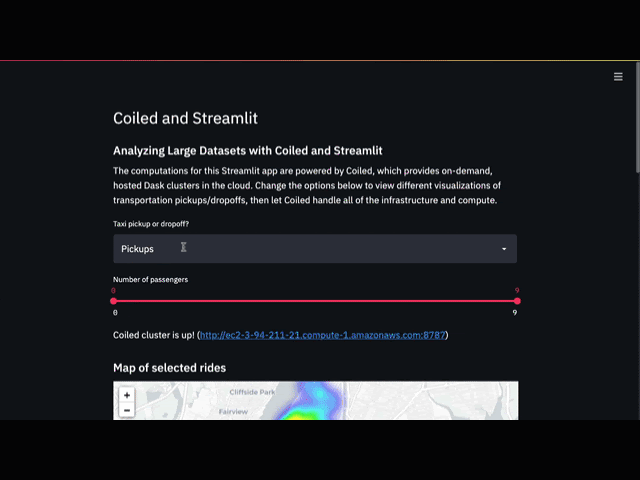
Are you using Streamlit to present multiple GBs of data to your users? Chances are you’ll run into the limits of your computational resources, either locally or on the virtual machine that hosts your Streamlit app. Coiled can help you burst into the cloud by spinning up on-demand Dask clusters. No more worries about any of the usual DevOps activities. Just scroll down to see how you can use a Streamlit-on-Coiled app to present live computations on the entire 10+ GB NYC Taxi dataset in a matter of seconds.
In this post, you’ll learn how to make your Streamlit-on-Coiled app ready for deployment using Streamlit's secret management feature. Why secret? Because after creating something this impressive, you’ll want to be sharing it with the world...and you'll want to do that securely!
But first, let's discuss why you'd want to do this.
- Why fuse Streamlit and Coiled
- Why use the Secrets Manager
- How to give Streamlit your Coiled credentials
- How to configure your Dask Cluster
- Share your app with the world
Can't wait to jump right in? Here's a sample app and repo code!
Why fuse Streamlit and Coiled?
By running your Streamlit app on Coiled, you can present computations on multiple-GB datasets in a seamless user experience. Expensive computations that would otherwise take minutes (or even hours) to run can be completed in a matter of seconds. The results will be displayed almost immediately. It’s a great example of two products built on Python-native OSS complementing each other to give you nimble-yet-powerful tooling in a familiar environment.
In a previous post, I provide a step-by-step guide of how you can achieve this. You can also jump straight to this GitHub repo to download the coiled-streamlit-expanded.py script and see for yourself. Note that the "Running get_client()" function starts up your Coiled cluster and can take a couple of minutes to complete.
Why use the Streamlit Secrets Manager?
This post will show you how to get your Streamlit-on-Coiled app ready for deployment.
Streamlit’s Sharing platform allows you to host up to 3 apps for free. Apps are deployed by running Python scripts that are hosted in public Github repositories. Because of this, you'll want to avoid including any sensitive information in your Streamlit scripts. It can expose you to potential security threats. For example, including your Coiled authentication token in a public repo would allow other users to spin up clusters and incur costs to your account.
This is why we'll be using Streamlit’s secrets management feature for the backend authorization necessary to hook your Streamlit app up to Coiled's cloud-computing resources.
You can do this by:
- Adding your Coiled credentials token to the Streamlit Secrets Manager
- Configuring your Dask cluster to use the right credentials
How to give Streamlit your Coiled credentials
To get your Streamlit app running on Coiled, you'll need a Coiled Cloud account. If you don't already have one, get your Free Tier account here by signing in with your Github or Google account. For a video walkthrough of this process, check out the Getting Started with Coiled guide.
Next, navigate to the Streamlit app deployment interface and click on "Advanced Settings". This will open a window in which you can include the Secrets that will be passed to your script in TOML format as key-value pairs.
Define a ‘token’ key here and set it to the Coiled token value from your Coiled Cloud dashboard.
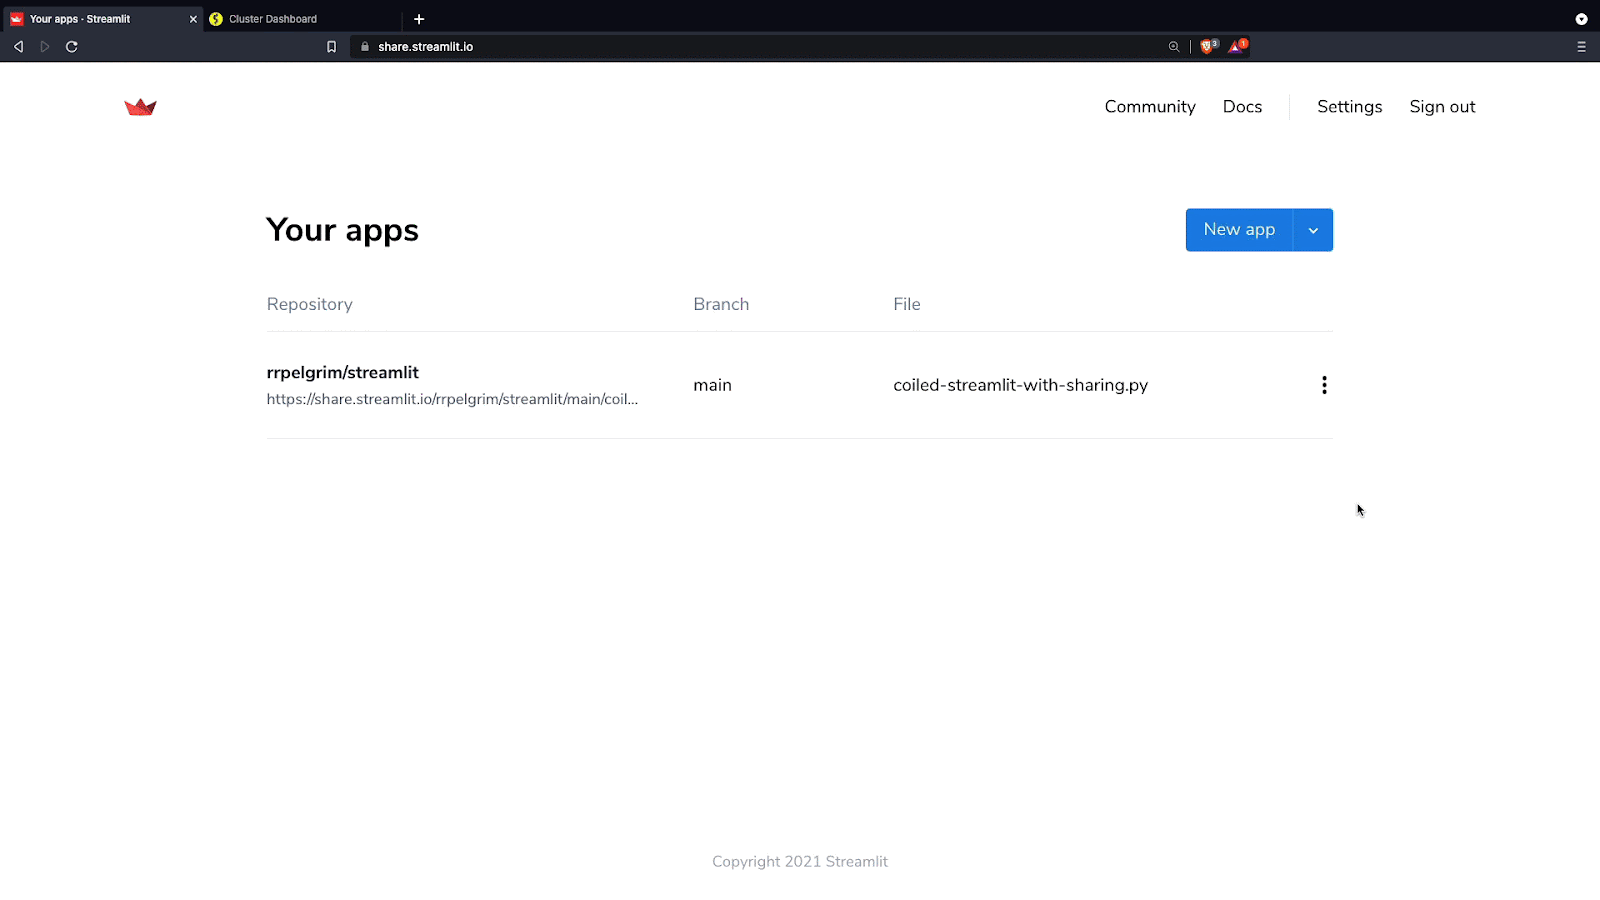
Alternatively, you can do this after deploying your app by clicking on the three-dots symbol to the far right of the app and selecting ‘Edit Secrets’.
How to configure your Dask Cluster
You only need to change two lines in the Python code of the existing Streamlit-on-Coiled app to make it ready for deployment:
- Include a hash_funcs keyword argument to the @st.cache call and set it to {"_thread.RLock": lambda _: None}). This turns off hashing for the _thread.RLock object type which improves our app performance. Read more on why and when you might want to turn hashing off here.
- Use dask.config.set within the already-defined get_client function definition to manually set the coiled.token that Dask uses to the ‘token’ key in the st.secrets dictionary you just created.
@st.cache(allow_output_mutation=True, hash_funcs={"_thread.RLock": lambda _: None})
def get_client():
	cluster_state.write("Starting or connecting to Coiled cluster...")
	dask.config.set({"coiled.token":st.secrets['token']})

	cluster = coiled.Cluster(
		n_workers=10,
		name="coiled-streamlit",
		software="coiled-examples/streamlit",
	)

	client = Client(cluster)
	return client
Share your App with the World
You're all set! You can now deploy your Streamlit-on-Coiled app and share it with the world. Get your invite to sharing and check out Streamlit's blog post and documentation on deploying.
We’d love to see what you’ve built, so feel free to drop us a line in our Coiled Community Slack channel, and with the Streamlit community on their community forum - we may just feature your app on the next Coiled blog. 😉
A fair warning—if you’ve built something really good that goes viral, you might run out of your monthly Coiled Free Tier credits. If that happens, you may want to consider upgrading to Coiled Pro.
Have questions? Reach out to @coiled.hq, support@coiled.io, or Coiled Community Slack.
Resources
Coiled
Streamlit


Comments
Continue the conversation in our forums →