
In the dynamic landscape of artificial intelligence (AI), generative AI and large language models (LLMs) have emerged as game-changers, revolutionizing how we process and understand massive amounts of text data. You can use LLMs for text generation, sentiment analysis, question answering, text summarization, document translation, document classification, and much more.
If you're captivated by the transformative powers of generative AI and LLMs, then this LangChain how-to tutorial series is for you. As it progresses, it’ll tackle increasingly complex topics.
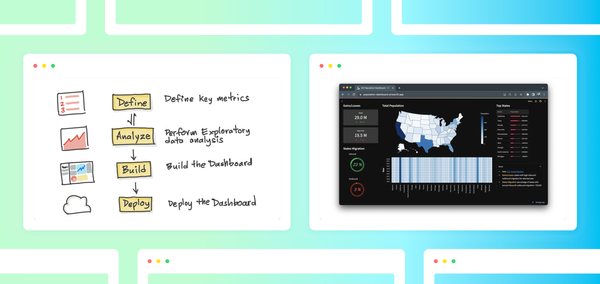
In this first part, I’ll introduce the overarching concept of LangChain and help you build a very simple LLM-powered Streamlit app in four steps:
- Get an OpenAI API key
- Set up the coding environment
- Build the app
- Deploy the app
But first, let's take a deeper look at LangChain.
What is LangChain?
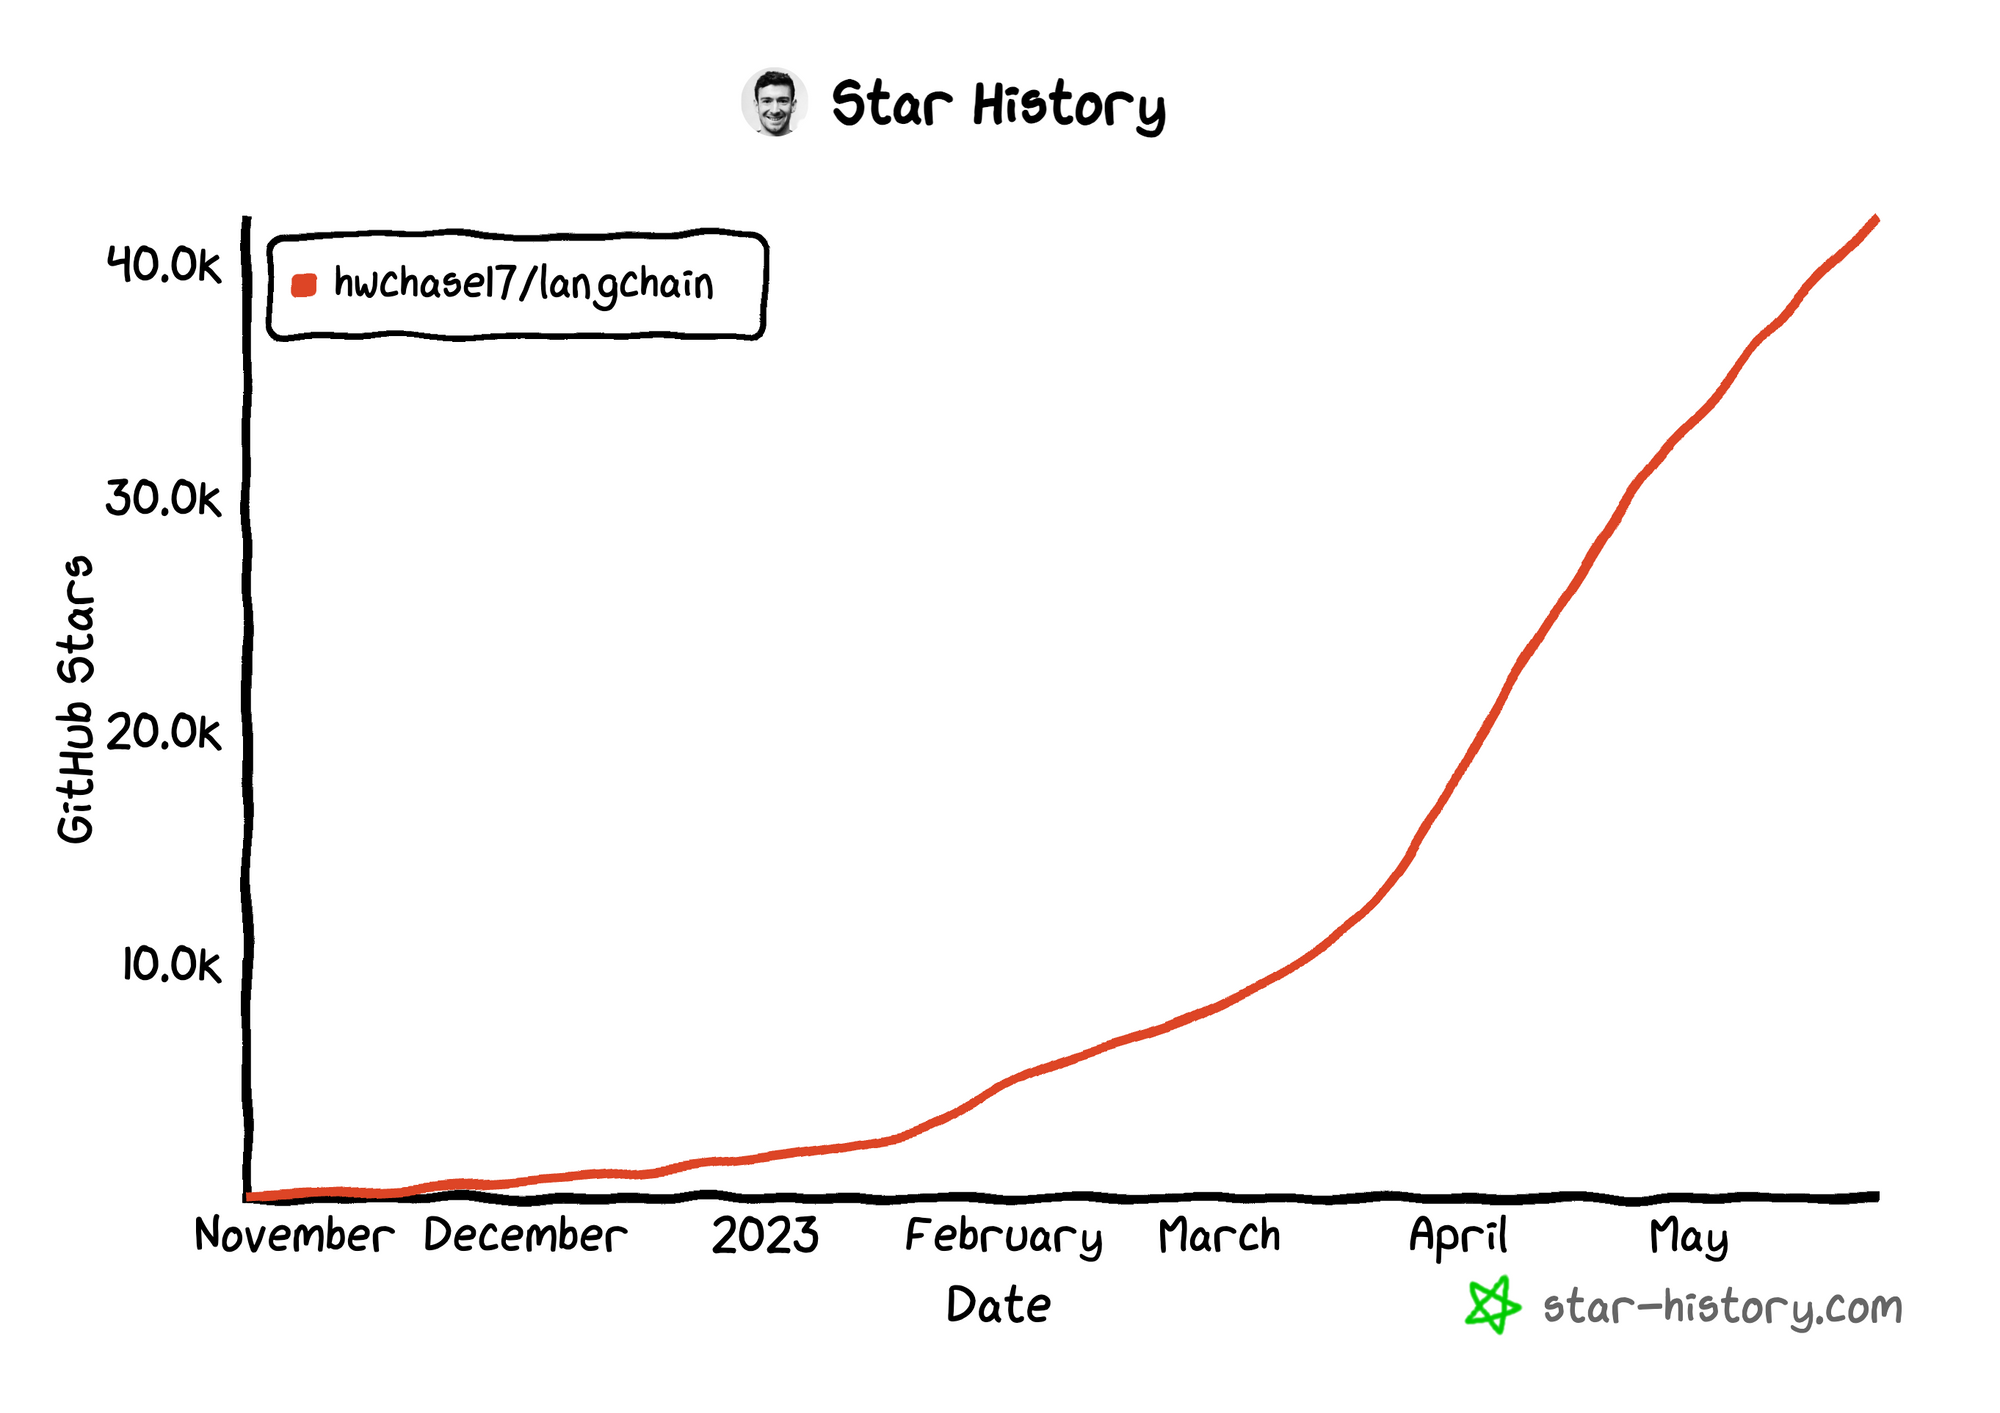
LangChain is a framework that uses LLMs to build applications for various use cases. Created by Harrison Chase, it was first released as an open-source project in October 2022. To date, it has accumulated 41,900 stars on GitHub and has over 800 contributors.
At a high level, LangChain connects LLM models (such as OpenAI and HuggingFace Hub) to external sources like Google, Wikipedia, Notion, and Wolfram. It provides abstractions (chains and agents) and tools (prompt templates, memory, document loaders, output parsers) to interface between text input and output. LLM models and components are linked into a pipeline "chain," making it easy for developers to rapidly prototype robust applications. Simply put, Langchain orchestrates the LLM pipeline.
LangChain's power lies in its six key modules:
- Model I/O: Facilitates the interface of model input (prompts) with the LLM model (closed or open-source) to produce the model output (output parsers)
- Data connection: Enables user data to be loaded (document loaders), transformed (document transformers), stored (text embedding models and vector stores) and queried (retrievers)
- Memory: Confer chains or agents with the capacity for short-term and long-term memory so that it remembers previous interactions with the user
- Chains: A way to combine several components or other chains in a single pipeline (or “chain”)
- Agents: Depending on the input, the agent decides on a course of action to take with the available tools/data that it has access to
- Callbacks: Functions that are triggered to perform at specific points during the duration of an LLM run
Now that you're familiar with LangChain, let's look at the app's functionality.
Copy/paste your API key (see how to get it in Step 1 below), then type in "What are the three key pieces of advice for learning how to code?" and click Submit:
You should see the response appear in the blue box:
This is how it works under the hood:
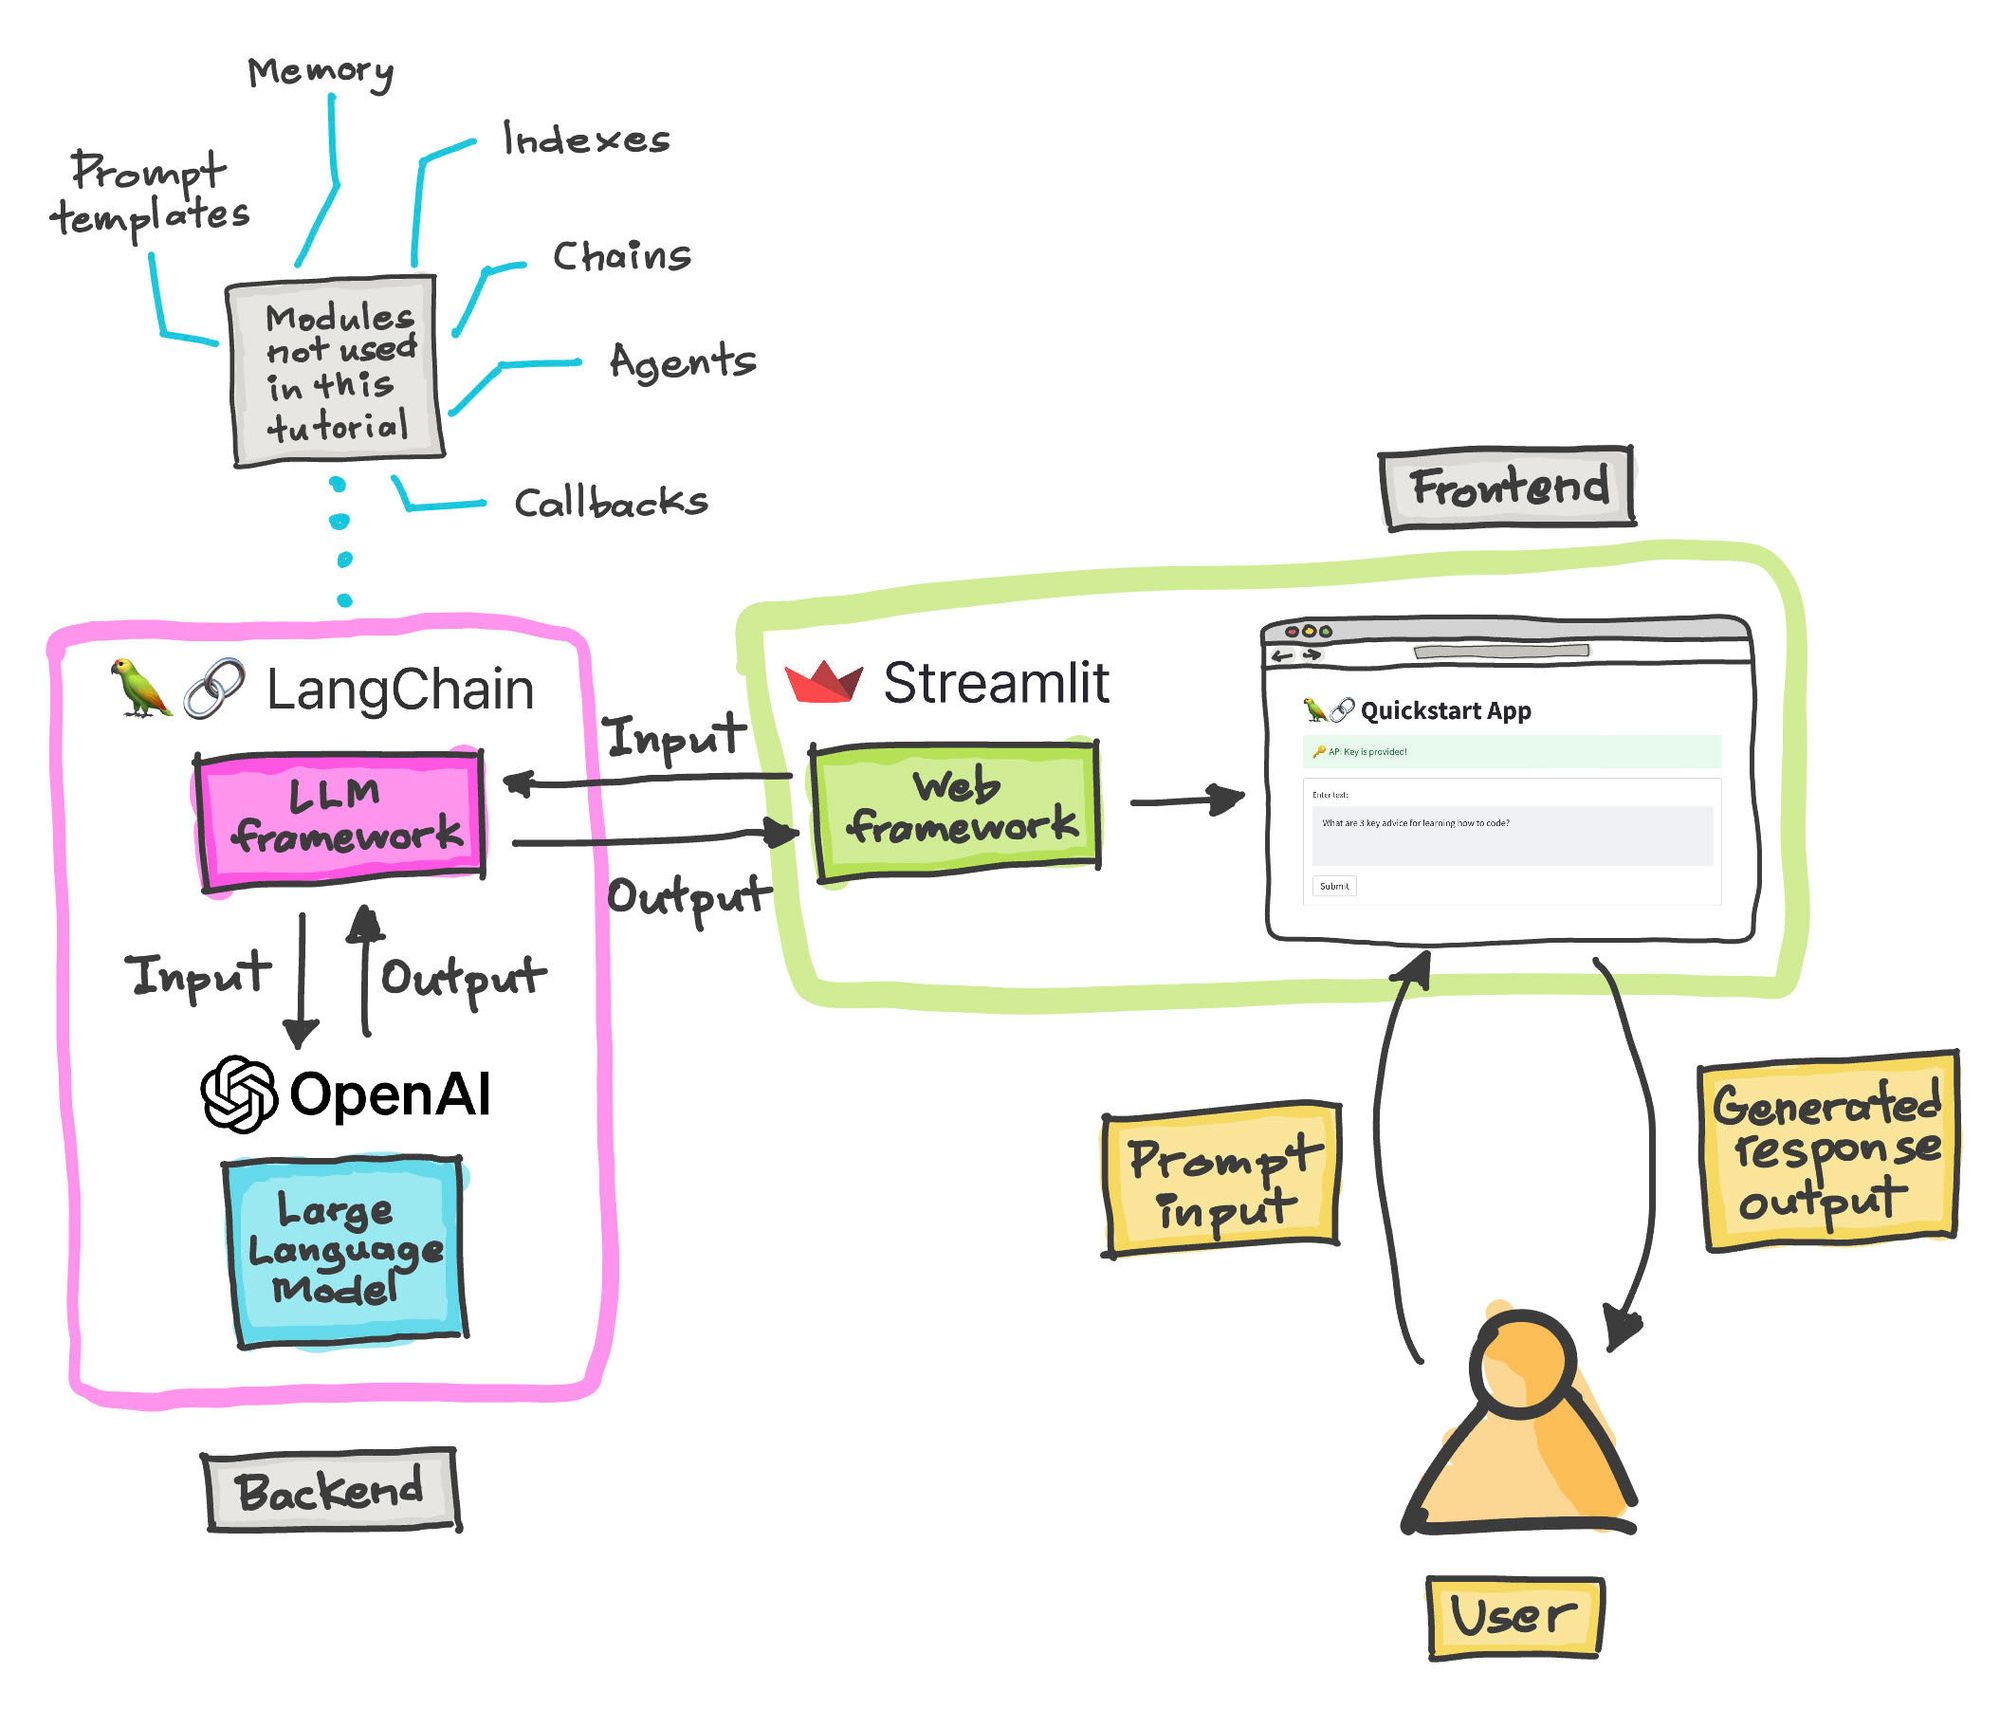
Essentially, you'll be using OpenAI (the LLM), LangChain (the LLM framework), and Streamlit (the web framework).
Let's get started!
Step 1. Get an OpenAI API key
First, get your own OpenAI API key:
- Go to https://platform.openai.com/account/api-keys.
- Click on the
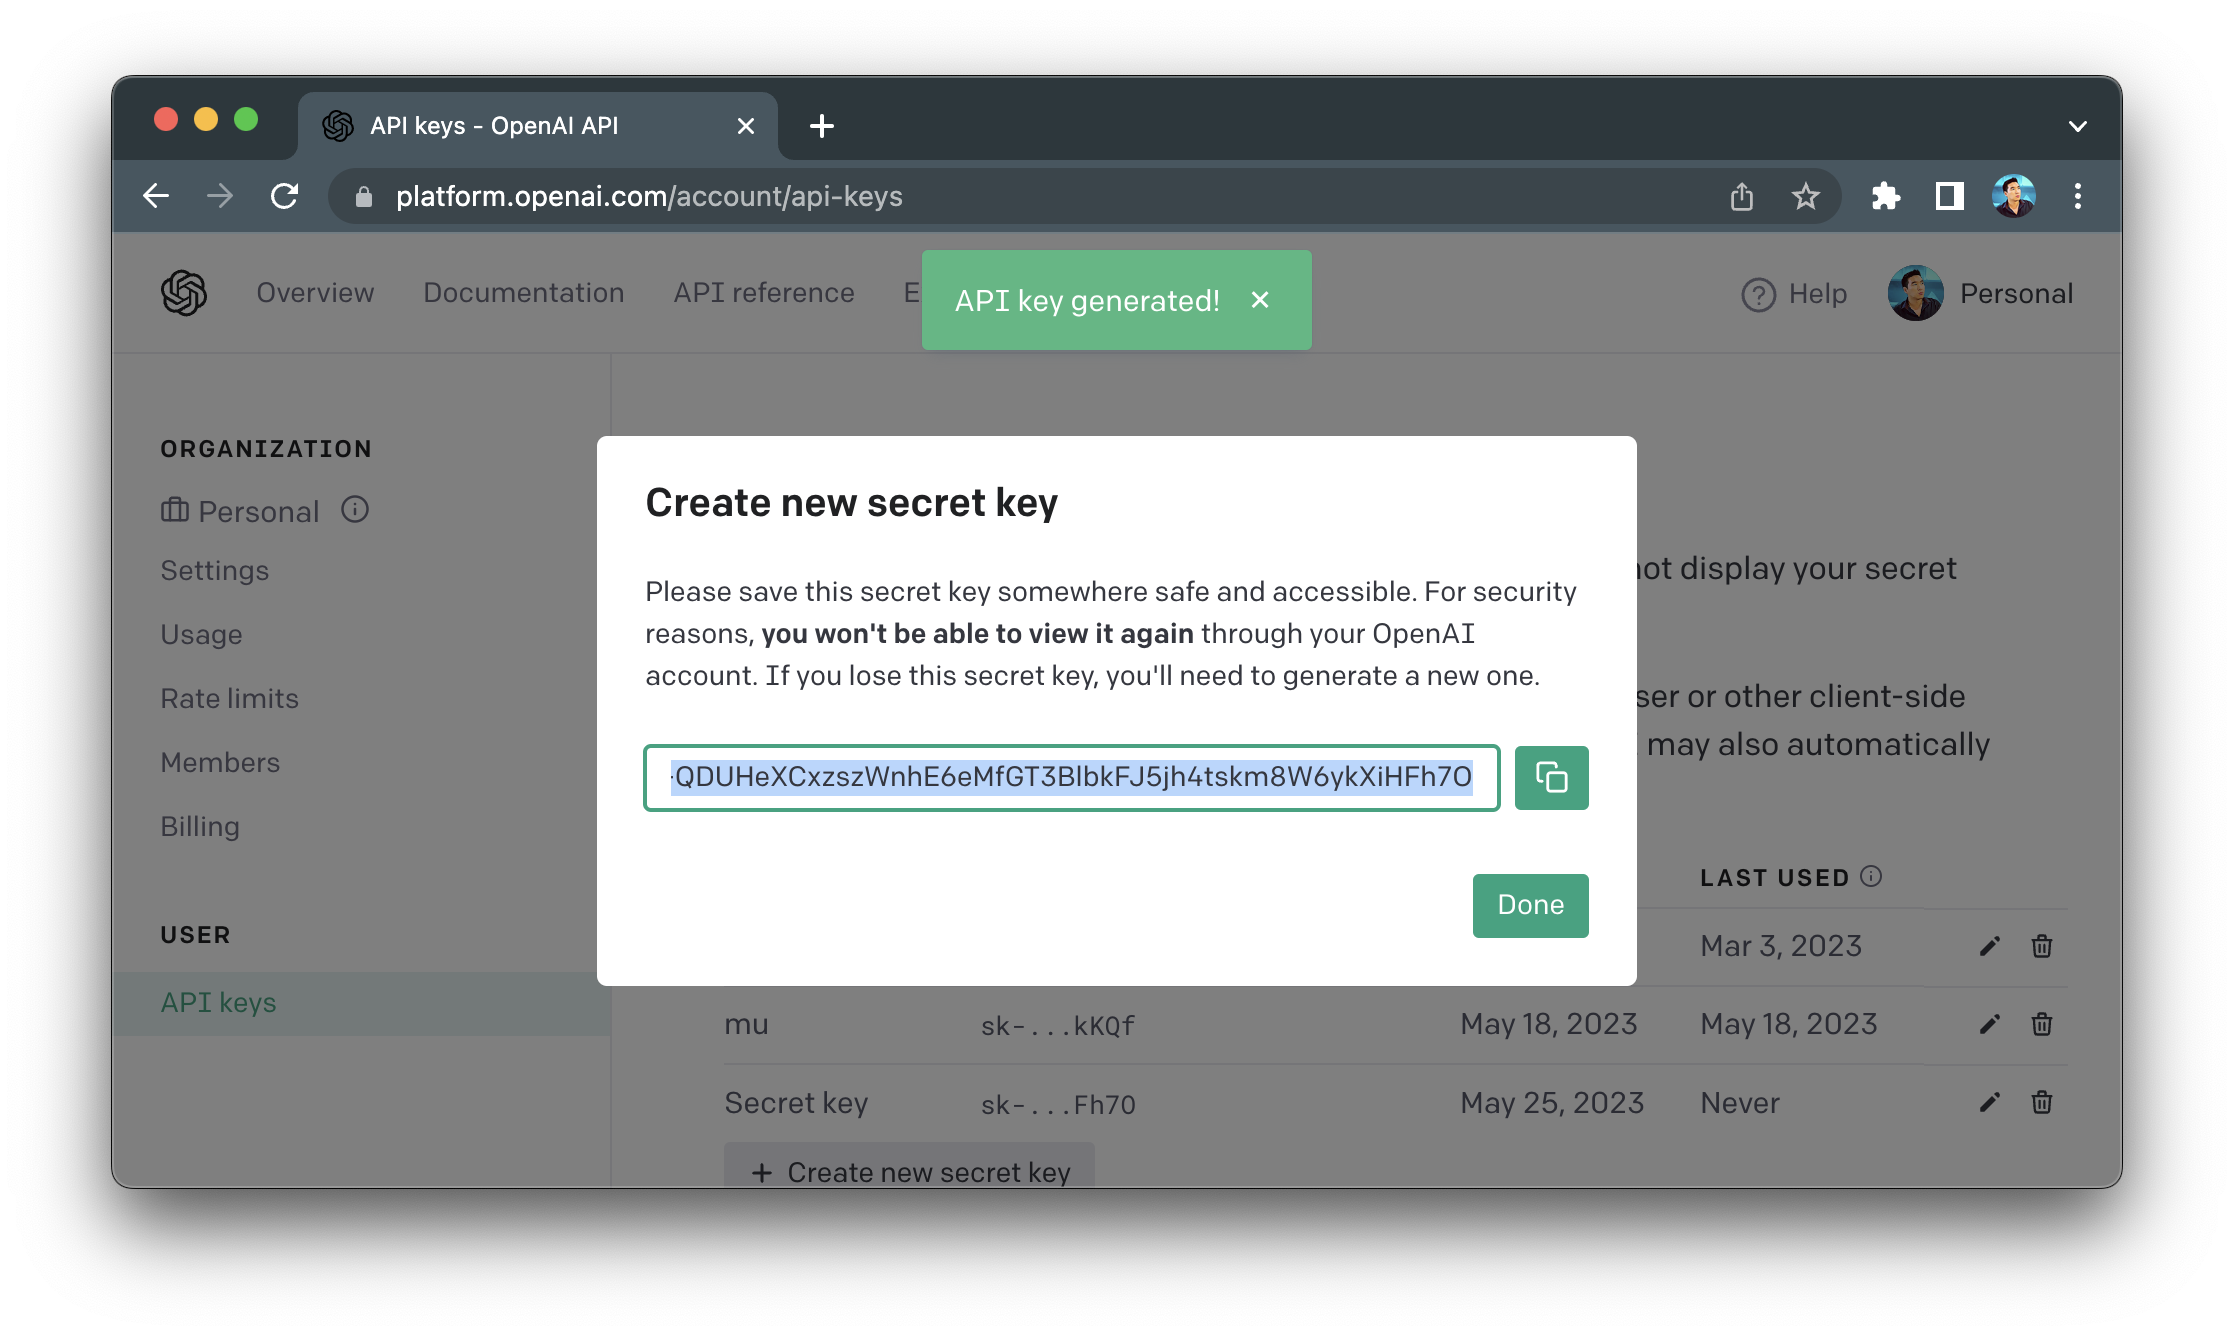
+ Create new secret keybutton. - Enter an identifier name (optional) and click on the
Create secret keybutton. - Copy the API key to be used in this tutorial (the key shown below was already revoked):
Step 2. Set up the coding environment
Local development
To set up a coding environment locally, make sure that you have a functional Python environment (e.g. Python >3.7) and install the following three Python libraries:
pip install streamlit openai langchain
Cloud development
You can also code directly on the Streamlit Community Cloud. Just use the Streamlit app template (read this blog post to get started).
Next, add the three prerequisite Python libraries in the requirements.txt file:
streamlit
openai
langchain
Step 3. Build the app
Now comes the fun part. Let's build the app!
It's only 18 lines of code:
import streamlit as st
from langchain.llms import OpenAI

st.title('🦜🔗 Quickstart App')

openai_api_key = st.sidebar.text_input('OpenAI API Key')

def generate_response(input_text):
  llm = OpenAI(temperature=0.7, openai_api_key=openai_api_key)
  st.info(llm(input_text))

with st.form('my_form'):
  text = st.text_area('Enter text:', 'What are the three key pieces of advice for learning how to code?')
  submitted = st.form_submit_button('Submit')
  if not openai_api_key.startswith('sk-'):
    st.warning('Please enter your OpenAI API key!', icon='⚠')
  if submitted and openai_api_key.startswith('sk-'):
    generate_response(text)
To start, create the streamlit_app.py file and import the two prerequisite libraries:
streamlit, a low-code framework used for the front end to let users interact with the app.langchain, a framework for working with LLM models.
import streamlit as st
from langchain.llms import OpenAI
Next, display the app's title "🦜🔗 Quickstart App" using the st.title() method:
st.title('🦜🔗 Quickstart App')
The app takes in the OpenAI API key from the user, which it then uses togenerate the responsen.
openai_api_key = st.sidebar.text_input('OpenAI API Key')Next, define a custom function called generate_response(). It takes a piece of text as input, uses the OpenAI() method to generate AI-generated content, and displays the text output inside a blue box using st.info():
def generate_response(input_text):
  llm = OpenAI(temperature=0.7, openai_api_key=openai_api_key)
  st.info(llm(input_text))
Finally, use st.form() to create a text box (st.text_area()) for accepting user-provided prompt input. Once the user clicks the Submit button, the generate-response() function is called with the prompt input variable (text) as an argument.
This creates AI-generated content:
with st.form('my_form'):
  text = st.text_area('Enter text:', 'What are the three key pieces of advice for learning how to code?')
  submitted = st.form_submit_button('Submit')
  if not openai_api_key.startswith('sk-'):
    st.warning('Please enter your OpenAI API key!', icon='⚠')
  if submitted and openai_api_key.startswith('sk-'):
    generate_response(text)
4. Deploy the app
Deploying the app is super simple:
- Create a GitHub repository for the app.
- In Streamlit Community Cloud, click the
New appbutton, then specify the repository, branch, and main file path. - Click the
Deploy!button.
And here it is!
Wrapping up
Now you know how to get your own OpenAI API key, set up your coding environment, create your first LLM-powered app with LangChain and Streamlit, and deploy it to the cloud. Check out the LLM gallery for inspiration and share your creation with the community. I can't wait to see what you'll build!
In future posts, I'll show you the superpowers of other LangChain modules (e.g., prompt templates, memory, indexes, chains, agents, and callbacks). If you have any questions, please post them in the comments below or contact me on Twitter at @thedataprof or on LinkedIn.
Happy app-building! 🦜🔗
P.S. This post was made possible thanks to the technical review by Joshua Carroll and editing by Ksenia Anske.


Comments
Continue the conversation in our forums →