
Is your chatbot occasionally falling short? Whether it's providing incorrect answers, not meeting users' expectations, or not engaging them the way you want, implementing in-app user feedback can be a game-changer!
Gathering real-time feedback from your users enables you to:
- Identify missing or incorrect content used to retrieve answers
- Detect technical issues (slow response times, library errors, API hiccups, etc.)
- Gauge the overall user satisfaction
How do you start collecting user feedback? Simple. All you need is a Retrieval Augmented Generation (RAG) chatbot, Trubrics' Feedback component, and a connection to LangSmith.
Let's get started!
What is LangChain?
First, let's walk through the basics of LangChain—the foundation for your custom chatbot.
LangChain is a versatile data framework designed for apps that utilize large language models (LLMs). It simplifies the process of creating robust chatbot apps by offering pre-built chains and modular components.
For this example, we'll be using LangChain's Retrieval-Augmented Generation (RAG) capabilities. Simply put, RAG is a technique that enhances the effectiveness of LLMs by connecting them to custom and up-to-date resources. This ensures that your chatbot provides accurate and precise answers to meet your user's requirements.
1. How to build a custom chatbot with LangChain
1.1 Set up pre-requisites
To get started:
- Follow the instructions here to obtain an OpenAI API key.
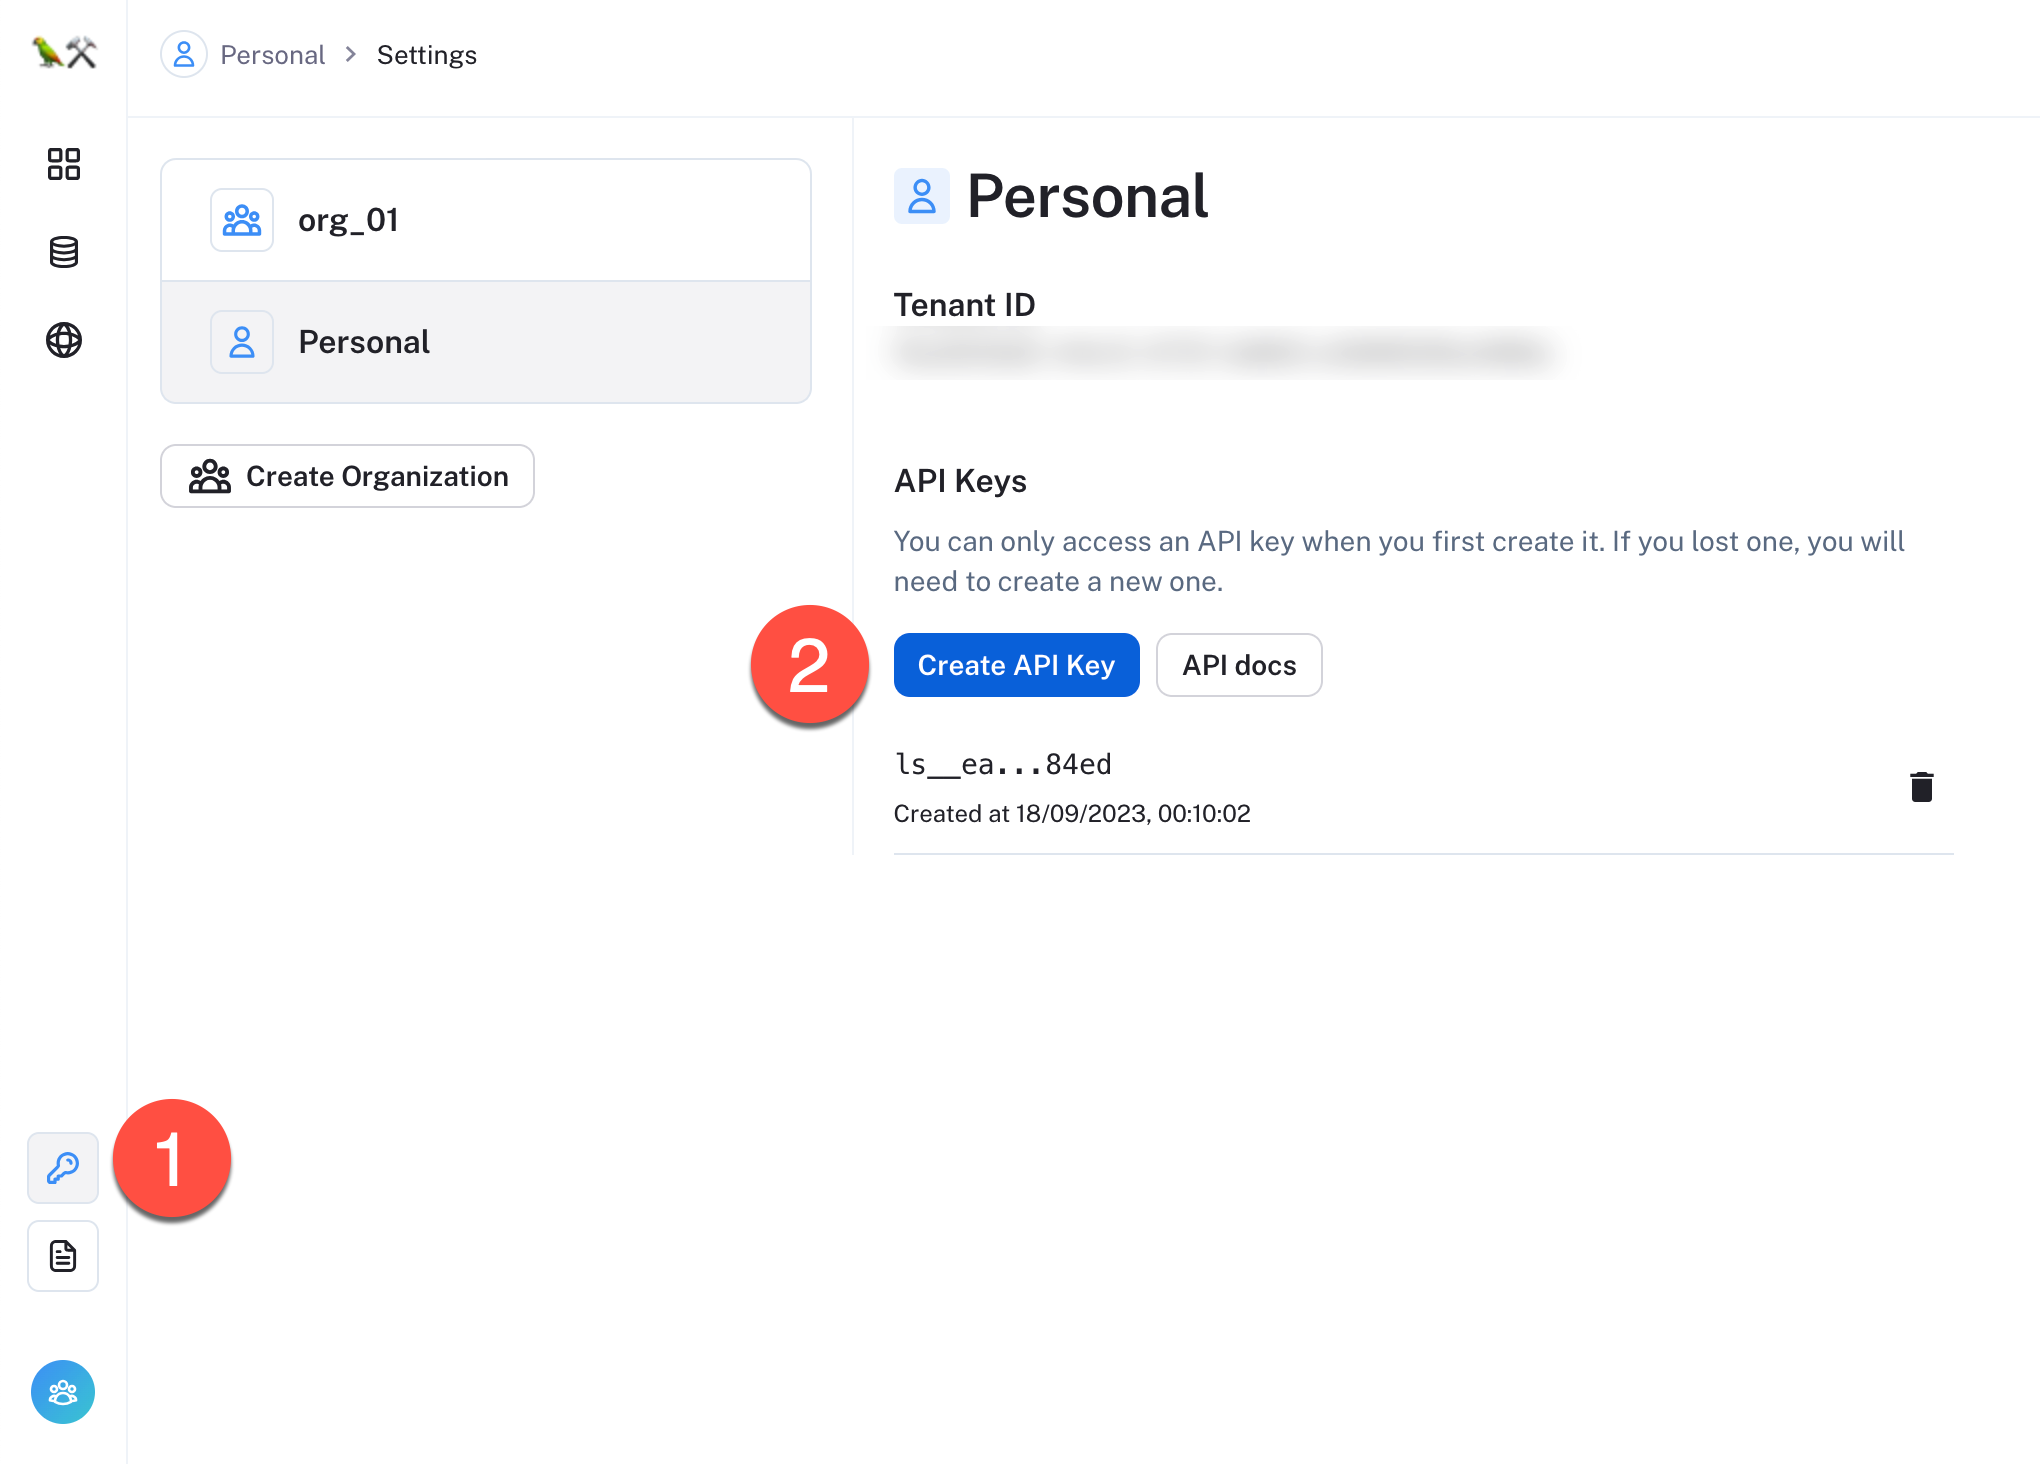
- Sign up for LangSmith at https://smith.langchain.com/ and generate an API Key. To do this, click on the
API Keyicon and then click onCreate API Key(make sure to copy it).
- Install
Streamlit,LangChain,LangSmith, thestreamlit-feedbackcomponent, and the dependencies from therequirements.txtfile—openai,tiktoken, andchromadb. Make sure to run this command in the virtual environment where you want to run your app to avoid any package conflicts:
pip install -r requirements.txt
1.2 Create the RAG chain
Now, let's move to the core of your chatbot—the essential_chain.py file. This file enables the vectorization of any documents (we'll use Streamlit's documentation as an example) to obtain up-to-date and context-aware responses.
To begin, import the required libraries and LangChain functions:
import os
import streamlit as st
from langchain.embeddings.openai import OpenAIEmbeddings
from langchain.vectorstores import Chroma
from langchain.text_splitter import RecursiveCharacterTextSplitter
from langchain.chains import ConversationalRetrievalChain
from langchain.chat_models import ChatOpenAI
from langchain.docstore.document import Document
from langchain.memory import ConversationBufferMemory
The main function in this file is initialize_chain, which sets up the chat model and loads the required documents.
- Create a ChatOpenAI instance with the
gpt-3.5-turbomodel:
@st.cache_resource(show_spinner=False)
def initialize_chain(system_prompt, _memory):
    llm = ChatOpenAI(temperature=0, max_tokens=1000, model_name="gpt-3.5-turbo", streaming=True)
- Iterate over all files in the specified directory (
./markdown_files), read the content of each markdown file, and store it as aDocumentobject. This allows you to integrate Streamlit's up-to-date markdown documentation into the app:
documents = []
folder_path = "./markdown_files"
# ... (loop through and read each .md file, storing them as Document objects)
Once loaded, the documents undergo a two-step process of splitting and embedding:
- Splitting: The content is divided into smaller chunks using
RecursiveCharacterTextSplitterto facilitate efficient vectorization. - Embedding: These chunks are then vectorized using OpenAI embeddings and stored in a Chroma DB database.
if documents:
    text_splitter = RecursiveCharacterTextSplitter(chunk_size=1500, chunk_overlap=150)
    document_chunks = text_splitter.split_documents(documents)
    embeddings = OpenAIEmbeddings()
    vectorstore = Chroma.from_documents(document_chunks, embeddings)
Finally, to make use of the vectorized data, initialize the ConversationalRetrievalChain:
qa = ConversationalRetrievalChain.from_llm(llm, vectorstore.as_retriever(), memory=_memory)
That's all for essential_chain.py!
Now, let's move on to the main.py file.
1.3 Create main.py
main.py is the nucleus of your app, where you call essential_chain.py and displays the front-end UI, among other things.
First, import the required modules into the file:
import streamlit as st
from streamlit_feedback import streamlit_feedback
from langchain.callbacks.tracers.run_collector import RunCollectorCallbackHandler
from langchain.memory import StreamlitChatMessageHistory, ConversationBufferMemory
from langchain.schema.runnable import RunnableConfig
from langsmith import Client
from langchain.callbacks.tracers.langchain import wait_for_all_tracers
from essential_chain import initialize_chain
import os
Next, configure the environment variables to establish connections with OpenAI and LangSmith:
# Set LangSmith environment variables
os.environ["OPENAI_API_KEY"] = st.secrets["api_keys"]["OPENAI_API_KEY"]
os.environ["LANGCHAIN_TRACING_V2"] = "true"
os.environ["LANGCHAIN_ENDPOINT"] = "<https://api.smith.langchain.com>"
In the app's sidebar, you will collect additional inputs from users to configure LangSmith:
# Add the toggle for LangSmith API key source
use_secret_key = st.sidebar.toggle(label="Demo LangSmith API key", value=True)

# Conditionally set the project name based on the toggle
if use_secret_key:
    os.environ["LANGCHAIN_PROJECT"] = "Streamlit Demo"
else:
    project_name = st.sidebar.text_input(
        "Name your LangSmith Project:", value="Streamlit Demo"
    )
    os.environ["LANGCHAIN_PROJECT"] = project_name

# Conditionally get the API key based on the toggle
if use_secret_key:
    langchain_api_key = st.secrets["api_keys"][
        "LANGSMITH_API_KEY"
    ]  # assuming it's stored under this key in secrets
else:
    langchain_api_key = st.sidebar.text_input(
        "👇 Add your LangSmith Key",
        value="",
        placeholder="Your_LangSmith_Key_Here",
        label_visibility="collapsed",
    )
if langchain_api_key is not None:
    os.environ["LANGCHAIN_API_KEY"] = langchain_api_key
- You can use the provided LangSmith API key, which is for demo purposes. By using it, you'll only have access to each run, and runs won't be stored in your account.
- If you choose to add your own LangSmith API key (toggle OFF), you'll gain full access to your LangSmith account and have the ability to specify a name for each of your projects.
1.4 Give your chatbot a memory
The chat memory is an essential component for maintaining a contextual conversation. Use LangChain's ConversationBufferMemory to store the chat history, simplifying access to previous interactions.
memory = ConversationBufferMemory(
    chat_memory=StreamlitChatMessageHistory(key="langchain_messages"),
    return_messages=True,
    memory_key="chat_history",
)
Next, add a functionality to clear the message history:
if st.sidebar.button("Clear message history"):
    print("Clearing message history")
    memory.clear()
    st.session_state.trace_link = None
    st.session_state.run_id = None
1.5 Build the chat interface
Use Streamlit's new st.chat_message command to create a chat user interface that displays messages from both the user and the assistant in separate containers.
for msg in st.session_state.langchain_messages:
    streamlit_type = _get_openai_type(msg)
    avatar = "🦜" if streamlit_type == "assistant" else None
    with st.chat_message(streamlit_type, avatar=avatar):
        st.markdown(msg.content)
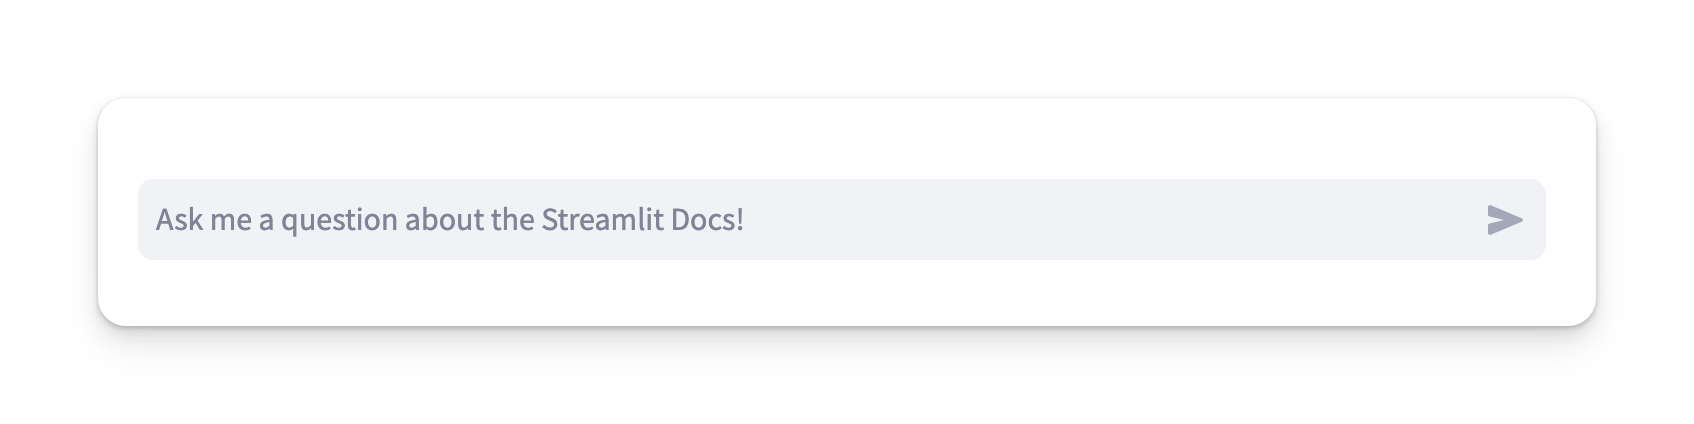
Then, the st.chat_input command provides a chat input widget for receiving user messages:
if prompt := st.chat_input(placeholder="Ask a question about the Streamlit Docs!"):
    # ... (Handling chat input and generating responses)
    # ... (Displaying thinking animation and updating session state)
1.6 Test the custom chatbot
Now that you have built a Streamlit docs chatbot using up-to-date markdown files, let's compare the results to ChatGPT. GPT-3.5 and 4 have only been trained on data up to September 2021, missing almost three years of new releases. So augmenting your LLM with Langchain ensures higher accuracy of the response.
Let's ask a question about Streamlit's Chat elements, released in July 2023: "Tell me about Streamlit's Chat elements."
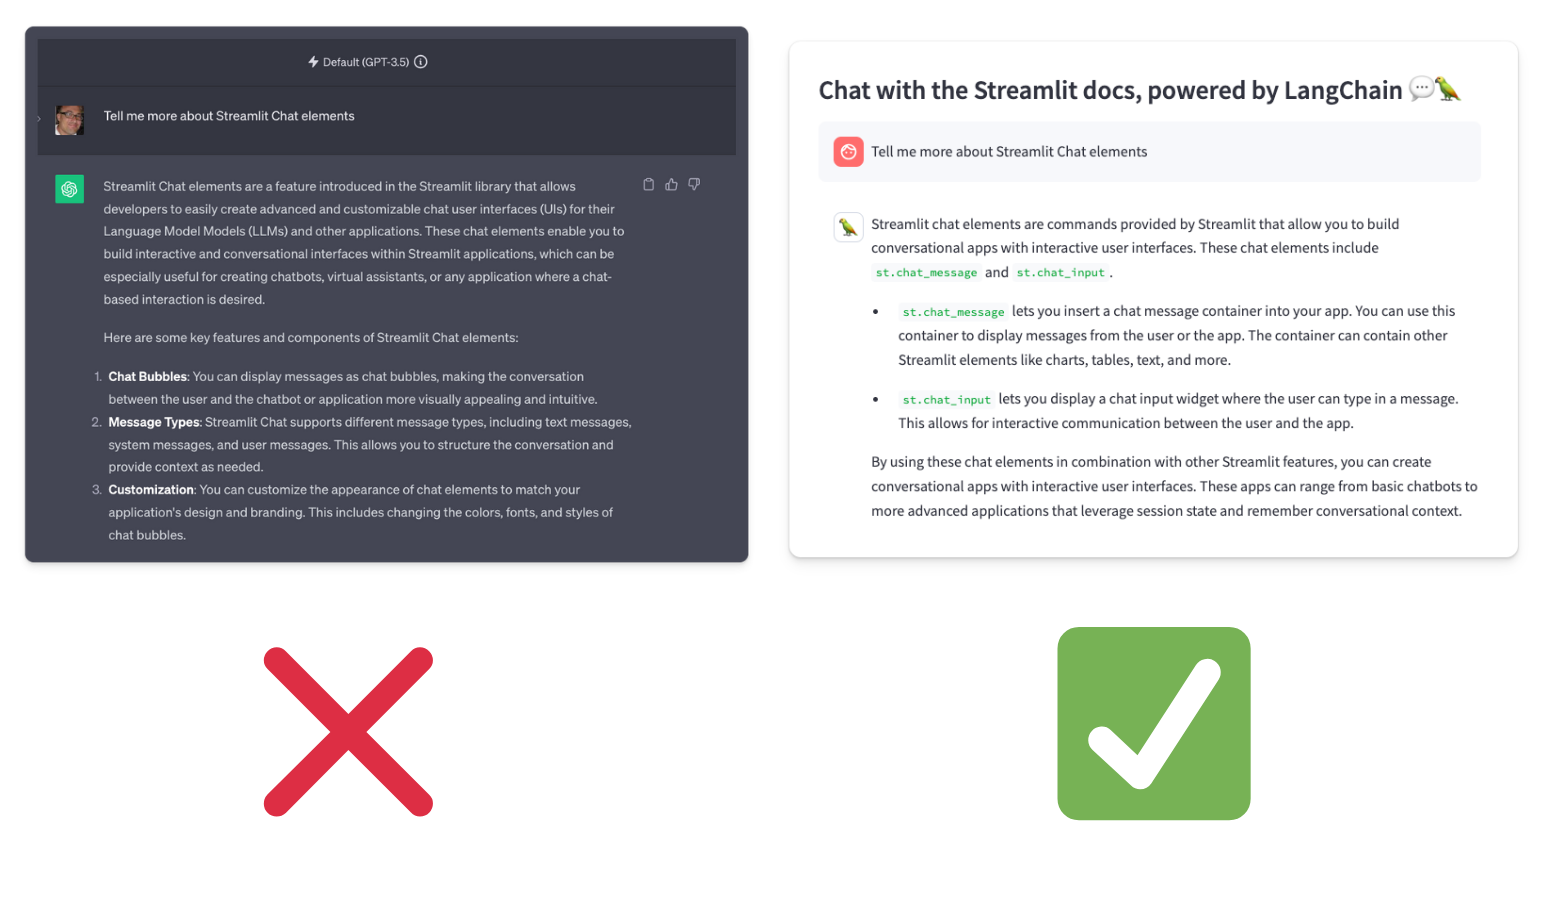
ChatGPT can’t come up with the right answer, but your custom chatbot can!
You can compare the classic GPT 3.5 LLM with our custom LLM directly in the demo app by switching between these two options:
2. How to implement Trubrics' Feedback
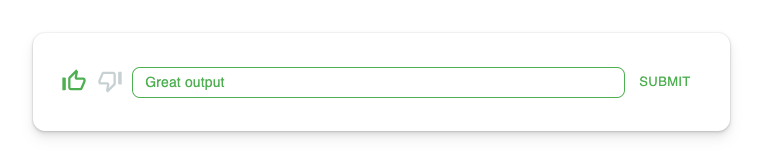
Trubrics' Feedback is a Streamlit component that enables you to collect user feedback directly in your app. With this component, users can rate the responses of the chatbot, and each feedback will be sent and stored in LangSmith.
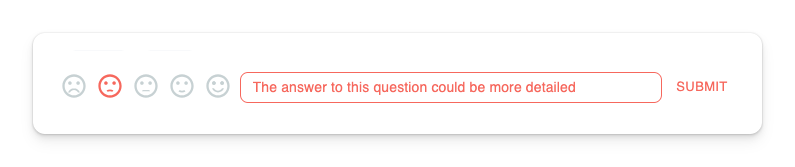
Trubrics' Feedback offers two feedback mechanisms:
thumbsstyle:
facesstyle:
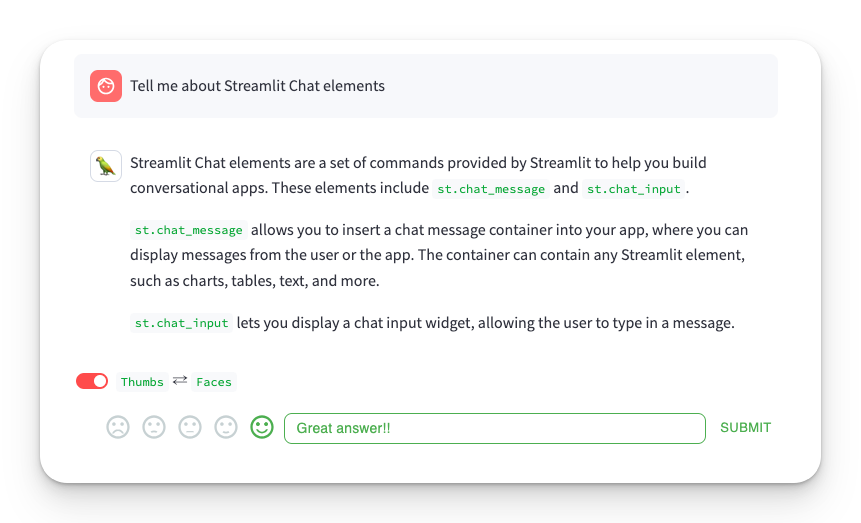
The default feedback style is set to thumbs. To allow users to easily switch between the two options, let's use Streamlit's new st.toggle widget:

feedback_option = "faces" if st.toggle(label="`Thumbs` ⇄ `Faces`", value=False) else "thumbs"
The selected feedback style is activated when a valid run_id is present:
if st.session_state.get("run_id"):
    feedback = streamlit_feedback(
        feedback_type=feedback_option,  # Apply the selected feedback style
        optional_text_label="[Optional] Please provide an explanation",  # Allow for additional comments
        key=f"feedback_{st.session_state.run_id}",
    )
3. How to connect to LangSmith
LangSmith seamlessly integrates with the LangChain library, which you used to build your custom chatbot. In this case, you’ll primarily use it to store user feedback and gain insights from it.
To establish a connection to LangSmith and send both the chatbot outputs and user feedback, follow these steps:
client = Client(api_url=langchain_endpoint, api_key=langchain_api_key)
To check if the connection is working, follow these steps:
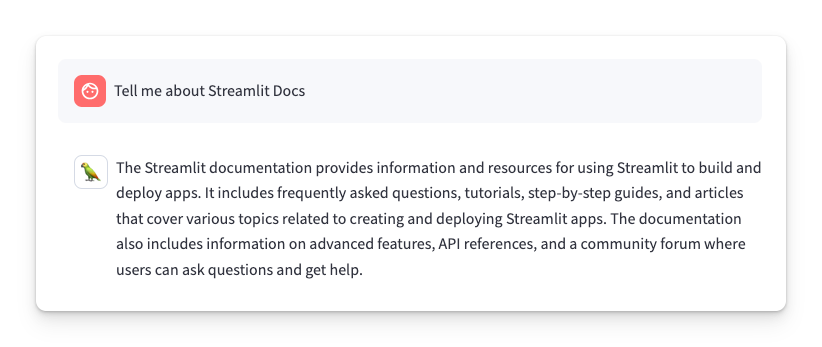
- Type a question in the chat. For example, ask, "Tell me more about Streamlit Chat elements."
- Provide feedback by giving a score and comment. For example, use
Thumbs upandGreat answer!
- Click on the
Latest Tracebutton in the chatbot app:
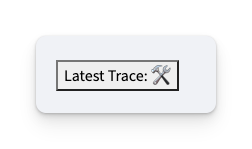
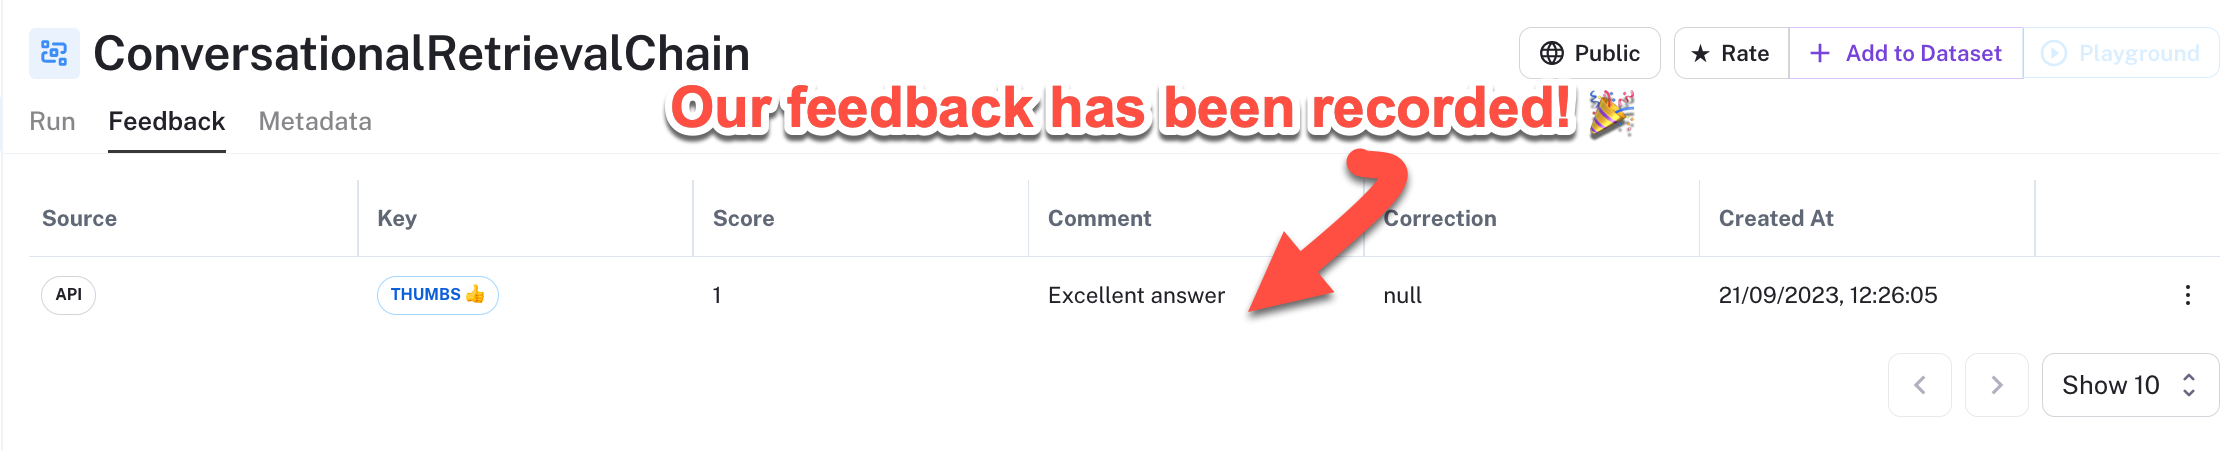
- You’ll be redirected to LangSmith, where you can view the details of your run.
- Click on the
Feedbacktab in LangSmith to access the user feedback for that run.
4. How to turn user feedback into actionable insights
Let me show you some examples of how user feedback can help improve your chatbot’s answers, spot errors, and enhance your app’s workflow.
4.1 Spot content inaccuracies
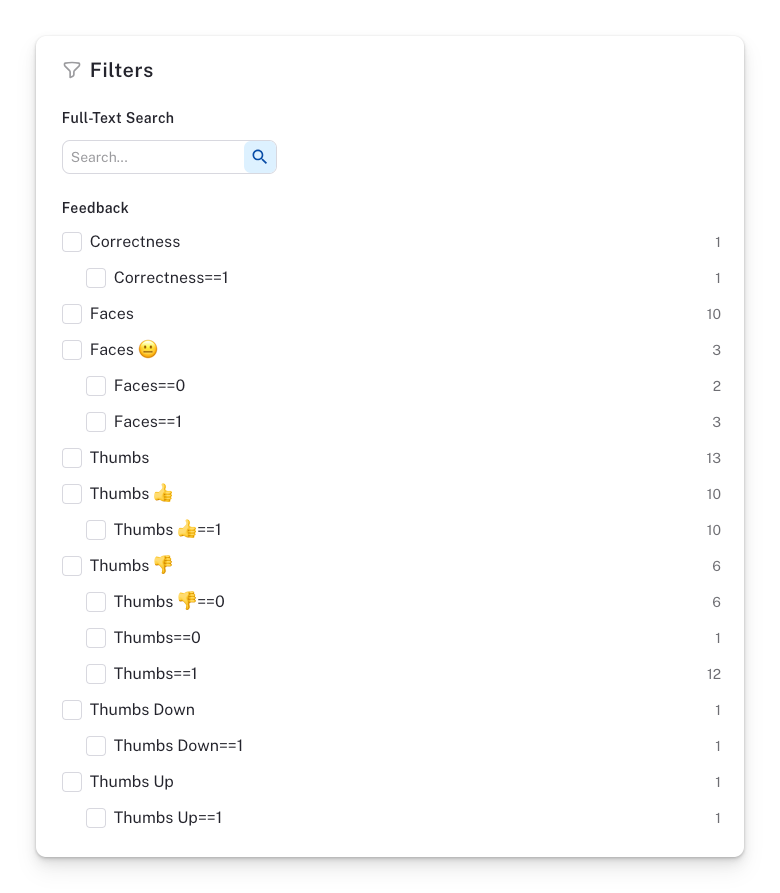
Here is how we spotted content inaccuracies in our internal user feedback for the Steamlit app. LangSmith enabled us to filter chatbot runs by feedback score using the filter panel:
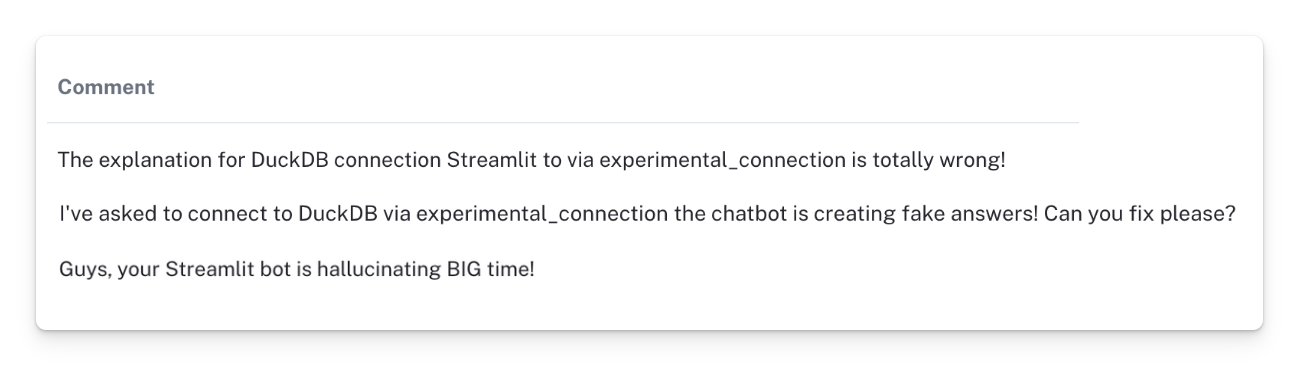
We reviewed the comments related to negative feedback scores and found that some users expressed dissatisfaction with the chatbot's responses to the question, "How can I connect DuckDB to Streamlit using st.experimental_connection()?"
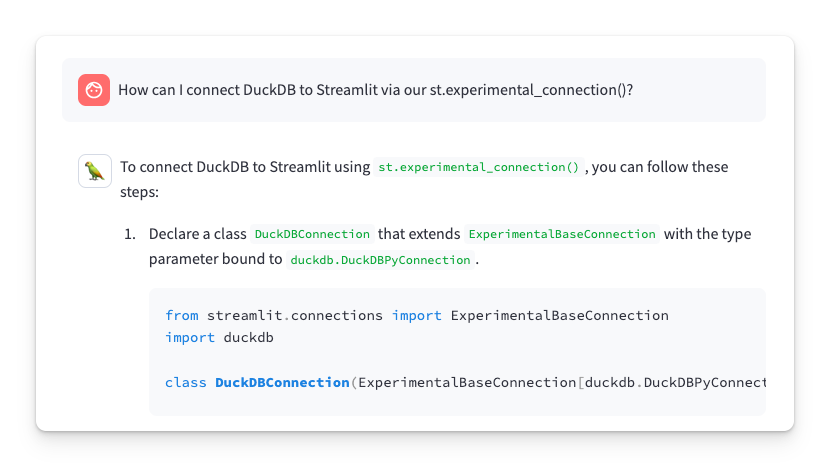
DuckDB is an SQL database system. While it’s possible to connect it to Streamlit using st.experimental_connection(), users have reported that the returned answers are incorrect. We tested this and found that our chatbot suggested non-existent Streamlit functions:
Then we reviewed our docs and found that there is no information on how to use st.experimental_connection() with DuckDB:
Our chatbot currently lacks the ability to retrieve the relevant content that users are requesting from our docs. So we requested the content team to prioritize creating content specifically related to "DuckDB + st.experimental_connection()". Once it’s created and added to the docs, we’ll integrate it into our custom chatbot to enhance its responses.
There are several benefits to this approach:
- ✅ It will provide improved and more accurate responses from the chatbot
- ✅ It will ensure that our docs remains current and relevant
- ✅ It will help us prioritize the most important content for our docs
4.2 Highlight slow response times
Slow chatbot response times can frustrate users and decrease user retention. Additionally, users frequently provide feedback about noticeable lags or delays during interactions.
Let's review some of the user feedback that we collected in our internal app:
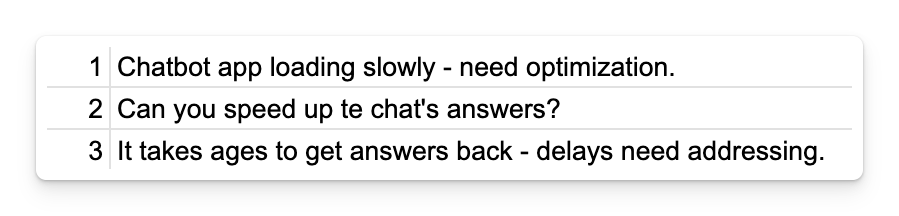
It’s clear that the chatbot’s responses could be sped up!
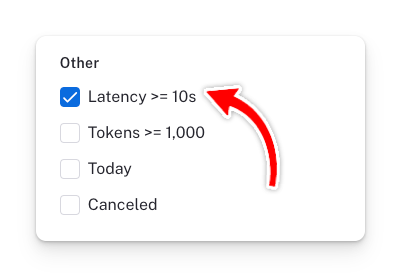
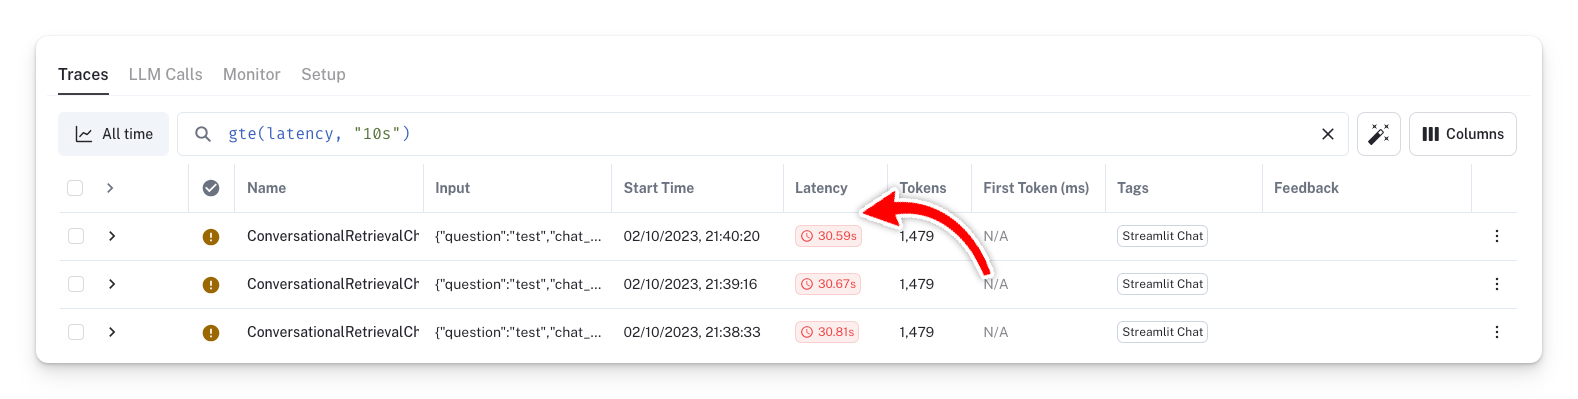
In LangSmith, we can identify chatbot runs with slow response times by using the Latency >= 10s tag. You can locate this tag in the filter panel of any project.
Any run with high latency will be displayed:
Here is how you can fix these latency issues:
- LangSmith can show you the latency associated with each chain of your chatbot. You can optimize response times by experimenting with different chains. For example, in some of our tests, we found that the
ConversationSummaryBufferMemorychain had a significant impact on latency. - You can also try Zep, an open-source long-term memory store designed to improve the performance of chatbots, especially those built with LangChain.
- We also recommend that you use
[st.cache_resource](<https://docs.streamlit.io/library/api-reference/performance/st.cache_resource>)to cache the relevant functions of your app (if you haven't done so already).
4.3 Gauge users’ satisfaction
In addition to analyzing individual user feedback as demonstrated in sections 4.1 and 4.2, it’s important to consider the value of aggregated feedback.
Aggregated feedback can help broaden your approach and provide a measurable indicator of user satisfaction towards a model, content, or chatbot application. LangSmith provides data visualizations for all recorded metrics, including metrics derived from user feedback. Each metric is presented on a timeline chart, allowing you to track its progress over time.
Let's explore!
After you build the app by following the steps below, head to your LangSmith project and click on the Monitor tab:
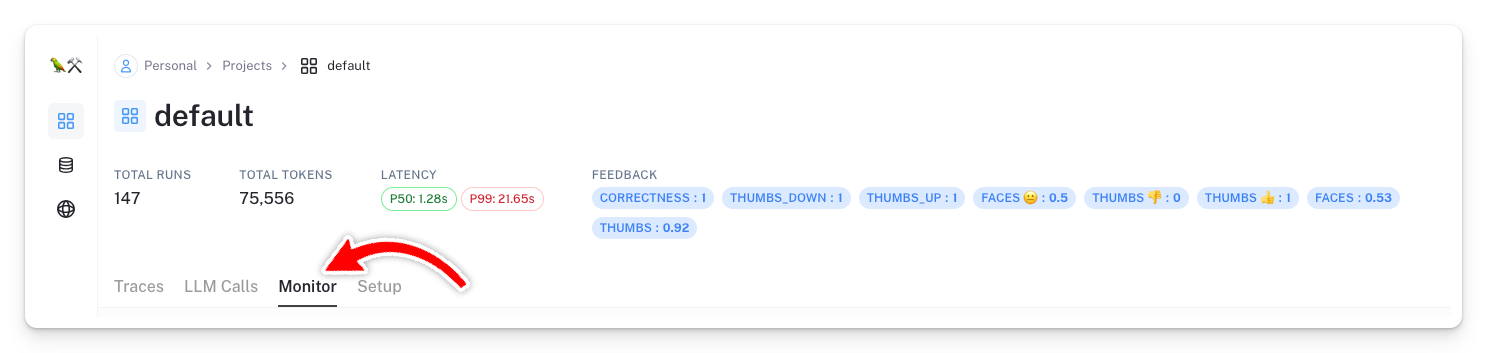
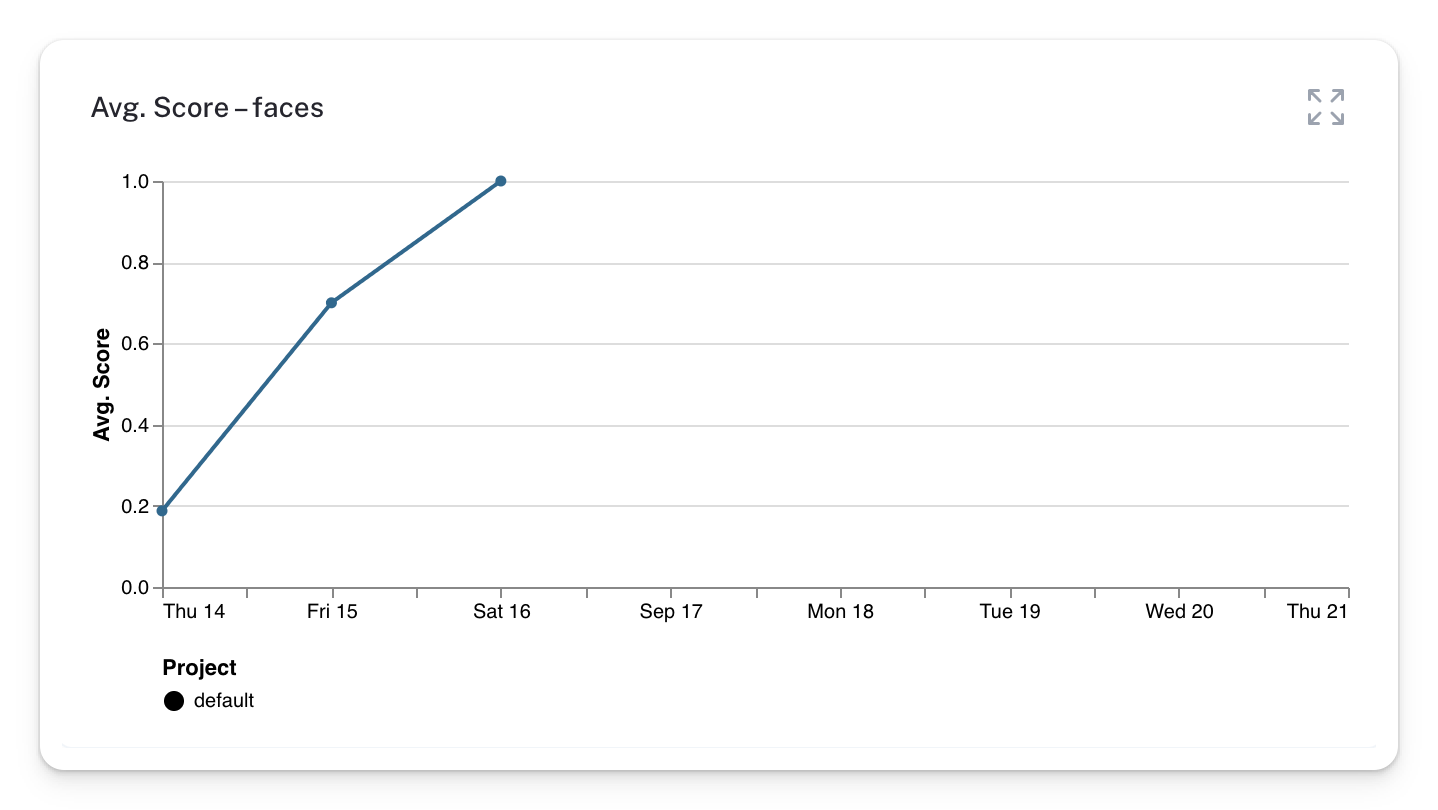
One way to track user satisfaction is by checking the Avg. Score - faces chart. From this chart, we can observe that user satisfaction with our internal chatbot is improving. So we’ll continue testing and refining it!
BONUS. Pinpoint library and API errors
While users can sometimes provide feedback on errors, there are instances where they can’t do so because these errors hinder the chatbot's proper functioning. The good news is that LangSmith logs all of these errors for you.
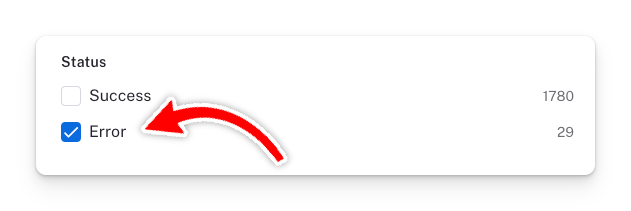
To view chatbot runs that contain errors, simply select the error tag in the filter panel:
During our internal testing, we found the following two issues:
- Library installations issues

✅ To fix it, we went back to the app and installed the h2 package.
- Incorrect API keys
We spotted several types of API errors and warnings (you also get the timing of their occurrences in LangSmith). For example, we observed an error when our OpenAI key became invalid.
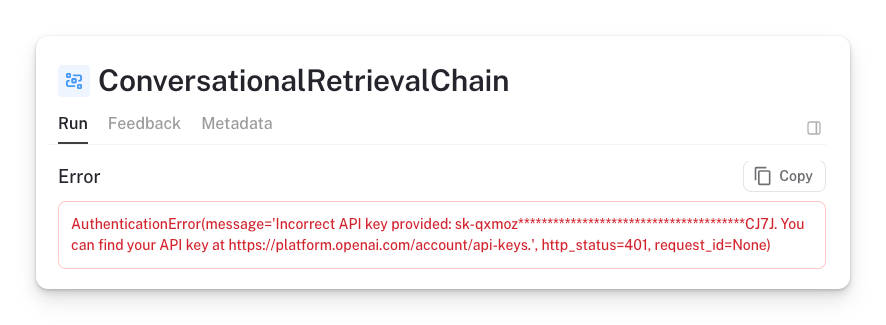
✅ To fix it, we updated the OpenAI API key in the app.
And now, let's get to building!
Wrapping up
We’ve embarked on a journey together, delving into the code to build a reliable and powerful RAG chatbot in Streamlit. Throughout this journey, I introduced you to the LangSmith platform and the Trubrics Feedback component. You’ve witnessed the value of user feedback, whether it’s for refining documentation, enhancing app workflows, identifying errors, or understanding user sentiments.
Feel free to explore our LLM gallery, learn, and draw inspiration from the amazing creations of the community. Soon enough, you'll be eager to create your own chatbot masterpiece! 🎈


Comments
Continue the conversation in our forums →